Hello! Welcome to the final lesson in our "Advanced Bash Scripting" module.
In our previous lesson, we explored how to manage collections of data using indexed and associative arrays. As your scripts grow in complexity to handle more sophisticated data structures and logic, the likelihood of introducing bugs also increases. Writing a script is one thing; ensuring it runs correctly and reliably is another.
This lesson directly addresses that challenge. Your learning outcome is to debug Bash scripts effectively using set -x, trap, and the shellcheck linter. We'll cover a three-layered approach to creating robust scripts:
- Static Analysis: Finding errors before you even run the script.
- Runtime Tracing: Watching what your script is doing as it executes.
- Error Handling: Ensuring your script can handle unexpected interruptions gracefully.
Mastering these techniques will give you the confidence to write and maintain complex automation scripts in a professional DevOps environment.
1. The First Line of Defense: Static Analysis with shellcheck
Why wait for a script to fail at 3 AM to find a bug? Static analysis tools scan your code for common errors, style issues, and anti-patterns without executing it. For Bash, the undisputed best tool for this job is shellcheck.
shellcheck can catch a huge range of subtle bugs, from incorrect quoting that breaks with certain inputs to using commands in ways that are known to be fragile.
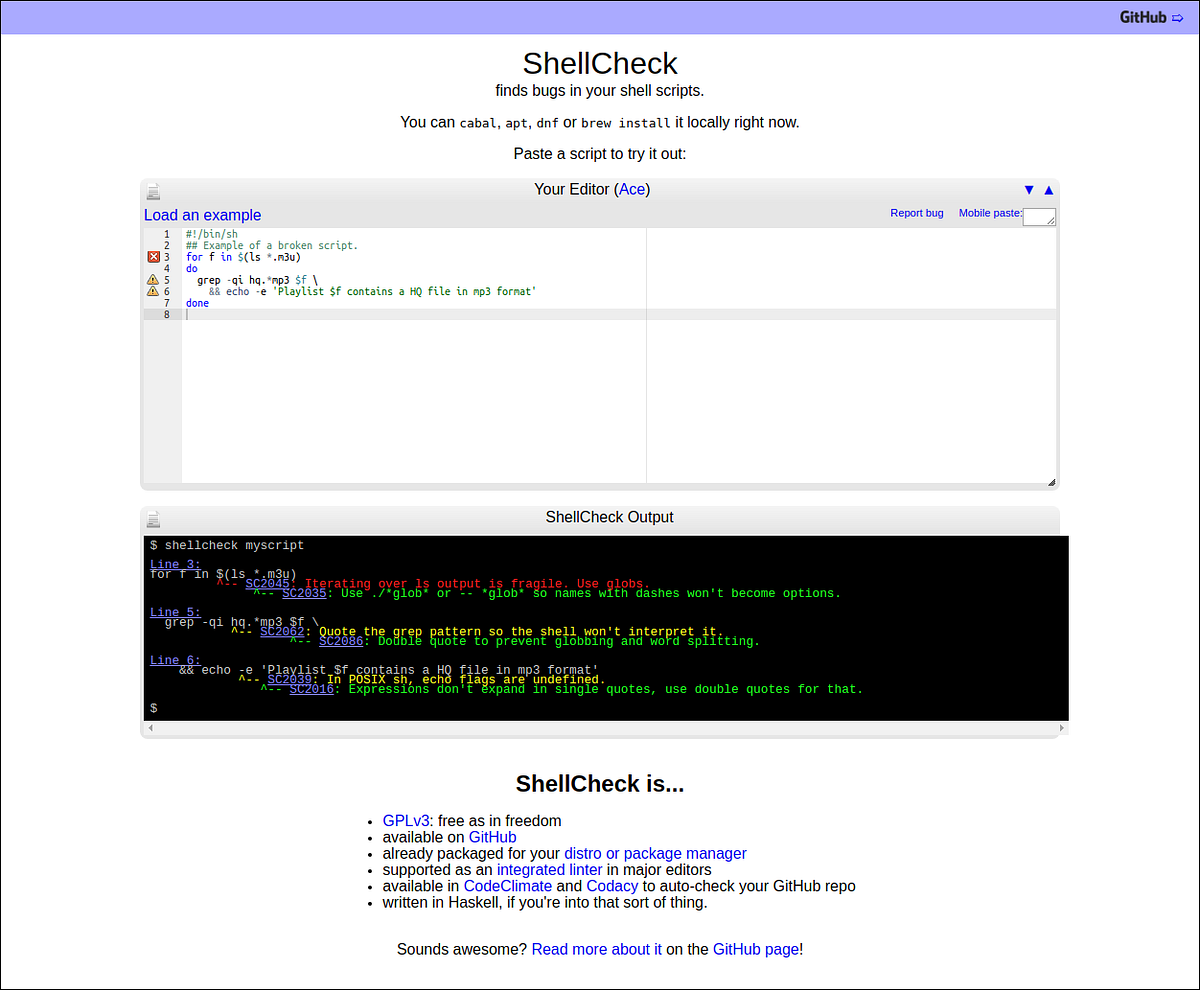
To see how powerful this is, let's watch a short video that introduces shellcheck and demonstrates how it identifies and helps fix common scripting errors.
Create BULLET PROOF Shell Scripts with ShellCheck and Neovim!
The video 'Create BULLET PROOF Shell Scripts with ShellCheck' from the DevOps Toolbox channel provides a great overview of what ShellCheck is and why it's so valuable.
Watch from the beginning until 04:18. Pay attention to: The types of common errors shellcheck immediately finds (quoting, syntax, variable usage). How it provides clear, educational explanations for each issue. The concept of the 'gallery of bad code' as a learning resource.
As a DevOps engineer, you'll want to integrate this directly into your workflow. You can run it from your terminal, set it up in your code editor, and—most importantly—add it to your CI/CD pipelines to automatically vet any script changes.
This next reading provides concise instructions on how to install shellcheck and integrate it into a GitHub Actions workflow.
Bash Scripting Best Practices for Reliable Automation - OneUptime
The article 'Bash Scripting Best Practices for Reliable Automation' from OneUptime has a practical section on using ShellCheck.
Read the section 'Use ShellCheck'. Focus on the installation commands for your OS and the example of a GitHub Actions step for CI integration. Notice the shellcheck disable comment, which is the correct way to ignore a warning for a specific, intentional reason.
2. Runtime Debugging: Tracing with set -x
shellcheck is fantastic, but it can't find logic errors. For those, you need to see what your script is actually doing at runtime. The simplest and most powerful tool for this is Bash's built-in xtrace option, enabled with set -x.
When set -x is active, Bash prints each command to standard error right before it's executed, after all expansions have taken place. This lets you see the exact commands being run, with all variable values substituted.
Activating Strict Mode and Trace Mode
In our first lesson on scripting, we introduced "strict mode." This is a set of options that make your scripts more robust by failing immediately when something goes wrong. It's a form of proactive debugging.
#!/bin/bash


# A robust header for any script
set -euo pipefail


# -e: Exit immediately if a command exits with a non-zero status.
# -u: Treat unset variables as an error when substituting.
# -o pipefail: The return value of a pipeline is the status of the last command to exit with a non-zero status.


# You can add -x here to trace the entire script
# set -euxo pipefail
You can enable trace mode for an entire script by adding x to the set command in the header, or you can turn it on and off for specific sections of your code to isolate a problem.
echo "This part is not traced."

set -x  # <-- Start tracing from here


# ... code you want to debug ...
variable="hello world"
echo "Expanded variable: $variable"
set +x  # <-- Stop tracing here

echo "This part is not traced either."
This is incredibly useful for seeing why a conditional is failing or what value a variable holds at a critical moment.
The following resource provides clear examples of how to use set -x and other debugging techniques.
Bulletproof Bash Scripts: Mastering Error Handling for…
The article 'Bulletproof Bash Scripts' by Karandeep Singh has an excellent section on debugging techniques.
Read the sections 'Debugging Techniques for When Bash Error Handling Fails' and 'Best Practices for Bash Error Handling in Production Environments'. Focus on: The set -x example and the output it produces. The DEBUG trap, which is an even more advanced way to trace execution line-by-line. The reinforcement of using set -euo pipefail in all production scripts.
3. Graceful Exits: Handling Signals with trap
Your script might be interrupted for many reasons: a user pressing Ctrl+C, a deployment system sending a termination signal (SIGTERM), or an internal error. If your script creates temporary files, holds a lock, or manages a connection, an abrupt exit can leave a mess.
The trap command allows you to "trap" these signals and execute a cleanup function before the script exits, ensuring it always leaves the system in a clean state.
To understand trap, you first need to understand signals. Let's watch a video that explains what signals are and how trap intercepts them.
Shell Scripting Tutorial for Beginners 27 - Signals and Traps
The 'Signals and Traps' tutorial from ProgrammingKnowledge provides a clear, foundational explanation of this concept.
Watch the following segments: 00:00 - 05:13: This explains the problem: how scripts can be interrupted by signals like SIGINT (Ctrl+C) and SIGKILL (kill -9). 05:13 - 06:16: Introduction to trap as the solution for capturing these signals. 06:16 - 08:25: How to use man 7 signal to see a list of all signals and their corresponding numbers. 10:53 - 13:07: A practical demonstration of trapping SIGINT (Ctrl+C). 13:07 - 14:48: An essential point about the exceptions: SIGKILL (9) and SIGSTOP cannot be trapped.
The Cleanup Pattern
The most common and useful pattern for trap is to define a single cleanup function and trap the EXIT signal. The EXIT signal is a special pseudo-signal that fires whenever the script exits for any reason: success, failure (set -e), or a trapped signal.
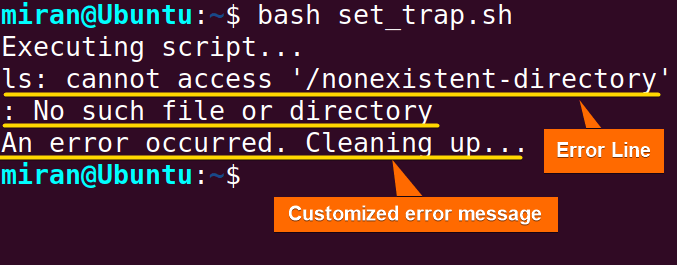
This pattern guarantees that your cleanup logic always runs. Let's look at a practical, professional implementation of this.
Bash Scripting Best Practices for Reliable Automation - OneUptime
The OneUptime article we saw earlier provides a perfect template for a robust cleanup function.
Read the section 'Handle Errors Gracefully'. This shows a well-structured cleanup function that removes a temporary directory and uses the script's exit code to log a helpful message. The trap cleanup EXIT line is the key that ties it all together.
By combining set -euo pipefail with a trap cleanup EXIT function, you create a script that is both strict about failures and responsible about cleaning up after itself.
Conclusion
You've now reached the end of the "Advanced Bash Scripting" module and have a powerful new toolkit for creating professional-grade scripts.
Key Takeaways:
shellcheckis your first step. Use it in your editor and CI pipeline to catch bugs before they ever run.set -xis for runtime inspection. When your logic is faulty, use it to trace execution and see the real values of your variables.trapis for resilience. Use it with acleanupfunction on theEXITsignal to ensure your script is a good citizen and doesn't leave temporary files or locks behind.- Combine all three: Start every script with
set -euo pipefailand atrap cleanup EXITblock. Regularly runshellcheckduring development. Useset -xto diagnose tough bugs.
Preview of the Next Module:
Bash is a phenomenal tool for orchestrating commands and managing files, as we've seen throughout this module. However, when your automation tasks involve heavy data manipulation, complex logic, or extensive interaction with REST APIs, a more general-purpose programming language is often a better choice.
In our next module, "Python for DevOps Automation," we will explore how to use Python to solve these kinds of problems. We'll start by learning how to interact with REST APIs using the requests library, a fundamental skill for any DevOps engineer in today's cloud-native world.