Hello! Welcome to the final module of our course. You've successfully built a complete, robust, and professional full-stack application. Now, it's time to take the last step: preparing it for the world to see.
In our last lesson, we polished the user experience by implementing comprehensive error handling and loading states. Your application is now feature-complete and resilient. The only thing left is to move it from your local development machine to a live production server.
This lesson kicks off our deployment module by focusing on a critical first step. We will cover how to prepare your React application for production by creating a static build. You'll learn the difference between the development code you've been writing and the optimized code that runs on a live website, and you'll use the commands to create this production-ready version of your frontend.
Part 1: Development vs. Production: Why We Need a "Build" Step
So far, you've been running your React application using npm run dev. This command starts a development server. This server is designed for developers; it's packed with features that make your life easier, like:
- Hot Module Replacement (HMR): Instantly showing your changes in the browser without a full page reload.
- Detailed Error Messages: Providing verbose errors in the console and on-screen to help you debug.
- Source Maps: Allowing you to see your original, un-compiled code in the browser's developer tools.
However, these features come at a cost: the code is larger, slower, and less secure. It's like working on a car with the hood open and diagnostic tools everywhere—perfect for a mechanic, but not what you give to a customer.
A production build is the finished, polished version of your application. It's highly optimized for performance and size, ready to be deployed to a server and used by your audience.
To understand this difference in more detail, let's turn to a great explanation.
The React Mega-Tutorial, Chapter 12: Production Builds
The article "The React Mega-Tutorial, Chapter 12: Production Builds" by Miguel Grinberg clearly explains the distinction between development and production builds and why the latter is essential for deployment.
Please read the short section titled "Development vs. Production Builds". It perfectly summarizes the purpose and trade-offs of each type of build.
The "build" process takes your human-readable JSX, JavaScript, and CSS files and transforms them through processes like:
- Bundling: Combining multiple files into fewer, larger files to reduce the number of network requests.
- Minification: Removing all unnecessary characters (like whitespace, comments, and new lines) from the code to make files smaller.
- Tree Shaking: Automatically removing any code that you've imported but never actually used.
- Transpilation: Converting modern JavaScript (ES6+) and JSX into older, more widely compatible JavaScript that can run in any browser.
The result is a small, fast, and efficient set of static files (.html, .js, .css) that can be served by any web server.
Part 2: Creating Your Production Build with Vite
Since you built your project with Vite, creating a production build is incredibly straightforward. In your project's package.json file, you'll find a script named "build". This script executes the vite build command, which orchestrates all the optimizations we just discussed.
Let's see this in action.
Vite Crash Course – Frontend Build Tool
This clip from the "Vite Crash Course" on the freeCodeCamp.org channel demonstrates exactly how to generate and preview a production build.
Watch the segment from 00:25:24 to 00:27:15. Pay attention to the two key commands: npm run build: The command that creates the production build. npm run preview: The command used to test the production build locally.
To create the build for your capstone project, follow these steps:
- Open a terminal in the root directory of your frontend project.
- Make sure the development server (
npm run dev) is stopped. - Run the command:
npm run build
You will see output in your terminal as Vite works its magic. When it's finished, you'll see a summary of the created files and their sizes.
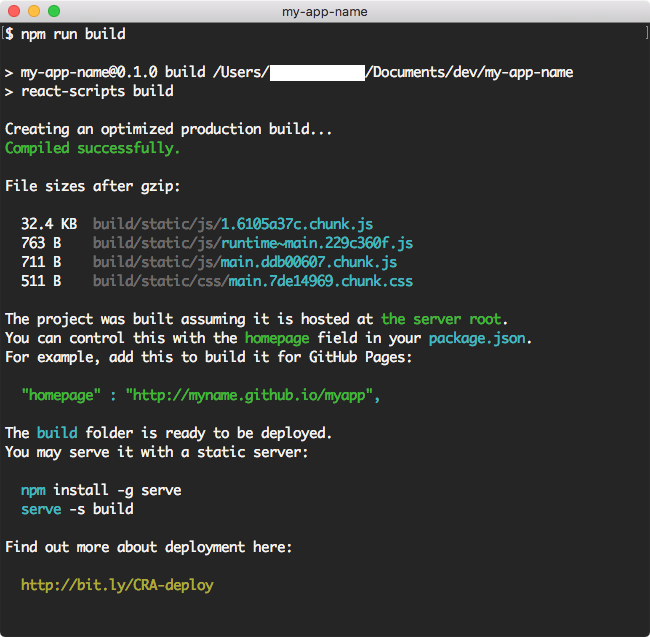
Part 3: Exploring the dist Directory
After the build command completes, you'll find a new directory in your project root named dist (short for "distribution"). This folder contains your entire production-ready frontend application.
The structure and contents of this folder are worth exploring.
The React Mega-Tutorial, Chapter 12: Production Builds
Let's return to Miguel Grinberg's tutorial for a clear breakdown of a typical build folder's structure. While the article refers to a build directory (common with Create React App), the concepts and file types are identical to Vite's dist directory.
Read the section "Structure of a Production Built Application". As you read, open the dist folder in your own project and identify the corresponding files and folders mentioned, such as index.html and the assets subdirectory (which is Vite's version of the static directory).
Inside your dist folder, you will typically find:
index.html: The single HTML file that serves as the entry point for your entire React application. It's been automatically updated to include<script>and<link>tags pointing to your newly created JavaScript and CSS bundles.assets/: A directory containing the optimized, bundled, and minified assets.- JavaScript files (e.g.,
index-a1b2c3d4.js): Your application's logic. - CSS files (e.g.,
index-e5f6g7h8.css): Your application's styles.
- JavaScript files (e.g.,
Notice the long, random-looking strings in the filenames (e.g., a1b2c3d4). This is called cache busting. Each time you build your app, these hashes will be different if the file content has changed. This ensures that when you deploy a new version, users' browsers will download the new files instead of using old, cached versions.
Part 4: Previewing the Build Locally
You've created the build, but how do you know if it works?
A common mistake is to try opening the dist/index.html file directly in your browser. This usually fails because modern web applications need to be served over an HTTP server, not opened from the local filesystem (file:// protocol).
Vite provides a handy command to solve this. It starts a simple, local static web server that serves the contents of your dist folder, simulating a real production environment.
The command, as shown in the video earlier, is:
npm run preview
Run this command in your terminal. It will tell you the local URL where your production app is running (usually http://localhost:4173). Open this URL in your browser, and you should see your fully functional task manager, but this time you are running the optimized production code!
Test your understanding!
You've just run npm run build, and the dist folder has been created. A teammate suggests just double-clicking the dist/index.html file to see if it works. Why is this approach likely to fail, and what is the correct Vite command to test the build?
Show answer
Double-clicking the file opens it using the file:// protocol. The application will likely fail because the paths to assets (like the JavaScript and CSS bundles referenced in index.html) are usually absolute (e.g., /assets/index-a1b2c3d4.js). The browser tries to find these files at the root of the local file system, not relative to the index.html file.
The correct way to test the build is to use a local HTTP server. The command provided by Vite for this is npm run preview, which serves the dist folder's contents over HTTP, correctly resolving all asset paths.
Conclusion
Congratulations! You've successfully taken your development code and transformed it into an optimized, production-ready static build. This is a fundamental skill for any web developer.
Key Takeaways:
- Development builds are for developers (easy to debug, feature-rich), while production builds are for users (fast, small, and optimized).
- The
npm run buildcommand initiates the production build process, creating a bundle of static files. - For Vite projects, the output is placed in a
distdirectory. This folder is self-contained and is all you need to deploy your frontend. - You can test your production build locally using the
npm run previewcommand, which starts a static file server.
Preview of the Next Lesson:
Now that we have this static build of our React frontend, what's next? In the next lesson, we will learn how to configure our Express server to serve the static React build. This will allow us to deploy our frontend and backend together as a single, cohesive unit on a single server, a very common and powerful deployment pattern.