Hello! Welcome to the fifth lesson in our JavaScript Core Concepts module.
In our last few lessons, you've learned powerful ways to structure your code within a single file using destructuring and the spread/rest operators. But as applications grow, keeping everything in one file becomes unmanageable.
Today, we'll solve that problem by learning how to organize code across multiple files using ES6 Modules. This lesson directly addresses the learning outcome: Import and export functionality between JavaScript files using ES6 modules. Mastering this is not just a best practice; it's a foundational skill for building any modern web application with frameworks like React, which are inherently modular.
1. Why Do We Need Modules? The Global Scope Problem
Before ES6 modules, if you included multiple JavaScript files in your HTML, they all shared the same "global scope." This meant a variable declared in one file could accidentally overwrite a variable with the same name in another file. This leads to bugs that are hard to track down.
To understand this problem and the old workarounds, let's turn to a well-written article that sets the stage for why modules are so important.
The Odin Project's article 'ES6 Modules' provides an excellent explanation of the 'global scope problem' that existed before modules. Understanding this context will help you appreciate why the modern import/export system was created.
Please read the section titled 'Before ES6 modules: The global scope problem'. This will give you a clear picture of how sharing a global scope across files can cause issues and the older patterns (like IIFEs) used to prevent them.
As the article explains, ES6 modules solve this by giving each file its own private scope. Nothing is shared unless you explicitly say so. Let's see how to do that.
2. The Core Syntax: export and import
The module system is built on two keywords: export and import.
export: Makes variables, functions, or classes available to other files.import: Pulls exported functionality from one file into another.
This simple diagram illustrates the basic concept:
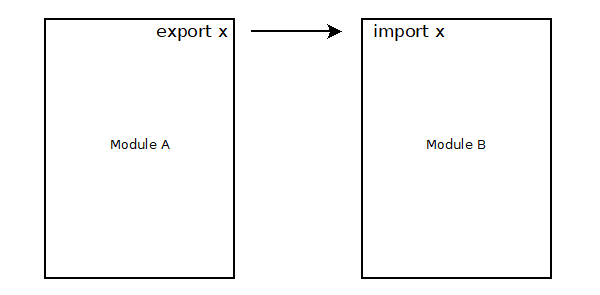
There are two primary ways to export from a file: named exports and a default export. The following video provides a fast and clear demonstration of both.
The video 'JavaScript ES6 Modules' by Web Dev Simplified is a fantastic, concise guide to the core syntax. It covers both named and default exports and how to import them.
Watch from the beginning to 02:02, and then from 02:10 to 05:45. Focus on the two types of exports and their corresponding import syntax. We'll cover the crucial type="module" part, shown between 02:44 and 03:13, in the next section.
Let's break down what you saw in the video.
Named Exports
Use named exports when you want to export several items from a single file. You can export them inline as you declare them, or all at once at the end of the file.
// file: mathUtils.js

// Inline exports
export const PI = 3.14159;

export function add(a, b) {
  return a + b;
}

// Or, export at the end (a common pattern)
const subtract = (a, b) => a - b;
const multiply = (a, b) => a * b;
// export { subtract, multiply }; // This would also work
To import these, you must use their exact names inside curly braces {}.
// file: main.js
import { PI, add } from './mathUtils.js';

console.log(PI); // 3.14159
console.log(add(2, 3)); // 5
If you want to rename an import to avoid a name conflict, you can use the as keyword:
// file: main.js
import { add as sum } from './mathUtils.js';

console.log(sum(5, 5)); // 10
Default Export
A file can have only one default export. This is used for the primary thing the file is meant to provide, like a main class or function.
// file: Greeter.js

// Note: 'export default' is followed by the value itself.
export default function greet(name) {
  return `Hello, ${name}!`;
}
When you import a default export, you don't use curly braces, and you can give it any name you like.
// file: main.js
import sayHello from './Greeter.js'; // 'sayHello' is our chosen name for the default export

console.log(sayHello('Alex')); // "Hello, Alex!"
You can also combine default and named imports in one line:
// Assuming mathUtils.js had a default export too
// import aDefaultFunction, { PI, add } from './mathUtils.js';
3. Making it Work in the Browser
Just writing import and export isn't enough. You need to tell the browser how to handle these files. There are two critical steps:
- Use
type="module"in your HTML: You only need to link to your main JavaScript file (your "entry point"). The browser will read itsimportstatements and fetch the other files automatically. - Use a local server: For security reasons, browsers block modules from loading directly from the file system (
file:///...). You need to serve your files over HTTP (http://...). The easiest way to do this is with the "Live Server" extension in VS Code.
This next video explains these two essential points perfectly.
Javascript Modules | Export Import Syntax for ES6 Modules
The video 'Javascript Modules' by Dave Gray clearly explains the practical setup required. It covers the 'CORS policy' error you'll see without a local server and the importance of type="module".
Watch from 00:43 to 03:42. This section covers the two crucial setup steps: running a local server and adding type="module" to your script tag. It also mentions that modules automatically run in 'strict mode' and are deferred, which are good things to know.
Here's what your HTML would look like, linking only to the main entry point:
<!DOCTYPE html>
<html lang="en">
<head>
  <title>Modules Demo</title>
</head>
<body>
  <h1>Check the console!</h1>
  <!-- Only one script tag is needed for your main JS file -->
  <script type="module" src="main.js"></script>
</body>
</html>
Test your understanding!
Let's put this into practice. Imagine you have two files: stringUtils.js and main.js.
1. In stringUtils.js:
- Create a function
capitalize(str)that capitalizes the first letter of a string. Export it as the default export. - Create another function
shout(str)that converts a string to uppercase. Export this as a named export.
2. In main.js:
- Import both functions from
stringUtils.js. - Use
capitalizeon the string"hello world"and log the result. - Use
shouton the string"make this loud"and log the result.
Show answer
stringUtils.js
export default function capitalize(str) {
  if (!str) return '';
  return str.charAt(0).toUpperCase() + str.slice(1);
}

export function shout(str) {
  return str.toUpperCase();
}
main.js
import cap, { shout } from './stringUtils.js';

const quietMessage = "hello world";
const loudMessage = "make this loud";

console.log(cap(quietMessage));    // "Hello world"
console.log(shout(loudMessage));   // "MAKE THIS LOUD"
Note that we chose to name the default import cap, but any valid variable name would work.
4. Common Patterns and a Look Ahead
As you start working on larger projects, you'll see some common patterns for organizing modules.
Importing a Namespace
Sometimes, you might want to import everything from a module into a single object to avoid naming conflicts. You can do this with import * as ....
// file: main.js
import * as math from './mathUtils.js';

console.log(math.PI);
console.log(math.add(4, 6));
Barrel Files (index.js)
In big projects, you might have a components folder with dozens of files. Instead of writing long import paths for each, a common pattern is to create an index.js file in that folder that re-exports everything. This is called a "barrel".
// file: components/index.js (the barrel)
export { Button } from './Button.js';
export { Input } from './Input.js';
export { Card } from './Card.js';
This simplifies imports in other files significantly:
// Instead of this:
// import { Button } from './components/Button.js';
// import { Input } from './components/Input.js';

// You can do this:
import { Button, Input } from './components'; // The '/index.js' is implied
This is a pattern you will see constantly in React projects. For a more detailed walkthrough, the "Optimization techniques" section of the freeCodeCamp article A Practical guide to ES6 modules is a great reference for the future.
Conclusion
You've now learned how to break your code into manageable, reusable, and self-contained modules—a huge step towards writing professional JavaScript.
Key Takeaways:
- Modules solve the global scope problem by giving each file its own private scope.
exportmakes code available;importbrings it into another file.- You can have many named exports (
export const x = ...) which are imported with curly braces (import {x} from ...). - You can have only one default export (
export default ...) which is imported without braces and can be renamed freely (import myName from ...). - To make modules work in the browser, you need a
<script type="module">tag and to run your code from a local server.
In our next lesson, we will dive into the most important array methods for data transformation: map(), filter(), and reduce(). Combining these powerful methods with the modular code structure you've learned today will unlock the ability to write clean, efficient, and scalable data-driven applications.