Welcome to your final hands-on lesson! In our last session, you mastered the delicate art of hemming, giving your sheer and underlining skirt layers a beautiful, clean finish. With every seam stitched and every hem completed, your dress is now a fully constructed garment.
This lesson addresses the final step in shaping your creation: Press the completed dress using a tailor's ham and press cloth for a professional finish.
This isn't merely about ironing out wrinkles; it's the crucial stage where you use heat, steam, and specialized tools to mold the fabric, define the dress's architectural lines, and set the final, flawless silhouette. Think of this not as a chore, but as the final rendering process for your design—the step that transforms a well-made garment into a stunning piece of couture. We will focus on the tools and techniques that distinguish a professional finish, ensuring your dress looks as incredible as the effort you've poured into it.
1. The Principle of Pressing: Molding, Not Ironing
Before we touch the iron to the dress, it's essential to understand the fundamental difference between "ironing" and "pressing." Ironing is the gliding motion you use to remove wrinkles from everyday clothes. Pressing, in tailoring, is a precise action of lifting and lowering the iron, often with steam, to shape the fabric.
The goal is to use heat and moisture to soften the fabric's fibers, mold them into the desired shape (like over a curve or into a sharp crease), and then let them cool and set permanently. This is what creates crisp seams and beautifully formed curves.
To start, let's watch an introduction to this concept from tailor and dress historian Bernadette Banner and couture creator Barbara of Royal Black.
Pressing: The Tailor's Secret to Perfect Seams | Masterclass feat. Barbara of Royal Black
In 'Pressing: The Tailor's Secret to Perfect Seams', they explain why pressing is the secret ingredient that elevates a garment from 'handmade' to 'professionally made'.
Watch the first three and a half minutes of the video, focusing on these two key areas: The Importance of Pressing (00:00 - 02:23): Listen for how they describe pressing as the 'real magic' in sewing and the key to a clean, professional finish. The Core Principle (02:23 - 03:33): Pay close attention to the explanation of the process: soften fibers with heat and moisture, mold the fabric into shape, and then cool it to set the shape permanently.
As the article "How To Press For Success" from Sew Essential clearly states, the technique is about lowering and lifting the iron, not gliding. This prevents you from stretching the fabric or distorting the grainlines you've worked so hard to maintain.
How To Press For Success In Your Sewing And Dressmaking
To solidify this core concept, please read a short section from the article 'How To Press For Success In Your Sewing And Dressmaking'.
Read the section titled 'Ironing Vs Pressing'. It provides a concise, clear definition of the two actions and why the distinction is so important.
2. Your Professional Pressing Toolkit
For a garment with the structure of your wedding dress, a standard iron and ironing board are not enough. The learning outcome specifically names the two most critical tools for this job: the press cloth and the tailor's ham.
The Press Cloth: Your Fabric's Shield
A press cloth is a piece of fabric placed between your iron and your garment. Its job is to protect your delicate fashion fabric from the direct, intense heat of the iron, preventing scorching, melting, or shine.
For your sheer silks, a silk organza press cloth is the ideal choice. Because it's transparent, you can see exactly what you're doing underneath, which is invaluable for precise work.
How to Use EVERY Pressing Tool
The video 'How to Use EVERY Pressing Tool' by Seamwork has a great segment explaining the purpose and types of press cloths.
Watch from 00:37 to 02:20. Notice the discussion of using a muslin cloth for general purposes versus a silk organza cloth for visibility and delicate fabrics.
The Tailor's Ham: For Every Curve
The tailor's ham is your most important tool for pressing the architectural bodice of your gown. It's a firmly packed, ham-shaped cushion that provides a curved surface, allowing you to press and mold areas like bust darts, princess seams, and armholes without flattening them.
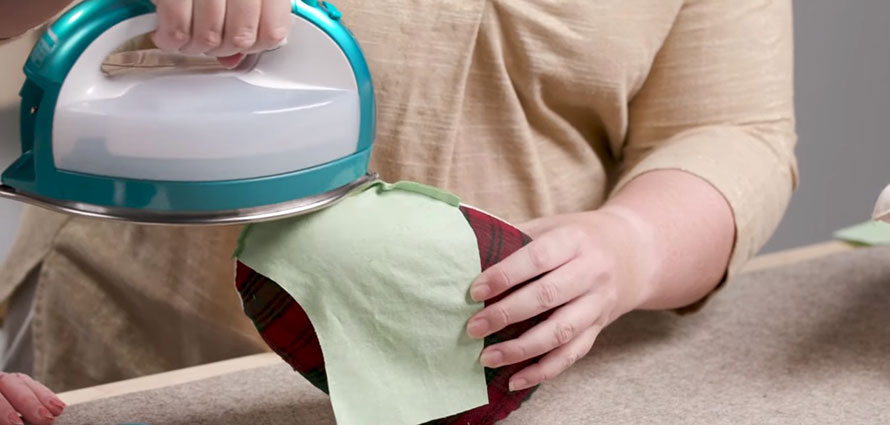
Most tailor's hams have two sides: a wool side for woolens and textured fabrics (it absorbs steam well and prevents shine), and a cotton canvas side for fabrics that can tolerate higher heat, like your underlining.
Let's see it in action.
How to Use EVERY Pressing Tool
The Seamwork and Bernadette Banner videos both offer excellent demonstrations of how to use a tailor's ham.
First, watch the 'How to Use EVERY Pressing Tool' video from 02:20 to 03:37. This gives a quick, clear overview of using the ham for darts and curves.
Pressing: The Tailor's Secret to Perfect Seams | Masterclass feat. Barbara of Royal Black
Next, for a more detailed look, return to the 'Pressing: The Tailor's Secret' video.
Watch the segment from 06:52 to 10:21. Barbara demonstrates pressing a curved seam, emphasizing how to position the fabric on the ham and use the iron's steam and weight to mold the curve. This is exactly the technique you'll use on your bodice.
3. Your Pressing Strategy: A Step-by-Step Guide
Approach pressing your dress with the same systematic mindset you'd use in a design project. Work in sections, from the inside out, and always test your iron's settings on a scrap of your fashion fabric first!
Step 1: Prepare Your Workspace
- Set up your ironing board, tailor's ham, and iron.
- Fill your iron with distilled water to prevent mineral deposits.
- Have your silk organza press cloth ready.
- Find a scrap of your silk organza and underlining. Test your iron's heat setting—start low and gradually increase until you get effective steam without risking damage.
Step 2: Pressing the Bodice
The bodice is all about reinforcing the three-dimensional shape.
- Press from the inside: Turn the dress inside out.
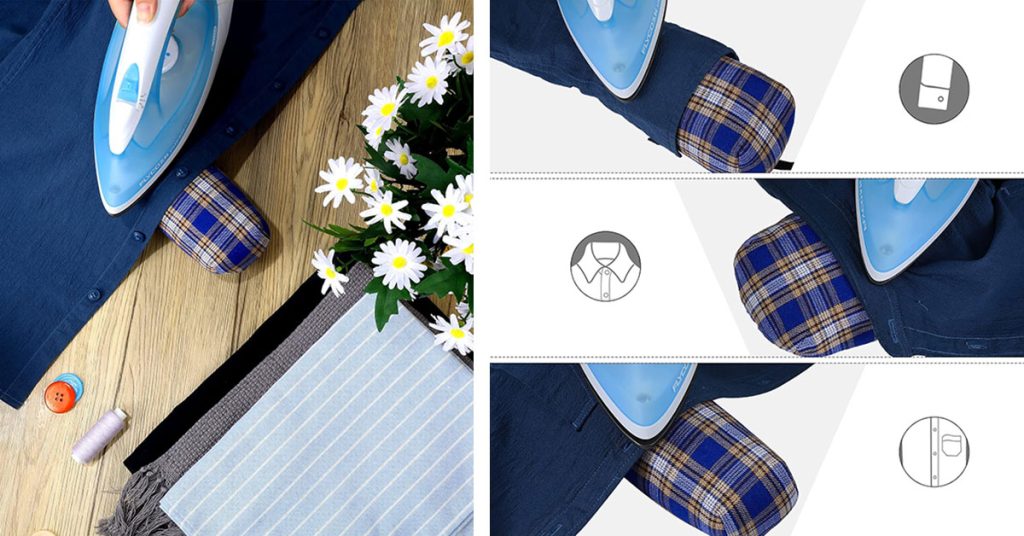
- Press the seams: Place a section of a princess seam or side seam over the tailor's ham. The ham should fill out the curve of the bodice.
- Use the press cloth: Place your silk organza press cloth over the seam allowance.
- Press and steam: Lower the hot iron onto the seam, apply steam, and hold for a few seconds. Lift, do not glide. Move to the next section and repeat. Press the seam allowances open or to the side, as you constructed them.
- Shape the cups: Pay special attention to the bust area. Use the fullest part of the ham to press this area, truly molding the fabric into a rounded shape.
- Define the pleats: From the outside of the garment (using the press cloth!), carefully press the vertical pleats to ensure they are crisp and defined. You can use the straight edge of your ironing board for this.
Step 3: Pressing the Skirt
The goal for the skirt is to create a smooth, clean drape.
- Press the underlining first: With the dress inside out, press the underlining layer. You can do this on the flat ironing board. Press the vertical seams open. Use your press cloth.
- Press the sheer layers: This requires the most care.
- Work in small, manageable sections.
- Ensure the fabric is smooth and flat on the ironing board.
- Always use your press cloth.
- Use the "lift and lower" motion. Do not drag the iron, as this will stretch the delicate silk.
- Let each pressed section cool completely before moving it to prevent new wrinkles from forming.
- Press the hem: Give the narrow rolled hems a final, light press to ensure they hang perfectly.
Step 4: The Final Golden Rule: Let It Cool
As emphasized in the Bernadette Banner video, perhaps the most critical tip is to let each section cool completely after pressing. The fabric is still malleable when hot and steamy. Moving it too soon will undo your work and can create new wrinkles. After pressing a section, step back. Let it cool and set. This is what locks the shape in permanently.
Conclusion
You have now applied the final layer of polish and precision to your wedding dress. By understanding the difference between pressing and ironing and by using the right tools—the tailor's ham and press cloth—you have professionally shaped and molded your garment.
Key Takeaways:
- Pressing is not ironing: It is the act of lifting and lowering the iron to mold fabric with heat and steam.
- A press cloth is essential: It protects your delicate fabric from direct heat. Silk organza is ideal for visibility.
- A tailor's ham is for curves: Use it to press and reinforce the 3D shape of your bodice without flattening it.
- Test on scraps: Always confirm your iron temperature on leftover fabric before touching your dress.
- Cool and set: The cooling phase is as important as the heating phase for locking in the final shape.
You've done it! The sewing and pressing are complete. In our very last lesson, you will learn how to develop and perform a final quality inspection of the finished garment, ensuring every detail is perfect for your wedding day.