Hello! Welcome to the final stage of bringing your wedding dress to life. In our last lesson, you took the crucial step of allowing your fully constructed gown to hang, letting gravity work its magic on the bias-cut sections of the silk skirt. The fabric has now settled, and you've preemptively avoided the dreaded wavy hem.
Today, we transition from patient observation to precise action. Our learning outcome is to mark an even hemline at the correct floor-length with the assistance of a helper. This is one of the most defining steps in dressmaking, turning a garment into a perfectly fitted piece of personal architecture. It's a measure-twice, cut-once moment that requires a methodical approach, which will resonate with your product design process of defining final specifications before production.
We'll cover the strategy for hemming a multi-layered gown, the necessary setup, and a step-by-step process for achieving a perfectly balanced hemline.
1. The Strategy: What is "Correct Floor-Length"?
For a multi-layered gown like yours, "floor-length" isn't a single measurement. It's a system of carefully planned, staggered lengths designed for both beauty and function. The goal is to have the outermost layer gracefully skim the floor while the inner layers are slightly shorter to prevent you from tripping.
Let's begin by defining our target. The following article clearly explains the standard for a professional-quality bridal hem.
What is The Proper Length a Wedding Dress Should be Hemmed?
The article 'What is The Proper Length a Wedding Dress Should be Hemmed?' from Lovella Bridal provides a clear definition of the goal for a multi-layered dress.
Please read the sections 'The Perfect Length' and 'Should My Toes Show?'. Pay attention to how the length changes from the inner layers to the outer layer.
As you've just read, the principle is to work from the inside out, with each layer getting progressively longer.
- Underlining/Lining: Hemmed to the top of your foot.
- Sheer Overlays: Hemmed to just graze the floor.
This tiered approach ensures you can walk with confidence, while the outer sheer layers create the intended floating, ethereal effect.
To see how this strategy is implemented in a high-end bridal context, the next video offers an incredibly detailed look at pinning a multi-layered ballgown. While your dress is an A-line, the principles of managing different layers are identical.
The secret is in the Pinning! Watch my methodology, step by step | How to Pin to Hem a Ballgown
The video 'The secret is in the Pinning!' from the SPARKLE SEWING channel is a masterclass in hemming complex gowns. We'll watch a few key sections to understand the logic for each type of layer.
Watch the following three clips. The seamstress discusses pinning each layer as a separate step, which is the mindset we'll adopt. Pinning the First Solid Layer (07:37 - 09:12): Notice she emphasizes that bodice adjustments must be complete and that this layer is pinned 'basically to the floor'. This will be our underlining. Pinning 'Diffuser' Layers (11:35 - 14:31): She discusses layers like organza or tulle that are meant to soften the look. Listen to her reasoning for cutting these layers slightly shorter so they are 'never to be seen' peeking out. Pinning the Organza Layer (18:33 - 21:48 & 23:20 - 25:43): This is highly relevant. Pay close attention to her warning to 'never trust organza' because of how it shifts. She explains how the fabric can seem to shorten after hemming due to movement during sewing and pressing, and how to account for it by pulling it down. This is critical knowledge for your silk organza and chiffon.
This tiered, layer-by-layer strategy is the professional standard for achieving a flawless result.
2. Preparation and Toolkit
Before you begin, gather your tools and set up your workspace. This process is a collaboration between you and your helper.
Essential Toolkit:
- You: Wearing the exact shoes and undergarments you will wear on your wedding day. This is non-negotiable, as even a small change in heel height or foundation garments will alter how the dress hangs.
- Your Helper: This person will be doing all the measuring and pinning.
- Measuring Tool: A yardstick, a long ruler, or a purpose-made hem marker. The key is that it can be held perfectly perpendicular to the floor.
- Pins: A good supply of sharp dressmaking pins.
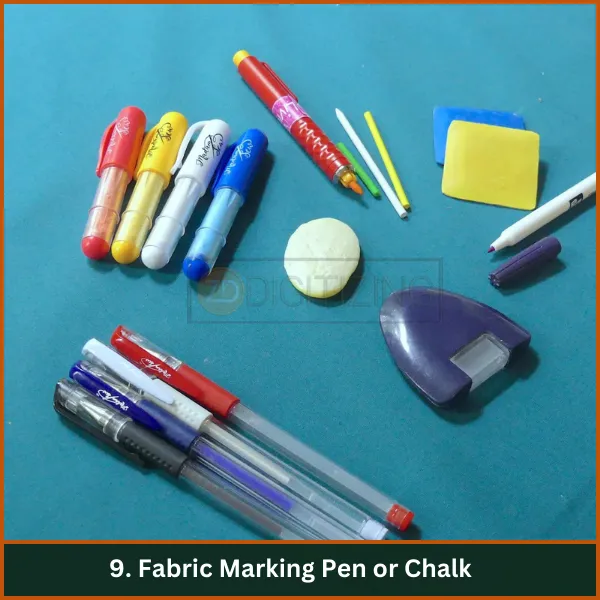
- Marking Tool: Tailor's chalk or a removable fabric pen. Choose a color that will be visible on your fabric but can be easily removed.
For a quick review of the fundamental principles of marking a hem, please read the following guide.
[PDF] EC93-445-A Hems for Garments
The 'Hems for Garments' guide from the University of Nebraska-Lincoln Extension provides a concise summary of the core principles for marking a hem.
Read the sections 'Features of a Successful Hem' and 'Marking the Hem'. This reinforces the importance of wearing the correct shoes and having your helper move around you while you stand still.
3. The Marking Process: A Step-by-Step Guide
This process is best done in two phases: first, pinning the hemline while you are wearing the dress, and second, refining and marking the line with the dress on a dress form. This combination ensures the fit is true to your body while allowing for a more stable and precise final marking.
BEST WAY TO MARK A DRESS HEM-No More Uneven Hemlines!
The video 'BEST WAY TO MARK A DRESS HEM' by Sew Darned Fun! demonstrates this two-phase process beautifully. It shows why measuring up from the floor is the only reliable method.
Please watch from the beginning to 09:43. This covers the entire process: The 'Why' (00:22 - 01:33): The rationale for measuring from the floor up. Pinning on the Body (01:33 - 04:48): Observe how the helper pins key reference points (center front, sides, center back). Transferring to a Dress Form (04:48 - 07:04): See how she checks that the key points are equidistant from the floor, adjusting the dress on the form to remove any unevenness from standing. Marking the Final Line (07:04 - 09:43): Finally, she uses a chalk marker to 'connect the dots' for a perfect line.
Now, let's adapt this process for your specific multi-layered gown. You will repeat these steps for each skirt layer independently.
Step 1: Get into Position
- Put on your dress, shoes, and undergarments.
- Stand on a hard, level surface in front of a full-length mirror.
- Stand naturally, looking straight ahead. Your helper should have all the other layers pinned up and out of the way to isolate the one they are working on.
Step 2: Mark the Opaque Underlining
- Your helper will work on this layer first.
- Goal: The hem should end at the top of your foot.
- Using a yardstick held vertically, your helper will measure a consistent distance up from the floor and place pins parallel to the floor. For example, if your shoes are 1 inch tall and the top of your foot is another inch above that, they might measure up 2 inches from the floor all the way around.
- Start with the key points: Center Front, Center Back, and both Side Seams. Then, fill in the space between these points with pins every 3-4 inches.
Step 3: Mark the Sheer Overlays (Organza/Chiffon)
- Pin the underlining up and out of the way. Drop the first sheer layer.
- Goal: This hem should just graze the top of the floor.
- Your helper will repeat the process, but the measurement from the floor will be smaller. For example, they might measure up ¼ inch from the floor all the way around.
- Pin this layer just as you did the first. If you have multiple sheer layers, mark each one separately. Generally, they are all hemmed to the same floor-grazing length.
Step 4: Transfer and Finalize
- Carefully take the dress off and put it on your dress form.
- Check the pin lines. Using the yardstick, verify that the pins on the underlining are all the same distance from the floor. Adjust the drape of the dress on the form until they are.
- Once satisfied, use your tailor's chalk to connect the pins with a smooth, continuous line. This is your cutting line for the underlining.
- Repeat the process for the sheer overlay(s). Check that this new pin line is also level and then mark it with chalk.
You should now have a dress with two (or more) distinct, perfectly level chalk lines, ready for the final step of sewing.

Conclusion
Congratulations! You have completed one of the most intellectually demanding and technically precise parts of creating your gown. By defining a clear strategy for your multi-layered skirt and executing a methodical marking process, you've set yourself up for a truly professional finish.
Key Takeaways:
- A multi-layered gown requires a tiered hemming strategy: inner layers are shorter for mobility, while the outer layer is hemmed to floor-length for aesthetics.
- The only accurate method is to measure a consistent distance up from the floor with the wearer in full attire (dress, shoes, undergarments).
- A two-phase process of pinning on the body and then marking on a dress form combines personalized fit with high precision.
- Always work on one fabric layer at a time, keeping the others pinned out of the way.
In our next and final construction lesson, we will take these carefully marked lines and learn the techniques to finish the hem on the sheer and underlining layers using a narrow or rolled hem.