Hello! Welcome to the next stage of finishing your gown.
In our last lesson, you completed the internal architecture of the bodice by cutting, tipping, and inserting the boning. You essentially built the "scaffolding" that will give your strapless gown its shape and support.
Now, we shift our focus from the internal structure to the closures. A beautifully executed closure is a hallmark of a high-quality garment. Before we can even think about stitching the zipper, we must prepare the foundation. This brings us to today's learning outcome: to reinforce the center back closure area with interfacing.
This step is fundamental. Just as in product design where thorough preparation prevents failures in the final product, stabilizing your fabric now will prevent common issues like puckering and waving, ensuring a flawless, professional finish for your zipper.
1. The 'Why': Preventing Wavy Zippers
One of the most common frustrations in sewing is installing a zipper, only to have the fabric ripple and wave alongside it. This is especially true when working with the kinds of fine and delicate fabrics used in bridalwear.
Why does this happen? It’s a simple mismatch of materials. The zipper tape is strong and stable, while your garment fabric—especially something like silk—is often lighter and has more 'give'. When they are stitched together, the stable zipper tape holds its shape while the fabric can stretch slightly under the feed dogs of the machine, creating unsightly waves.
To understand this problem and its solution in more detail, let's look at an excellent article that breaks it down.
5 Invisible Zipper Problems Solved: No More Wavy Seams ...
The article '5 Invisible Zipper Problems Solved' from Seamwork magazine clearly explains why zippers can appear wavy and how to prevent it.
Please read the introduction and 'Problem 1: A Zipper That Ripples and Waves'. Pay close attention to the 'Why It Happens' and 'The Solution: Interfacing Strips' sections. The side-by-side photo provides a powerful visual of the difference this technique makes.
As the article explains, the solution is interfacing.
2. The Tool for the Job: Understanding Interfacing
Interfacing is a separate material that is applied to the main fabric to add stability, shape, and support. For this task, we will be using fusible interfacing, which has an adhesive on one side that is activated by the heat of an iron.
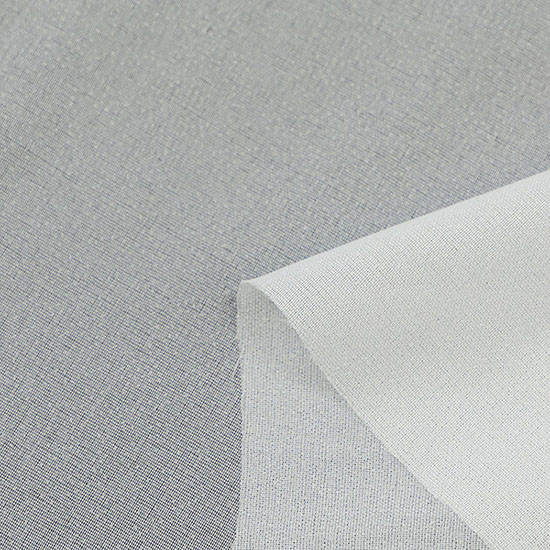
For your gown, you should use a lightweight fusible interfacing. This will provide the necessary stability without adding bulk or creating a stiff, visible edge through your fashion fabric. A lightweight knit or weft-insertion interfacing is often a great choice for delicate fabrics, as it stabilizes without completely eliminating the fabric's natural drape.
3. The 'How': Applying Interfacing to the Center Back
The process is straightforward and consists of three main steps: cutting the strips, positioning them, and fusing them with an iron. Let's watch a clear, concise demonstration.
How to Sew an Invisible Zipper Step by Step | Sewing Tutorial with Angela Wolf
In this tutorial, sewing instructor Angela Wolf demonstrates the entire preparation process, including a great professional tip for preventing the interfacing from creating a visible line.
Watch from the beginning until 0:53. Observe how she cuts the interfacing, uses pinking shears on one edge, and uses a 'press and lift' motion with the iron to fuse it to the fabric.
Let's break down those key steps:
1. Cut the Interfacing Strips:
- Length: Cut two strips of interfacing that are about 2.5 cm (1 inch) longer than your zipper opening.
- Width: The strips should be wide enough to cover your seam allowance plus about 1.5 cm (1/2 inch). A total width of 3-4 cm () is usually sufficient.
- (Optional Pro Tip): As shown in the video, using pinking shears on the inner edge of the interfacing strip creates a feathered, zig-zag edge. This helps the interfacing blend more smoothly into the fabric, making it less likely that a hard line will show through on the right side of the dress.
2. Position the Strips:
- Place the interfacing strips on the wrong side of your two center back bodice pieces.
- Align the straight, uncut edge of the interfacing flush with the raw edge of the center back seam. The adhesive side (the rough, bumpy side) should be facing down, against your fabric.
3. Fuse with an Iron:
- Set your iron to the appropriate temperature for your fabric (use a lower temperature for silks). Always use a press cloth to protect your delicate fashion fabric from direct heat.
- As Angela Wolf demonstrated, use a press and lift motion. Place the iron on the interfacing, hold for 10-15 seconds (check interfacing instructions), lift it, and move to the next section. Do not glide the iron back and forth, as this can stretch and distort the fabric you are trying to stabilize.
This next short video provides another quick, clear view of the application process.
This clip offers a very focused look at placing the interfacing and marking the seam allowance, reinforcing the core technique.
Watch from 0:56 to 1:15. Notice how the interfacing is applied directly to the wrong side of the fabric along the edge where the zipper will be installed.
For a final review and a helpful diagram, this article provides excellent text-based instructions that you can refer back to.
Mastering Centre Back Zips: Tips and Tricks for a Flawless Wedding ...
The article 'Mastering Centre Back Zips' offers specific advice for wedding dresses and includes a useful diagram illustrating the placement of the interfacing.
Please read section 'A. Reinforcing Centre Back Seam'. The diagram clearly shows the interfacing strip positioned along the center back edge of the pattern piece.
By following this process, you create a stable, non-stretching foundation that is perfectly prepared for a smooth and truly "invisible" zipper installation.
Conclusion
You have now completed a crucial preparatory step that sets you up for success. By reinforcing the center back seam, you have engineered the fabric to handle the stress of a zipper, ensuring the closure will be flat, smooth, and professional. It’s a small step in terms of time, but a giant leap in terms of the final quality of your gown.
Key Takeaways:
- Reinforcing the center back seam with lightweight fusible interfacing is essential to prevent the fabric from stretching and creating a wavy zipper line.
- Cut interfacing strips slightly longer than the zipper opening and about 3-4 cm wide.
- Apply the interfacing to the wrong side of the fabric, aligning it with the raw edge of the seam.
- Use a press cloth and a press-and-lift motion with your iron to fuse the interfacing without distorting the fabric.
In our next lesson, we will put this newly reinforced fabric to use. You will install a practice invisible zipper on a lined fabric scrap to master the technique. This is your prototyping phase—a chance to perfect your skills on low-stakes material before executing the final installation on your beautiful dress.