Hello! Welcome to your next lesson in our Computer Vision module.
In the previous lesson, we dove into the theory behind the YOLO (You Only Look Once) architecture. You learned about the core concepts that make it so effective: dividing an image into grid cells, predicting bounding boxes and class probabilities, and using Non-Maximum Suppression (NMS) to clean up the final detections.
Today, we transition from theory to practice. You will take those concepts and apply them using a state-of-the-art, pre-trained YOLOv8 model. Your goal for this lesson is to apply a pre-trained YOLO model for object detection. We'll use the powerful and easy-to-use ultralytics Python library to find and identify objects in images and videos, bringing the concepts from our last session to life with code.
Let's get started!
1. Getting Started with Ultralytics and YOLOv8
The creators of YOLO have made it incredibly simple to use their models through the ultralytics Python package. It provides a high-level API that handles all the complexities we discussed, allowing you to get results in just a few lines of code.
First, let's see how you can use a pre-trained YOLOv8 model directly from your terminal. This is a great way to quickly verify your installation and see the model in action without writing a full Python script.
Object Detection with Pre-trained Ultralytics YOLOv8 Model | Episode 1
This video from Ultralytics, the creators of YOLOv8, provides a concise introduction to using their framework. We'll start by watching the segments on installation and command-line prediction.
Watch the video from 00:01:10 to 00:02:53. Focus on these two steps: Installation: The video will show you how to install the ultralytics package using pip. Command-Line Prediction: Observe the simple command used to run prediction: yolo predict model=<model_name>.pt source=<your_image_url_or_path>. Notice how it automatically downloads the model weights and outputs a new image with the detections.
As you saw, running a powerful object detection model can be as simple as a single command. The model used, yolov8s.pt (a small version), is pre-trained on the COCO dataset, which contains 80 common object classes like 'person', 'car', 'dog', and 'chair'. When you run the prediction, the model outputs the class, a confidence score, and the bounding box for each object it finds.
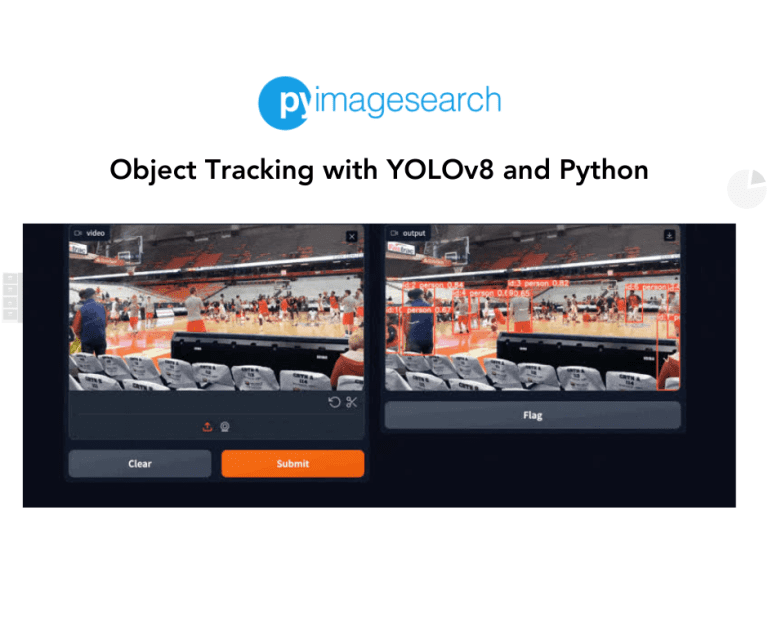
2. Object Detection with Python
While the command line is useful for quick tests, you'll typically integrate YOLO into a larger Python application. Your background in Python will make this next step straightforward. The ultralytics library makes this process exceptionally clean.
With just two main lines of Python code, you can load a model and run predictions.
Object Detection with Pre-trained Ultralytics YOLOv8 Model | Episode 1
Let's return to the Ultralytics video to see how to perform the same detection task within a Python script.
Now, watch from 00:02:53 to 00:04:16. Pay attention to the core Python code: from ultralytics import YOLO model = YOLO('yolov8n.pt') results = model.predict(source='...') The video will demonstrate this on a video file, but the same code works for images, webcam streams, and more.
This is powerful! But what exactly is inside the results object? To build an application, you need to access the data: the bounding box coordinates, the class names, and the confidence scores for each detection.
The results object is a list, where each element corresponds to an input image. Let's dive into how to parse this object to extract the information you need.
How to Detect Objects in Images Using the YOLOv8 Neural Network
This article from freeCodeCamp provides a clear, step-by-step guide to using YOLOv8 and interpreting its output. We'll focus on the section that explains how to work with the prediction results.
Please read the section titled 'How to Use a Pre-trained YOLOv8 Model'. Start from where it says results = model.predict("cat_dog.jpg") and read until the end of the section. The key things to focus on are: How the results object is a list. How to access the boxes property from a single result. How to loop through the boxes to get the coordinates (box.xyxy), class ID (box.cls), and confidence score (box.conf). How to use the result.names dictionary to map a numeric class ID (like 16) to a human-readable name (like 'dog').
Now, let's put all that together into a complete, working Python script. This script will load a pre-trained YOLOv8 model, run detection on an image, and print the details for each object found.
# main.py

from ultralytics import YOLO
from PIL import Image
import requests


# 1. Load a pre-trained YOLOv8 model
# The 'n' stands for nano, the smallest and fastest model.
# Other options: 'yolov8s.pt', 'yolov8m.pt', 'yolov8l.pt', 'yolov8x.pt'
model = YOLO('yolov8n.pt')


# 2. Define the image source
# This can be a local path, a URL, or a PIL Image object
image_url = 'https://ultralytics.com/images/bus.jpg'
image = Image.open(requests.get(image_url, stream=True).raw)


# 3. Run prediction
# The model.predict() method returns a list of Results objects
results = model.predict(source=image)


# The results object is a list, since you can pass multiple images. We are interested in the first result.
result = results[0]


# 4. Process the results
print(f"Found {len(result.boxes)} objects in the image.")

for box in result.boxes:


    # Get the class ID and name
    class_id = int(box.cls[0].item())
    class_name = result.names[class_id]


    # Get the confidence score
    confidence = round(box.conf[0].item(), 2)


    # Get the bounding box coordinates (xyxy format)
    coords = [round(x) for x in box.xyxy[0].tolist()]

    print("---")
    print(f"Object type: {class_name}")
    print(f"Confidence: {confidence}")
    print(f"Coordinates: {coords}")


# 5. Display the image with bounding boxes (optional)
# The `plot()` method returns a numpy array of the image with detections drawn on it.
annotated_image = result.plot()


# To display it, you might need libraries like OpenCV or Matplotlib
# For example, using PIL:
Image.fromarray(annotated_image).show()
This script provides a practical template you can adapt for your own projects. For more details on the different arguments you can pass to the predict function (like stream=True for videos or save=True to save output files), the official documentation is your best friend.
Python Usage - Ultralytics YOLO Docs
The Ultralytics documentation provides a concise reference for using YOLO in Python. It's a great resource to bookmark for future use.
Briefly review the 'Predict' section. Notice the variety of input sources it accepts (0 for webcam, a folder path, PIL images, etc.) and the examples of how to access different parts of the result, such as result.boxes.xyxy.
3. Real-Time Object Detection
One of YOLO's most exciting applications is real-time object detection using a live webcam feed. Thanks to the ultralytics library, this requires only a minor change to the source argument in our script.
Let's see just how fast and effective this is.
Object Detection with Pre-trained Ultralytics YOLOv8 Model | Episode 1
The final part of the Ultralytics video demonstrates live detection on a webcam feed. This showcases the 'real-time' capability that makes YOLO famous.
Watch from 00:06:05 to 00:07:04. Notice that the only change needed is setting source='0' to use the default webcam. The video also highlights the inference speed (measured in milliseconds or frames per second), which is a key performance metric.
The ability to process video streams at high frames per second (FPS) is crucial for many AI applications, from autonomous driving to security systems. This demonstration shows you're now equipped with a tool capable of building such systems.
Conclusion
Congratulations! You have successfully bridged the gap between the theory of object detection and its practical application. You've used a pre-trained, state-of-the-art YOLOv8 model to detect objects in images and videos, a fundamental skill for any AI developer.
Key Takeaways:
- The
ultralyticslibrary offers a simple and powerful Python interface for working with YOLO models. - You can perform object detection with a pre-trained model in just a few lines of code by loading a model (
YOLO('yolov8n.pt')) and calling the.predict()method. - The prediction results can be processed to extract detailed information for each detected object, including the class name, confidence score, and bounding box coordinates.
- The same code structure works seamlessly for various sources, including static images, video files, and real-time webcam feeds.
Preview of the Next Lesson:
So far, we have treated the neural network as a "black box." We give it an image, and it gives us detections. But what is happening inside? In the next lesson, you will learn to visualize CNN feature maps and filters to interpret model behavior. This will help you build intuition about how these networks "see" and make decisions, moving you one step closer to mastering deep learning.