Hello! Welcome to the first lesson in our module on building dynamic user interfaces.
In our last few lessons, we took a deep dive into React's memory: the useState hook. You learned how to initialize state, how to update it correctly using immutable patterns, and how state changes cause your components to re-render. Now, we'll bridge the gap between state and the user. After all, a web application isn't just for displaying information; it's for interacting with it.
Today's learning outcome is to attach event handlers like onClick and onChange to JSX elements. We will explore how to make your components respond to user actions like button clicks and text input, which is the foundation of creating interactive and engaging experiences in React.
1. What are Events and Event Handlers?
In web development, an event is an action that occurs in the browser, such as a user clicking a mouse, pressing a key, or submitting a form. An event handler is a function you write that runs in response to a specific event.
React provides a simple and consistent way to handle these events directly within your JSX. The syntax is very similar to HTML, but with a few key differences:
- React event handlers are named using camelCase (e.g.,
onClick,onChange) instead of lowercase (onclick,onchange). - With JSX, you pass a function as the event handler, rather than a string of code.
There are many types of events you can respond to. The image below gives you a nice overview of the most common ones. Today, we'll focus on the two you'll use most frequently: onClick and onChange.
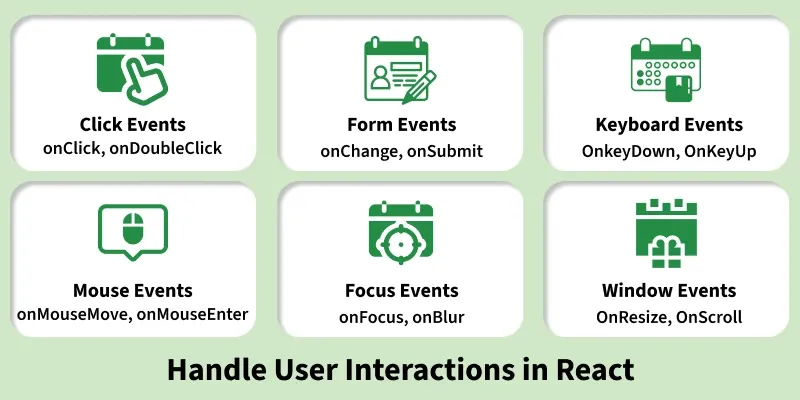
2. Handling Clicks with onClick
The most basic user interaction is a click. In React, you can attach a function to a button's onClick prop to execute code whenever the button is clicked.
Let's read the official React documentation to see the standard approach.
This section from the React documentation clearly explains the three steps to add an event handler.
Read the section 'Adding event handlers'. Focus on the three steps outlined for making the button show a message.
As the article explains, the process is straightforward:
- Define a function inside your component. By convention, these are often named with a
handleprefix, likehandleClickorhandleSubmit. - Implement your logic inside that function.
- Pass the function to the appropriate event handler prop in your JSX, like
onClick={handleClick}.
Here is what that looks like in practice:
import React from 'react';

function AlertButton() {
  // 1. Define the event handler function
  function handleClick() {
    // 2. Implement the logic
    alert('You clicked the button!');
  }

  return (
    // 3. Pass the function to the onClick prop
    <button onClick={handleClick}>
      Click Me
    </button>
  );
}

export default AlertButton;
This component renders a button. When you click it, React calls the handleClick function, and the alert appears.
3. The Most Common Pitfall: Passing vs. Calling
When you're new to React, there's one mistake that's incredibly easy to make with event handlers. Understanding this distinction is critical.
A function passed to an event handler must be passed, not called.
onClick={handleClick}(Correct): This passes thehandleClickfunction itself. React will hold onto it and call it only when the user clicks the button.onClick={handleClick()}(Incorrect): The parentheses()execute the function immediately during the rendering process. The return value ofhandleClick()(which isundefinedin our example) is what gets passed toonClick. The alert will fire once when the component renders, and then nothing will happen on subsequent clicks.
This is a subtle but fundamental difference. The following video and text resource explain this pitfall perfectly.
The React documentation has a dedicated 'Pitfall' section that explains this concept with clear examples.
Read the 'Pitfall' section carefully. Pay close attention to the two tables comparing correct and incorrect syntax.
To reinforce this, let's see it demonstrated in a video.
This Is How You Handle Events In A React App
This clip from Sam Meech-Ward's tutorial provides a great verbal explanation of why you must pass a function reference.
Watch from 00:32 to 01:52. The key explanation of passing vs. calling happens from 01:40 onwards.
Always remember: you are giving React a function to call later. You are not calling it yourself.
4. Inline Event Handlers
Instead of defining a separate named function, you can define the handler function directly, or "inline," within the JSX. This is very common for short, simple handlers. You can do this with an anonymous function, but it's most frequently done with an ES6 arrow function, which you're already familiar with.
// Using a named function (as before)
function handleClick() {
  console.log('Button clicked!');
}
<button onClick={handleClick}>Click Me</button>

// Using an inline arrow function
<button onClick={() => console.log('Button clicked!')}>Click Me</button>
Both styles are functionally identical. Using inline handlers is convenient, but for more complex logic, defining a separate function can make your component's return statement cleaner and easier to read.
5. Handling Input with onChange
Now let's move from clicks to another essential interaction: typing into an input field. The onChange event handler is used for form elements like <input>, <textarea>, and <select>. It fires every single time the element's value changes.
This is where event handlers become truly powerful, because we can use them to update our component's state.
Let's watch a quick demonstration of how to hook up an onChange handler to an input field.
This Is How You Handle Events In A React App
This clip shows how to use an onChange handler to capture the value of an input field.
Watch from 03:15 to 04:23. Notice how the handler function receives an event object, and the input's current value is accessed via event.target.value.
Let's break down the code pattern you just saw, combining useState with onChange:
import React, { useState } from 'react';

function NameInput() {
  const [name, setName] = useState('');

  // This function is the event handler.
  // React automatically passes an "event" object to it.
  function handleChange(event) {
    // We update the state with the input's current value.
    setName(event.target.value);
  }

  return (
    <>
      <label htmlFor="name-input">Name: </label>
      <input
        id="name-input"
        value={name}
        onChange={handleChange}
      />
      <p>Your name is: {name}</p>
    </>
  );
}
In this example:
- We have a piece of state,
name, which holds the current value of the input. - The
<input>element'svalueis tied directly to ournamestate. - The
onChangeprop is set to ourhandleChangefunction. - When you type in the input,
handleChangeis called. It updates thenamestate with the input's new value. - Because the state was updated, the component re-renders, and the
<p>tag displays the new name.
We'll explore the event object and event.target in much more detail in our next lesson. For now, the key takeaway is the pattern of using onChange to call a state setter function.
6. Practice Challenge
The best way to solidify this knowledge is to fix a broken component. The official React docs have an excellent interactive challenge for this.
Responding to Events - Challenge 1 of 2
Let's apply what you've learned. The following challenge presents a component where the event handler is wired up incorrectly. Your task is to fix it.
Scroll to the 'Try out some challenges' section at the bottom of the page and solve the first challenge, 'Fix an event handler'. You'll see a CodeSandbox editor where you can directly edit the code. Hint: review section 3 of this lesson!
Conclusion
Congratulations! You've just learned how to make your React components interactive. This is a fundamental skill that you will use in every single React application you build.
Key Takeaways:
- Event handlers in React are props like
onClickandonChangethat are written in camelCase. - You must pass a function reference (
onClick={myFunction}) to an event handler, not call the function (onClick={myFunction()}). - Handler logic can be defined in a separate, named function or written inline using an arrow function for conciseness.
- The
onClickhandler is used for click events, typically on buttons. - The
onChangehandler is used for form elements and is essential for updating state in response to user input.
Next Up:
In this lesson's onChange example, you saw us use event.target.value to get the text from the input. The event object that React passes to every handler is full of useful information and methods. In our next lesson, we will dive deep into this object to see how you can access event details and prevent default browser behaviors like form submission.