Hello! Welcome to your next lesson in the "Applying AI Builder Models" module.
In our previous lesson, we successfully integrated trained AI Builder models into a Power App, creating interactive experiences for users. You learned how to use both dedicated AI Builder components for image/document processing and the Power Fx Predict function for more flexible, code-driven integration.
Today, we shift our focus from the front-end to the back-end. Many powerful business processes don't require user interaction; they run automatically based on events. This lesson will teach you how to integrate a trained AI Builder model into a Power Automate flow to automate document or text processing. This skill is essential for building end-to-end automations, like processing invoices from email attachments or analyzing customer feedback as it arrives, and is a key topic for the PL-400 certification.
1. AI Builder in Power Automate: The Automation Engine
While Power Apps brings AI to the user's fingertips, Power Automate brings AI to your business processes. By integrating AI Builder into a cloud flow, you can create automations that trigger on an event (like a new email or a file being created), use an AI model to understand the content, and then take action in other systems—all without human intervention.
To get a general sense of the types of models available and the overall process, the following article from Avantiico provides a good high-level summary.
How to Get Started with AI Builder (Power Automate)
The article 'How to Get Started with AI Builder (Power Automate)' gives a good overview of what AI Builder is, the difference between prebuilt and custom models, and the general steps for using them in a flow.
Please read the introduction ('What Is AI Builder in Power Automate?'), the section on 'Prebuilt Models vs. Custom Models', and 'Step 3: Use Your Model in a Power Automate Flow'. This will set the stage for the hands-on example we are about to build. Focus on understanding the conceptual difference between the models and the idea of using the model's output in subsequent flow actions.
As the article explained, the core of this integration is the AI Builder connector in Power Automate. It contains a rich set of actions that correspond to the different AI models. Your main task as a developer is to:
- Choose the correct trigger for your process.
- Add the appropriate AI Builder action and provide it with the necessary input (e.g., file content, text).
- Parse the output from the AI model and use that data in subsequent actions (e.g., writing to a Dataverse table, sending an email, or starting an approval).
2. Practical Example: Automating Document Processing
Let's dive into a detailed, hands-on scenario. Imagine your organization receives construction funding request forms as PDF attachments in a shared mailbox. Your goal is to create a flow that automatically:
- Triggers when a new email with an attachment arrives.
- Uses a custom AI Builder document processing model to extract data like
Loan Number,Draw Amount, and line items from the PDF. - Creates a new "Loan Draw" record in Dataverse with the extracted information.
This is a classic automation pattern and a perfect demonstration of AI Builder's power. We will follow a guided lab that walks through building this exact solution.
While the lab also covers training the model, you can treat that part as a review, since we've covered it in previous lessons. Our primary focus will be on Exercise #2, which details the Power Automate flow integration.
This Microsoft Learning lab provides a step-by-step guide to building a complete AI-powered automation. We will focus on the second half, where the trained model is used within a cloud flow.
Please follow the instructions in 'Exercise #2: Modify flow to use AI Builder model', starting from 'Task #1: Use AI Builder'. You will be modifying an existing flow to add the AI Builder action, map its outputs, and test the end-to-end process. Pay close attention to the expressions used to handle and clean the extracted data, such as the replace() function for the currency amount.
Deconstructing the Flow
Let's break down the key steps and concepts from that lab exercise, which are fundamental to any document processing flow.
1. The AI Builder Action:
The core of the flow is the Extract information from documents action. You select your published custom model, specify the document type, and pass the file content from the email attachment as input.
2. Handling Model Outputs:
After the action runs, its outputs are available as dynamic content. This is where your developer skills come into play. The outputs are structured and predictable:
- Simple Fields: For each field you defined in your model (e.g.,
Loan Number), the action provides[Field Name] value(the extracted text) and[Field Name] confidence score. - Tables: For tables (e.g.,
Budget Items), the action provides an array of objects. Each object in the array represents a row, and its properties correspond to the columns you defined (e.g.,Budget Items Description value,Budget Items Amount value).
This GIF illustrates how you map these outputs to the inputs of another action, such as creating a Dataverse record.
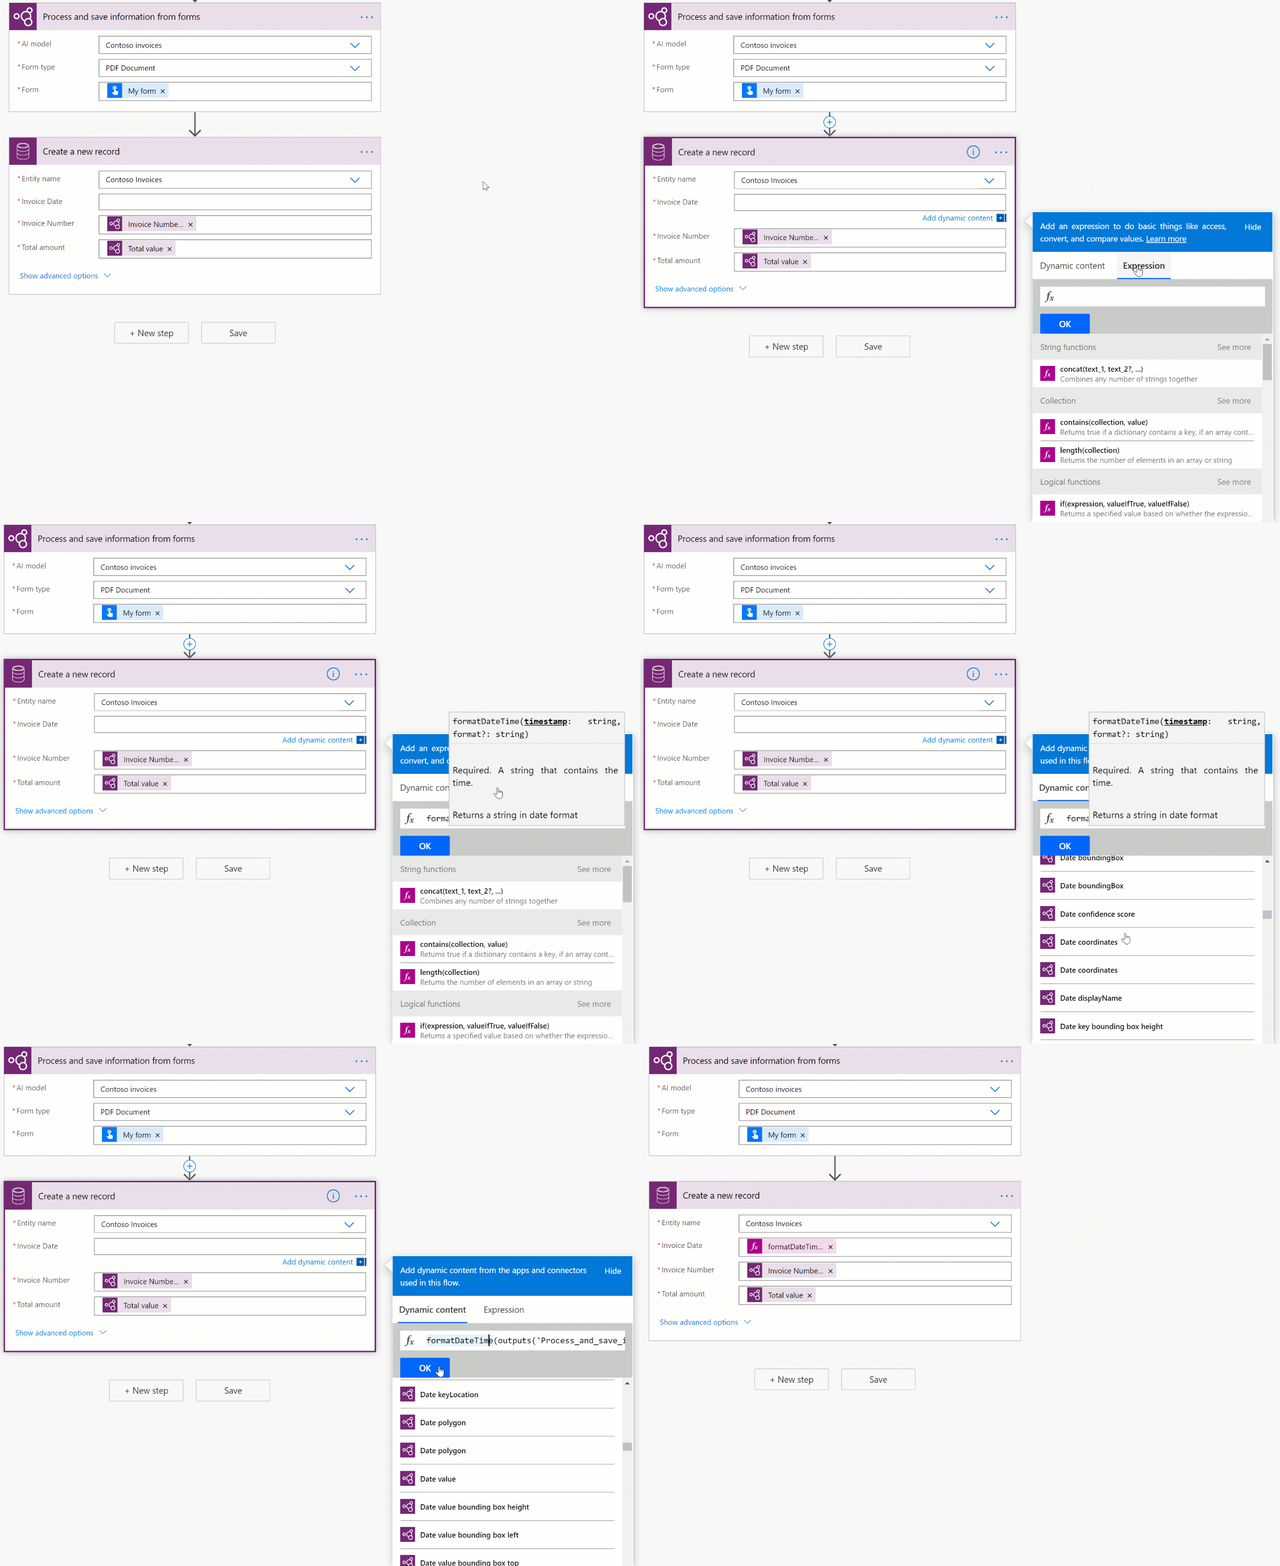
3. Processing Tabular Data:
Because the table data is an array, you must use an Apply to each control to iterate over it. In the lab, the goal was to create a single string of all work items. The pattern is:
- Initialize a string variable before the loop.
- In the
Apply to eachloop (which iterates over theBudget Itemsoutput), use theAppend to string variableaction to add the details from each row.
4. Data Transformation with Expressions:
Raw data from a document often needs cleaning. The lab provides an excellent example: the Draw Amount is extracted as text (e.g., "$10,000.00"). To store this as a currency value in Dataverse, you must first remove the non-numeric characters. The expression used is:string(replace(outputs(...),'€',''))
(Note: The lab might use '€' or '$', the principle is the same).
Given your background in C# and data manipulation, you can see this is analogous to string manipulation and type casting. Power Automate expressions are a powerful tool for these transformations.
Test your understanding!
You've used a document processing model to extract an invoice. The model's table output is named LineItems and contains a Price column for each item. You need to calculate the total sum of all line item prices.
How would you accomplish this in your flow? Describe the controls and actions you would use.
Show answer
- Initialize Variable: Before the loop, add an
Initialize variableaction. Create a new variable, let's call itTotalAmount, set its type toFloat, and its initial value to0. - Apply to each: Add an
Apply to eachcontrol and select theLineItemstable output from your AI Builder action as the input. - Increment Variable: Inside the loop, add an
Increment variableaction. Select theTotalAmountvariable. For theValue, you'll need to use an expression to convert thePricetext to a number. The expression would look like this:float(item()?['price']).item()?['price']refers to thePricecolumn of the current row in the loop. Thefloat()function converts it to a number.
After the loop completes, the TotalAmount variable will hold the sum of all line item prices.
3. Integrating a Text Processing Model
Not all AI automation involves complex documents. You can also automate processes based on unstructured text using prebuilt models.
Scenario: Let's say you want to analyze customer feedback submitted via a web form and route it based on sentiment.
The flow would be:
- Trigger:
When a new response is submitted(from the Microsoft Forms connector). - Get Details:
Get response details. - Analyze Sentiment: Add the AI Builder action
Analyze positive or negative sentiment in text. Pass the feedback text from the form response to theTextinput field. - Condition: Add a
Conditioncontrol. Check the output of the sentiment action. The condition could beOverall text sentimentis equal toNegative. - Branching Logic:
- If yes (Negative): Create a task in Planner for a manager to follow up and send an empathetic email to the customer.
- If no (Positive/Neutral): Add the feedback to a "Positive Feedback" list in SharePoint.
This pattern is incredibly useful for triage, routing, and understanding customer voice at scale.
Accessing Nested Outputs with Expressions
Sometimes, the dynamic content pane might not show the exact value you need, or you may want to access a specific piece of data from the complex JSON output of a model. As a developer, you can write expressions to navigate this JSON directly.
The image below shows a Predict action's output being parsed by an expression in a Compose action.

This demonstrates that you have full control to access any part of the model's response, just as you would when consuming a REST API in C#. The ? is the safe navigation operator, equivalent to the null-conditional operator (?.) in C#, preventing the flow from failing if an intermediate property is null.
Conclusion
In this lesson, you have learned how to embed AI intelligence directly into your automated backend processes using Power Automate. This moves AI from a tool for user assistance to a driver of core business automation.
Key Takeaways:
- The AI Builder connector in Power Automate is your gateway to using models in flows.
- The implementation pattern is: Trigger -> AI Action -> Parse Output -> Subsequent Actions.
- Custom document processing models return structured fields and tables. Table outputs are arrays that must be processed using an
Apply to eachloop. - Prebuilt text models (like sentiment analysis) provide a simple way to add intelligence to text-based triggers.
- Expressions are crucial for transforming and cleaning extracted data and for accessing deeply nested values in a model's output.
What's Next?
We've now worked with a custom document model and discussed a prebuilt text model. In the next lesson, we will focus on another common scenario: using the prebuilt text recognition AI model in a flow to extract text from an image. This will cover how to handle unstructured text within images, such as text from a photograph of a sign or a screenshot, further expanding your automation toolkit.