Hello! Welcome back to the course.
In the last lesson, you successfully assembled all the individual components of our chess engine into a complete, playable two-player game in the console. You now have a solid foundation with all the game logic implemented and tested.
Today, we begin an exciting new module: adding graphics to our game. We'll leave the text-based console behind and start the journey of creating a visual, interactive chessboard. Our first step is to learn how to bring in external tools to help us. This lesson focuses on a single, crucial skill: adding an external graphics library to our project using Cargo.
By the end of this lesson, you will understand how Rust's package manager, Cargo, works to include third-party code (called "crates") and will have added macroquad, our chosen graphics library, to your chess project.
1. The Rust Ecosystem: Crates and Cargo
In C or Java, you might be used to manually downloading library files, setting up include paths, or using build tools like Maven or Gradle. Rust simplifies this process immensely with its built-in build tool and package manager, Cargo.
- Crates: In Rust, a package of code (what you might call a library or a module) is called a crate. The community publishes open-source crates to a central repository called crates.io.
- Cargo: This is the tool you've been using to create, build, and run your project (
cargo new,cargo run). A key role of Cargo is to manage your project's dependencies—the external crates your code relies on. Cargo.toml: This file is the "manifest" for your project. It contains metadata like the project's name and version. Crucially, it's also where you list all your dependencies in a section called[dependencies]. When you build your project, Cargo reads this list, automatically downloads the correct versions of the crates, compiles them, and links them to your program.
Today, we'll add the macroquad crate, which provides simple, cross-platform functions for drawing shapes, images, and text, and for handling user input like mouse clicks.
2. Adding macroquad to Your Project
There are two primary ways to add a dependency to your Cargo.toml file: editing the file manually or using a Cargo command. The command is generally easier and less error-prone.
Let's look at a resource that walks through this exact process.
This guide, from the official Macroquad documentation, shows the simplest way to start a new project with the library. We'll focus on the commands for adding the dependency to our existing project.
Read the 'Implementation' section. Pay close attention to the cargo add macroquad@0.4 command and the resulting Cargo.toml file. This is exactly what we're about to do.
As you saw in the guide, the command cargo add <crate_name> is all you need. Cargo finds the latest compatible version of the crate, adds it to Cargo.toml, and you're ready to go. Specifying a version like macroquad@0.4 ensures you get that specific version, which is good practice for tutorials to avoid breaking changes.
3. Hands-On: Modifying Your Chess Project
Now, let's apply this to your chess game.
-
Open your project: Navigate to your chess project's root directory in your terminal. This is the directory that contains your
Cargo.tomlfile. -
Add the dependency: Run the following command:
cargo add macroquad@0.4 -
Verify the change: Open your
Cargo.tomlfile. You should see a new line under the[dependencies]section:[dependencies] macroquad = "0.4"Your file might show a more specific version like
0.4.5, which is perfectly fine. Cargo has resolved the0.4you requested to the latest patch version available. -
Build the project: Now, run
cargo build. You'll see Cargo working hard.Updating crates.io index Downloading crates ... Compiling miniquad v0.4.5 Compiling quad-gl v0.4.5 Compiling macroquad v0.4.5 ... Compiling chess-game v0.1.0 (C:\path\to\your\project) Finished dev [unoptimized + debuginfo] target(s) in Xm YsNotice that Cargo didn't just download
macroquad. It also downloaded and compiled its dependencies, likeminiquad. This is the power of a package manager—it handles the entire dependency tree for you.
You have now successfully added an external library to your project!
4. A Deeper Look: Crate Features
Sometimes, a large crate like a graphics library or a web framework offers a lot of functionality that you might not need. For instance, macroquad includes code for handling audio, but our chess game doesn't have sound.
To keep projects lightweight and compile times fast, many crates use feature flags. These are optional functionalities that you can enable or disable.
Macroquad Rust Guide - Generalist Programmer
This article gives another overview of adding macroquad, but it also includes a section on 'Feature Flags'. Let's see what that looks like.
Read the subsection titled 'Feature Flags' within the 'Installation' section. It shows the syntax for specifying features in your Cargo.toml file.
By default, cargo add includes the crate's default features. If you wanted to customize this, you would modify your Cargo.toml file manually.
Here's a great visual example from a different library (tokio) that illustrates how features work.
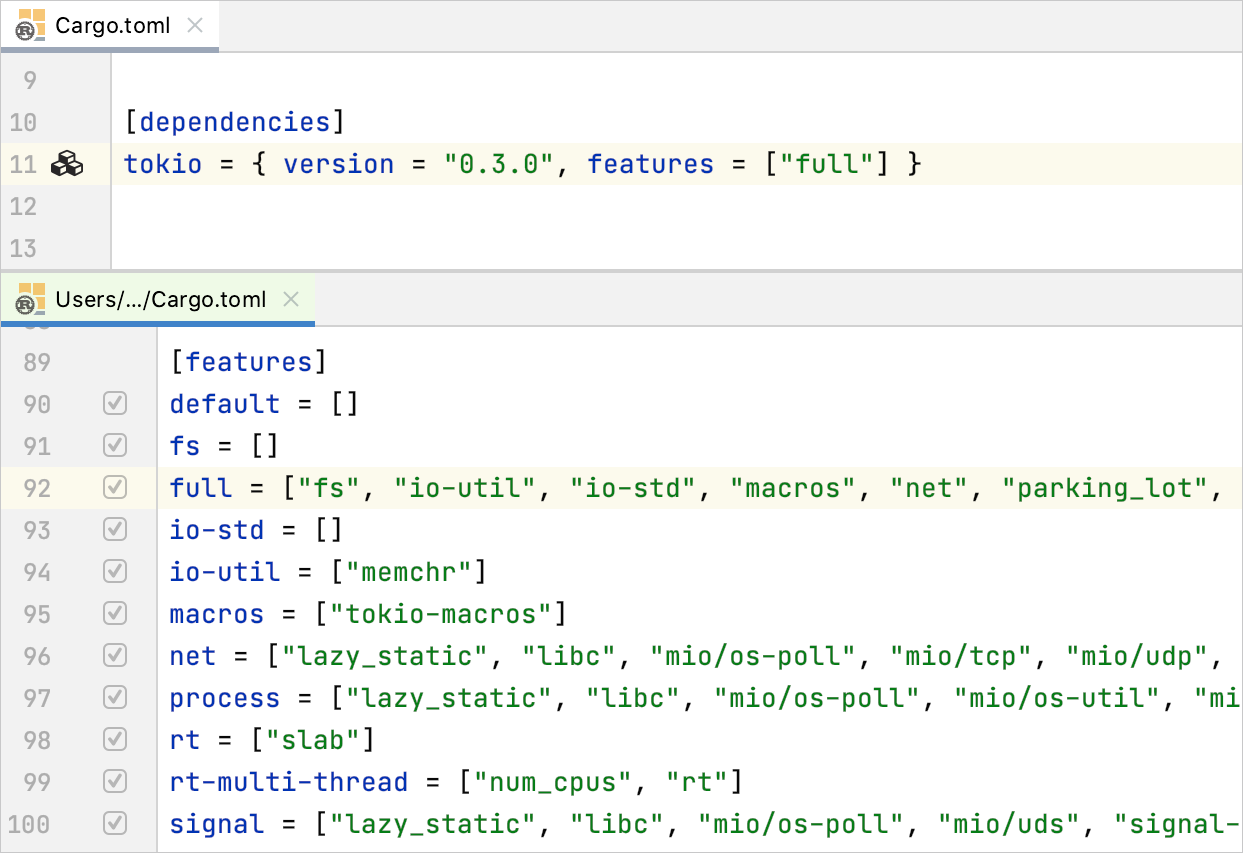
For our chess project, the default features of macroquad are fine. But knowing about features is an important part of managing dependencies in Rust, especially as you build more complex applications.
Conclusion
Great work! This was a short but fundamental lesson that unlocks the vast ecosystem of libraries available to Rust developers. You've taken the first concrete step in transforming your console application into a graphical one.
Key Takeaways:
- Rust libraries are called crates and are managed by Cargo.
- Dependencies are listed in the
[dependencies]section of yourCargo.tomlfile. - The
cargo add <crate_name>command is the simplest way to add a new dependency. - When you build your project, Cargo automatically downloads and compiles all necessary crates.
- Many crates use feature flags to let you include only the functionality you need.
Preview of the Next Lesson
Now that macroquad is part of our project, the next step is to use it. In the next lesson, we will create a game window and set up a main rendering loop. We'll write our first few lines of graphics code to open a window and draw a background color, officially starting the visual front-end for your chess game.