Hello! Welcome to the first lesson in our new module, "Pen-and-Paper Charting Essentials."
In the previous module, we delved deep into the mathematics of creating a perfectly flat circle. You learned the formulas for calculating increases, the importance of stitch height, and how to troubleshoot common problems like ruffling and cupping. Now, we shift from the abstract world of numbers to the tangible process of design. This module is all about translating that mathematical knowledge onto paper, and since you prefer a hands-on, tactile approach, we'll be focusing exclusively on the classic drafting tools.
Today's lesson is the crucial first step. You will learn how to use a compass, protractor, and ruler to draft a precise radial grid. This grid will become the canvas for your retro doily designs, providing the fundamental structure for charting your ideas.
Why a Radial Grid? The Blueprint of a Doily
Think back to our discussions on flat-circle math. We established that to keep a circle flat, you need to add a consistent number of stitches in each round, and these increases are typically grouped into segments or "wedges." For example, a circle made of double crochet often starts with 12 stitches and adds 12 more in each subsequent round, creating 12 distinct points of increase.
A radial grid is simply the geometric blueprint of this structure.
- The concentric circles represent the rounds of your crochet pattern.
- The radial lines (the "spokes" of the wheel) represent the segments or wedges, guiding the placement of your stitches and increases.
The final product is a precise framework, much like the polar coordinate grid shown below. This is what we are aiming to create.
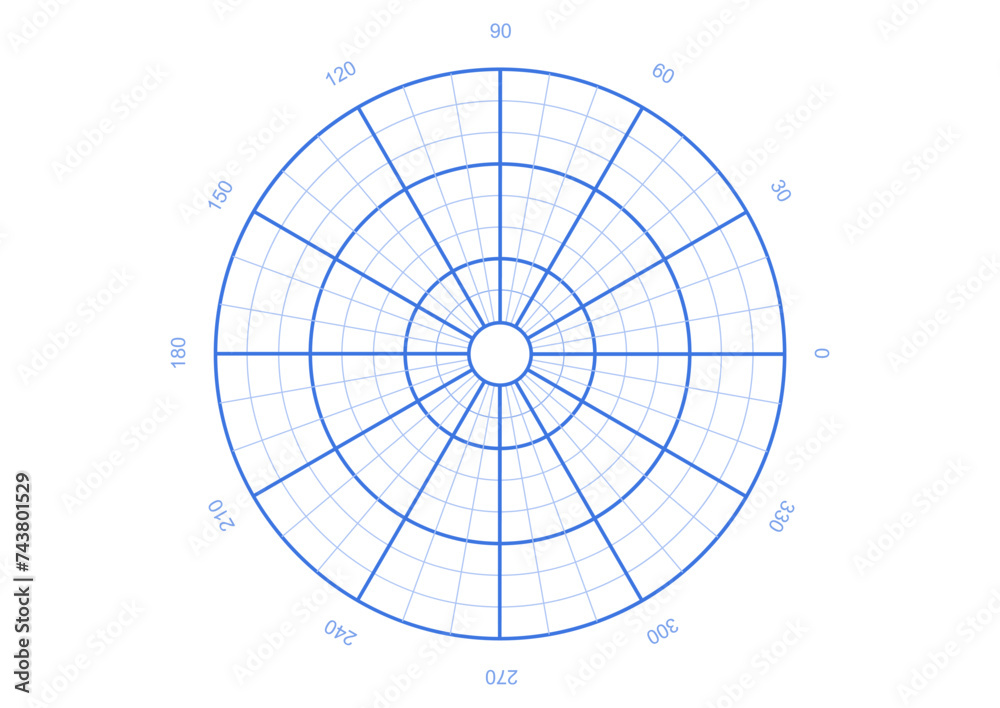
This process is identical to drawing a mandala grid, which, like a doily, is a design that radiates symmetrically from a central point.
Your Tools for Drafting
For this lesson, you will need the tools you prefer for design work. There's a certain satisfaction and precision that comes from using these manual instruments, which digital tools sometimes lack.

Gather the following:
- A sheet of paper (graph paper can be helpful but isn't required)
- A sharp pencil and a good eraser
- A ruler
- A drawing compass
- A protractor
How to Draft Your Grid: A Step-by-Step Guide
The process of creating the grid is methodical and precise. The following guide breaks it down into clear, manageable steps.
How to Draw a Mandala Grid in Few Simple Steps
The article 'How to Draw a Mandala Grid in Few Simple Steps' from mariahajj.com provides an excellent visual and textual guide to the drafting process. We will follow its steps to create our grid.
Please read the section titled 'How to Draw a Mandala Grid?', which covers steps 'a' through 'e'. Focus on understanding the sequence: establishing the center and axes, drawing the circles with a compass, marking angles with a protractor, and finally tracing the grid lines.
Let's break down those steps and apply them specifically to crochet chart design.
1. Establishing the Center and Axes
As the guide explains, the first step is to mark your center and draw your primary horizontal and vertical lines. This immediately divides your circle into four quadrants, giving you a foundational structure to build upon.
2. Drawing Concentric Circles (Rounds)
Using your compass, draw a series of circles from the center point. Each circle represents one round of your doily.
- Spacing: For your first grid, you can use uniform spacing, as suggested in the similar tutorial "How to Draw a Mandala" from Doodle Art Club, which recommends making marks at 1 cm intervals along an axis to guide your compass.
- Advanced Tip: As you become more comfortable, you can vary the spacing of your circles to reflect the height of the stitches in that round. A round of tall double crochet stitches would get a wider space than a round of short single crochet stitches. For now, uniform spacing is perfectly fine.
3. Dividing the Circle (Segments)
This is where the math from our last module comes directly into play. The number of segments in your grid is determined by the number of stitches in your first round.
The angle you need to measure between each radial line is calculated with a simple formula:
Here are the most common configurations for crochet:
- 6 segments (for single crochet):
- 8 segments (for half-double crochet):
- 12 segments (for double crochet):
- 16 segments (for complex centers):
Place your protractor at the center of your paper, aligned with one of the axes. Mark your chosen angle all the way around the circle.
4. Tracing the Grid Lines
Using your ruler, connect the angle marks you just made to the center point. Draw the lines extending all the way to the edge of your largest circle.
You now have a complete radial grid, ready for charting!
Test your understanding!
You are planning to design a doily that starts with a round of 12 double crochet stitches in a magic ring. You need to draw a grid to chart the pattern.
- How many segments (wedges) should your radial grid have?
- Using the formula, what angle should you measure between each radial line with your protractor?
Show answer
- The grid should have 12 segments, corresponding to the 12 double crochet stitches in the first round.
- The angle between each line will be . You will use your protractor to mark points every 30 degrees around your center.
Conclusion
In this lesson, you have successfully bridged the gap between mathematical theory and practical design. You've learned how to take the abstract requirements of a flat circle—its rounds and repeating segments—and represent them physically on paper with a precisely drafted radial grid. This hand-drawn chart is the foundational canvas for your creative work.
Key Takeaways:
- A radial grid for crochet consists of concentric circles (representing rounds) and radial lines (representing pattern segments/repeats).
- The essential tools for this are a compass, protractor, and ruler.
- The number of segments in your grid is determined by the stitch count of your starting round (e.g., 12 stitches = 12 segments).
- The angle between radial lines is calculated by dividing 360° by the number of segments.
Now that you have your "canvas," the next step is to prepare your "paint." In our next lesson, we will focus on developing a personal symbol key for common and complex crochet stitches. This will give you the shorthand you need to quickly and clearly chart your design ideas onto the grid you just learned to create.