Hello! Welcome back to your React course.
In our first lesson, we explored the "what" and "why" of React, focusing on its declarative nature and how the Virtual DOM makes UI updates efficient. We contrasted this with the imperative approach of vanilla JavaScript.
Today, we're moving from theory to practice. This lesson is all about getting your hands on the tools you'll need to start building. Our goal is to set up a modern React development environment using Vite. By the end of this lesson, you'll have a fully functional "hello world" React application running on your local machine, ready for you to start coding.
Why Do We Need a Build Tool? And Why Vite?
As a frontend developer, you know that modern web development involves more than just writing HTML and JavaScript files. We use tools to handle tasks like:
- Compilation: Converting modern syntax (like JSX, which we'll cover next) into JavaScript that browsers can understand.
- Bundling: Combining multiple JavaScript modules into fewer files for better performance.
- Development Server: Running a local server that provides features like live reloading as we make changes to our code.
For a long time, the standard tool for creating React projects was Create React App (CRA), which uses a powerful but complex bundler called Webpack under the hood. While effective, it can become slow as a project grows, because it needs to re-bundle your entire application every time you save a file.
Vite (pronounced "veet", the French word for "fast") is a modern and much faster alternative. Instead of bundling your entire app during development, Vite leverages native ES modules in the browser. It serves files on demand, which results in a nearly instant server start-up and incredibly fast updates when you change your code.
To get a clear picture of why Vite is such a game-changer, let's watch a short explanation.
Vite Crash Course | Faster Alternative To CRA
This video from the Traversy Media channel provides a fantastic explanation of what Vite is and how its development process differs from traditional bundlers like Webpack.
Watch from the beginning to 03:53. Pay close attention to the comparison between the Webpack/CRA workflow and the Vite workflow. This will clarify why we're choosing Vite for our course.
In short, Vite gives you:
- Faster Development Cycles: Near-instant server starts and updates.
- Optimized Builds: It uses a highly optimized bundler called Rollup for production builds.
- A Leaner Setup: It requires far fewer initial dependencies than Create React App.
Now, let's set up our first project.
Setting Up Your First React Project: A Hands-On Guide
This process will be done entirely in your terminal. As an experienced developer, you should be comfortable with this workflow.
Step 1: Prerequisites
The only prerequisite is to have a recent version of Node.js installed (version 18 or later is recommended). Node.js includes npm (Node Package Manager), which we'll use to create the project and manage its dependencies.
You can check your Node.js version by running this command in your terminal:
node -v
If you need to install or update Node.js, you can do so from the official Node.js website.
Step 2: Create the React App
We'll use npm's create command to scaffold a new project using the Vite template.
-
Navigate in your terminal to the directory where you want to store your projects.
-
Run the following command:
npm create vite@latest
You will be prompted with a few questions. The following video demonstrates this interactive process. You can follow along as you answer the prompts.
Vite Crash Course | Faster Alternative To CRA
Watch this clip to see the exact commands and interactive prompts for creating a new React project with Vite.
Watch the segment from 06:38 to 08:02. When prompted in your own terminal, provide a project name (e.g., react-essentials-app), select 'React' as the framework, and 'JavaScript' as the variant.
Step 3: Install Dependencies and Run the Server
Once the project files are created, your terminal will instruct you on the next steps.
- Navigate into your new project directory:
cd your-project-name - Install the necessary dependencies. This will download React, Vite, and other required packages into a
node_modulesfolder.npm install - Start the development server:
npm run dev
Your terminal will now show you a local URL, typically http://localhost:5173/. Open this URL in your browser. You should see the default Vite + React starter page!
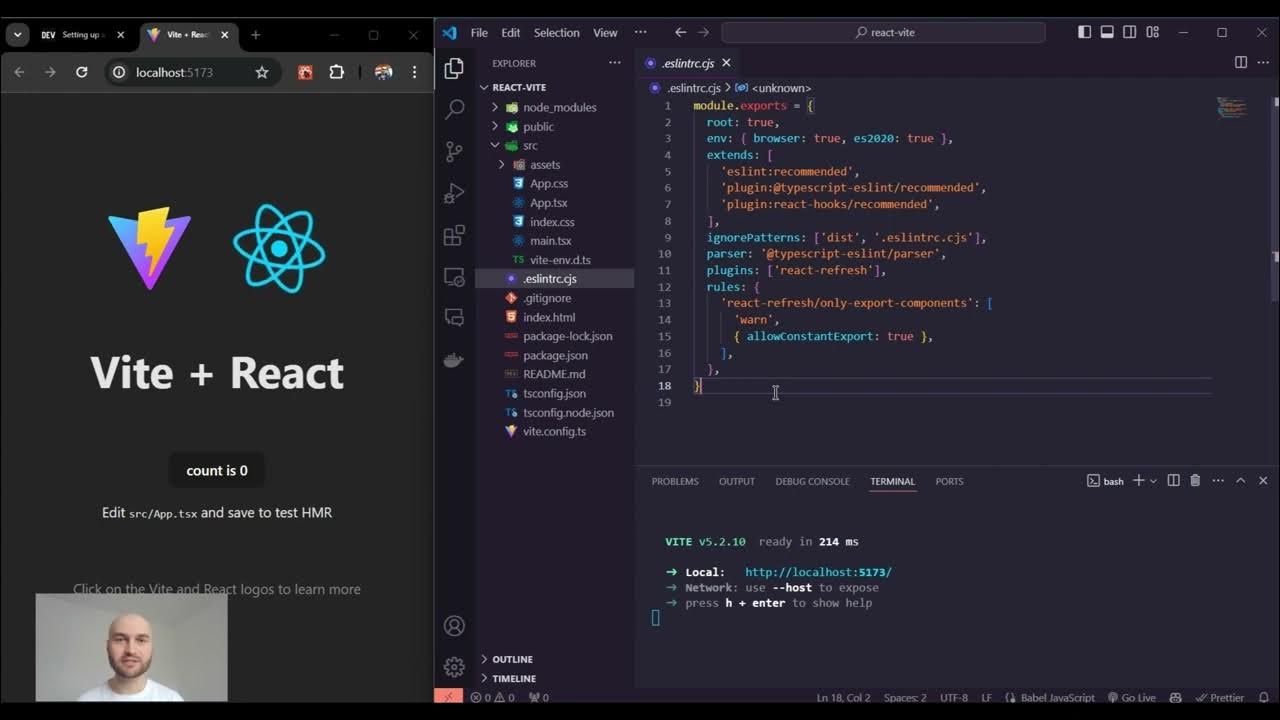
Exploring the Project Structure
Now that we have a running application, let's open the project folder in your code editor (like VS Code) and understand the files Vite has created for us.
For a clear text-based overview of the file structure, please read the "Application structure" section of the following MDN article.
Getting started with React - Application structure
The MDN Web Docs provide an excellent, concise written guide to the files and folders generated by Vite.
Read the section titled 'Application structure'. This will familiarize you with the purpose of key files like index.html, package.json, and the src directory.
To reinforce this, let's watch a visual walkthrough of the same files.
Vite Crash Course | Faster Alternative To CRA
This clip from the Traversy Media course will walk you through the key files in the editor, providing context for each one.
Watch from 08:02 to 09:45. Pay attention to the package.json scripts and the simple vite.config.js file.
Here's a quick summary of the most important files:
package.json: Defines your project's metadata, dependencies, andscriptslikedev,build, andpreview.vite.config.js: The configuration file for Vite. It's very minimal by default but can be extended with plugins and other options.index.html: The main entry point for your application. Unlike older setups, it's in the project root. Your React app will be injected into the<div id="root"></div>element.src/main.jsx: This is the JavaScript entry point. It finds therootdiv inindex.htmland tells React to render our main application component (<App />) inside it.src/App.jsx: This is your root component. All other components you build will eventually be nested inside this one. The.jsxextension signifies that the file contains JSX syntax.
Test your understanding!
What is the role of the src/main.jsx file in a Vite-based React project?
Show answer
The src/main.jsx file acts as the bridge between your React application and the browser's DOM. It imports the main App component and uses ReactDOM.createRoot().render() to mount and render the entire React component tree into the <div id="root"> element found in the index.html file.
The Fast Development Experience with HMR
One of the most significant advantages of using Vite is its support for Hot Module Replacement (HMR). This means that when you edit and save a file, Vite instantly updates the relevant part of your application in the browser without doing a full page refresh. This is extremely powerful because it preserves your application's state (like form inputs or, in our case, the counter value).
Let's see this in action.
Vite Crash Course | Faster Alternative To CRA
This final clip demonstrates HMR. Notice how the counter's state is preserved even after the code is changed and the UI updates.
Watch from 10:45 to 12:12. Try this yourself: click the counter button in your browser a few times, then go into src/App.jsx in your editor, change the <h1>Vite + React</h1> text to something else, and save the file. The text will update in the browser, but your counter value will remain unchanged.
Pro Tip: To make starting your server even easier, you can modify the dev script in your package.json file to automatically open the browser for you.
// In package.json
"scripts": {
  "dev": "vite --open", // Add the --open flag
  "build": "vite build",
  "lint": "eslint . --ext js,jsx --report-unused-disable-directives --max-warnings 0",
  "preview": "vite preview"
},
Now, whenever you run npm run dev, your default browser will automatically open a new tab with your application.
Conclusion
Congratulations! You have successfully set up a complete, modern React development environment. This is a critical first step and the foundation upon which we will build everything else.
Let's recap what we've accomplished:
- We learned why a build tool is necessary for modern React development.
- We understood the advantages of using Vite, primarily its exceptional speed and fast Hot Module Replacement (HMR).
- We walked through the terminal commands (
npm create vite@latest,npm install,npm run dev) to scaffold a new React project. - We explored the generated project structure, identifying the roles of key files like
index.html,main.jsx, andApp.jsx.
You now have a running project, a fast development server, and a solid understanding of your local environment.
In the next lesson, we will finally start writing React code. We'll dive into JSX, the special syntax that allows us to write HTML-like structures directly within our JavaScript files.