Hello! Welcome back.
In our last lesson, we focused on sketching basic 2D shapes and using them to deconstruct and build complex objects. This process, called construction, is the foundation of all drawing.
Today, we'll take that crucial next step. The learning outcome for this lesson is to construct basic 3D forms (spheres, cubes, cylinders, cones) from 2D shapes. We are moving from the flat world of shapes into the three-dimensional world of form. This is how you create the illusion of volume, depth, and weight on a 2D surface.
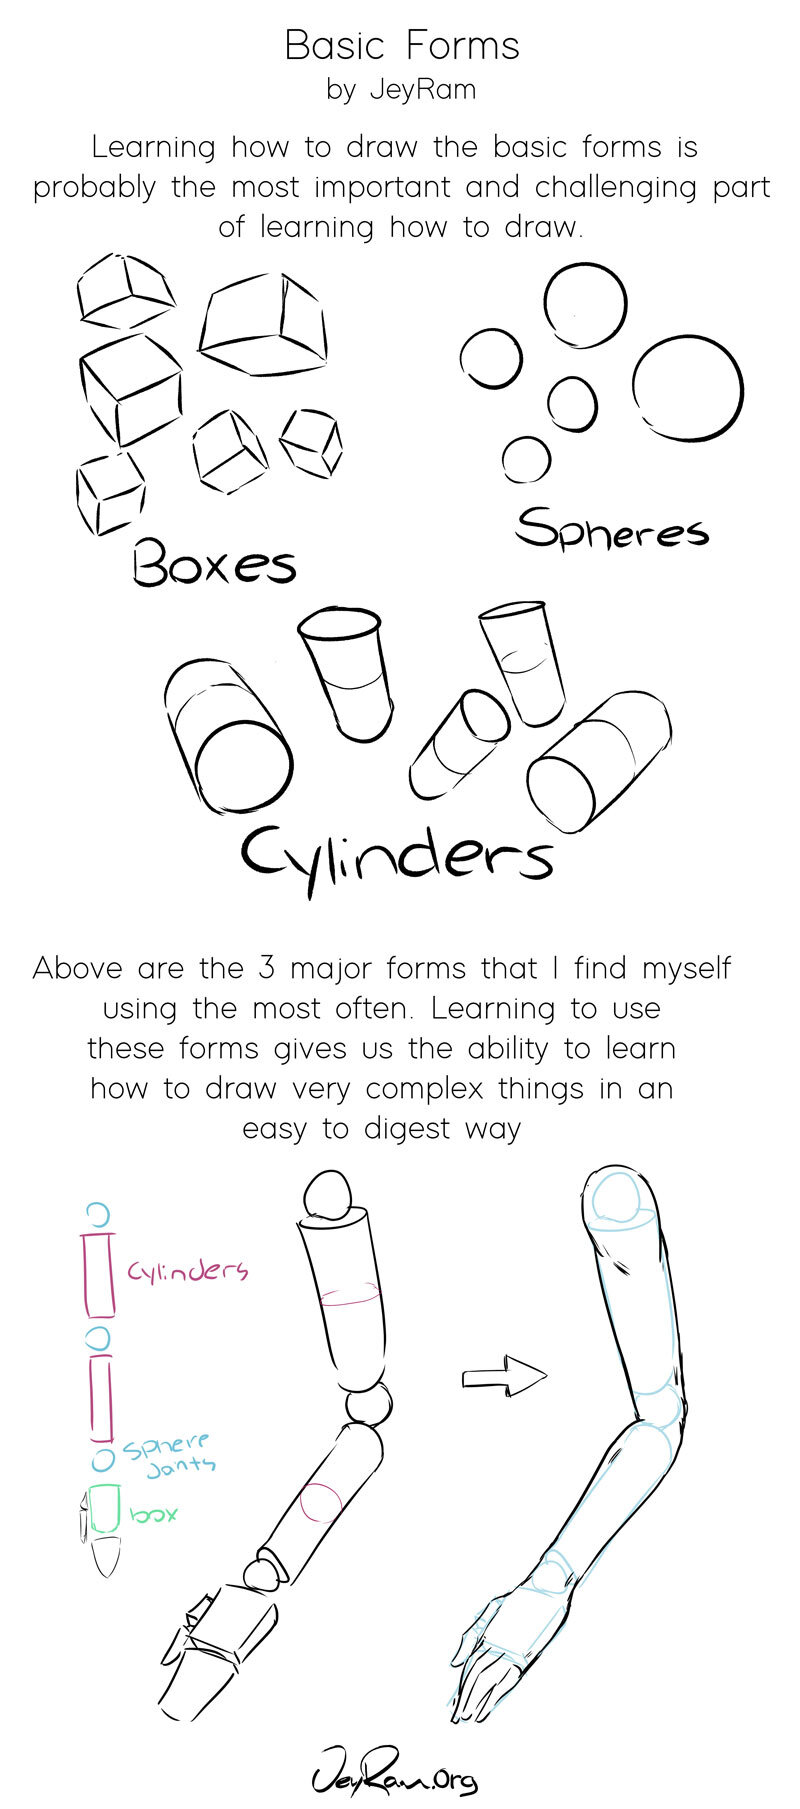
Mastering these simple forms is essential because all complex objects—including the human figure—are combinations of these basic volumes. Your goal of drawing anatomy will rely heavily on your ability to see and draw the underlying cylinders of the limbs, the boxy form of the pelvis, and the spherical shape of the cranium.
1. The Concept: Adding a Third Dimension
How do we transform a flat square into a solid-looking cube? The key is to add more visible sides, or planes. A 2D shape has only one plane facing the viewer. A 3D form shows multiple planes, each facing a slightly different direction. This is what creates the illusion of depth.
The article 'Lesson 3: Going From 2D to 3D' from RapidFireArt provides a clear, concise explanation of how planes create the illusion of 3D form.
Please read the section titled 'What Makes Drawings Look 3D?' up to (but not including) 'Contour Lines'. Focus on the simple idea that adding faces (planes) is what turns a 2D shape into a 3D form.
The fundamental transformations we will be learning are:
- A circle becomes a sphere.
- A square becomes a cube.
- A rectangle and two ellipses become a cylinder.
- A triangle and one ellipse become a cone.

2. How to Construct Basic Forms
Let's look at the general methods for drawing each form. We'll start with the pure geometry before moving to Procreate-specific techniques.
How to Draw Basic 3D Shapes for Beginners: Narrated Step-by-Step
The video 'How to Draw Basic 3D Shapes for Beginners' by Circle Line Art School gives a clear, narrated walkthrough for constructing a cylinder, cube, sphere, and cone.
Watch the video from the beginning up to 05:05 to see how each of the four basic forms is constructed from simpler lines and shapes. Pay attention to how the artist builds the 'wireframe' of each object.
Based on the video and our core concepts, here are the key takeaways for each form:
-
Sphere: In line art, a sphere is indistinguishable from a circle. Its 3D nature is revealed through shading and contour lines, which we will cover in future lessons. For now, drawing a good circle is drawing a good sphere.
-
Cube: The simplest way to think about constructing a cube is to draw one square, then draw an identical, offset square behind it, and finally connect the corresponding corners (vertices). The lines that go "back" in space are parallel to each other.
-
Cylinder: This is essentially two ellipses (circles viewed in perspective) connected by two straight, parallel lines. The "fatter" or "thinner" the ellipses are, the more we feel like we are looking at the cylinder from above or from the side.
-
Cone: A cone is made from one ellipse for the circular base and two straight lines that converge at a single point (the apex).
3. Practice: Building Forms in Procreate
Now it's time to apply these ideas in Procreate. The app has powerful tools that can help you construct these forms with precision.
Drawing for Beginners in Procreate
This video, 'Drawing for Beginners in Procreate,' demonstrates a very practical, tool-assisted workflow for creating these exact shapes. We'll use it as a guide for our practice.
Have Procreate open and be ready to follow along. You will draw each shape immediately after watching the relevant segment. Don't worry about the shading parts for now; just focus on constructing the line art for each form.
Exercise 1: Guided Construction (15 minutes)
Follow these steps, using the video as your guide.
-
Sphere (from a Circle):
- Watch the video segment from 00:20 to 00:50.
- Your Turn: In Procreate, use the technique shown to draw a perfect circle. Draw a rough circle and hold your pen down to activate QuickShape, then tap with one finger on the screen to snap it to a perfect circle. Congratulations, you've drawn a sphere in line art.
-
Cylinder:
- Watch the video segment from 05:15 to 07:15. The artist uses a brilliant method: draw one ellipse, duplicate the layer, move it down, and then draw connecting lines on a new layer.
- Your Turn: Follow this process to construct a cylinder. Pay close attention to how the artist uses the Transform tool with Snapping enabled to keep everything aligned. This is a great example of leveraging digital tools, much like you'd use a library or framework in coding to handle repetitive tasks.
-
Cube:
- Watch the video segment from 14:55 to 18:30. This demonstrates how to build a cube from a front-facing square and two angled parallelograms for the top and side planes.
- Your Turn: Replicate this process. Use QuickShape to get your initial square and the subsequent quadrilaterals for the side and top planes. Notice how each plane is on a separate layer initially, allowing for easy adjustment.
-
Cone:
- Watch the video segment from 22:26 to 24:00.
- Your Turn: Construct a cone using the demonstrated method: draw a triangle, and then draw an ellipse on a separate layer for the base. Adjust the ellipse with the Transform tool to fit perfectly. Merge the layers once you are satisfied.
Exercise 2: Independent Practice (15 minutes)
Now, put the training into practice. Your task is to fill a canvas with these 3D forms.
- On a new canvas in Procreate, start drawing cubes, cylinders, and cones.
- Challenge yourself:
- Draw the forms from different viewpoints. For cubes, this means changing the angles of the side and top planes. For cylinders and cones, this means making the ellipses wider or narrower to change the viewing angle.
- Try combining them. Can you stack a sphere on top of a cube? Or place a cone next to a cylinder?
- Focus on the construction process. Use layers, QuickShape, and the Transform tool to help you. The goal is not a single perfect drawing, but the repetition of the construction process to build muscle memory.
Conclusion
Excellent work. You have now made the leap from 2D shapes to 3D forms. This is arguably one of the most important skills in an artist's toolkit, as it's the foundation for creating anything that feels tangible and real.
Key Takeaways:
- 3D form is created by showing multiple planes or faces of an object.
- The basic forms—sphere, cube, cylinder, cone—are constructed from 2D shapes you already know.
- Sphere: A perfect circle.
- Cube: Built from squares and parallelograms.
- Cylinder: Built from two ellipses and two parallel lines.
- Cone: Built from one ellipse and a triangle.
- Procreate tools like QuickShape, Layers, and Transform are powerful aids for precise construction.
In our next lesson, we will learn how to apply cross-contour lines to describe the surface and volume of a 3D form. Now that you can build the basic wireframe structure, we'll learn how to draw lines across its surface to better define its volume and make it look even more convincingly three-dimensional.