Hello! Let's get started.
In our last lesson, we put a guard in place for our checkout page, ensuring only logged-in users can access it. This was a crucial step in setting up the user flow for your e-commerce application.
Today, we'll build what's behind that guard: the checkout form itself. Our goal is to build a multi-step checkout form for shipping and payment information. Complex forms like this are often broken down into smaller, logical steps to improve the user experience and reduce the chances of a user abandoning the process. This is a core pattern in e-commerce.
We'll use two powerful libraries to make this process clean and efficient:
- Material-UI (MUI): For a pre-built, visually appealing
Steppercomponent to guide the user. - React Hook Form: To manage the form's state and validation without the boilerplate of numerous
useStatehooks.
1. The Architecture of a Multi-Step Form
Before writing code, let's understand the core pattern. A multi-step form in React is typically managed by a single parent component.
This parent component is responsible for:
- Keeping track of the current step (e.g.,
step 1: Shipping,step 2: Payment). - Holding the entire form's data in one unified state object.
- Conditionally rendering the child component for the active step.
This structure should feel familiar. It's conceptually similar to how a controller in a backend framework like Laravel might manage a multi-step "wizard," orchestrating different views while maintaining state across requests.
The diagram below illustrates this "Master Form" (or parent component) pattern.

2. Setting Up the Checkout Page
Let's start by setting up the main component and installing the necessary libraries. We'll be working in your Checkout.jsx page component.
First, open your terminal in the project directory and install MUI and React Hook Form:
npm install @mui/material @emotion/react @emotion/styled react-hook-form
Next, we'll lay out the basic structure of our Checkout component. The following article provides a fantastic guide. We will use it as our primary reference for building the form.
Building a Multi-Step Checkout Form with React MUI Stepper and React Hook Form
The article 'Building a Multi-Step Checkout Form with React MUI Stepper and React Hook Form' by Kombai covers the exact stack we're using. First, let's get familiar with the two main tools.
Please read the sections 'Understanding MUI Stepper Component' and 'Understanding React Hook Form'. This will give you the necessary background on the key props of the Stepper and the core features of React Hook Form that we'll be using.
Now, let's implement the base structure in your src/pages/Checkout.jsx file. We will define the steps, initialize the form state with useForm, and set up the MUI Stepper.
// src/pages/Checkout.jsx
import React, { useState } from 'react';
import { useForm, FormProvider } from 'react-hook-form';
import { Container, Paper, Stepper, Step, StepLabel, Button, Typography, Box } from '@mui/material';

// We'll create these components in the next step
// import ShippingForm from './ShippingForm';
// import PaymentForm from './PaymentForm';

// Define the steps for the checkout process
const steps = ['Shipping address', 'Payment details', 'Review your order'];

// A function to get the content for each step
function getStepContent(step) {
  switch (step) {
    case 0:
      return <p>Shipping Form Component will go here</p>; // Placeholder
    case 1:
      return <p>Payment Form Component will go here</p>; // Placeholder
    case 2:
      return <p>Review Component will go here</p>; // Placeholder
    default:
      throw new Error('Unknown step');
  }
}

export default function Checkout() {
  const [activeStep, setActiveStep] = useState(0);
  const methods = useForm(); // Initialize React Hook Form

  const handleNext = () => {
    setActiveStep(activeStep + 1);
  };

  const handleBack = () => {
    setActiveStep(activeStep - 1);
  };

  return (
    <Container component="main" maxWidth="sm" sx={{ mb: 4 }}>
      <Paper variant="outlined" sx={{ my: { xs: 3, md: 6 }, p: { xs: 2, md: 3 } }}>
        <Typography component="h1" variant="h4" align="center">
          Checkout
        </Typography>
        <Stepper activeStep={activeStep} sx={{ pt: 3, pb: 5 }}>
          {steps.map((label) => (
            <Step key={label}>
              <StepLabel>{label}</StepLabel>
            </Step>
          ))}
        </Stepper>

        {activeStep === steps.length ? (
          // This displays when all steps are complete
          <>
            <Typography variant="h5" gutterBottom>
              Thank you for your order.
            </Typography>
            <Typography variant="subtitle1">
              Your order number is #2001539. We have emailed your order
              confirmation, and will send you an update when your order has
              shipped.
            </Typography>
          </>
        ) : (
          // This renders the form for the current step
          <FormProvider {...methods}>
            <form onSubmit={methods.handleSubmit(handleNext)}>
              {getStepContent(activeStep)}
              <Box sx={{ display: 'flex', justifyContent: 'flex-end' }}>
                {activeStep !== 0 && (
                  <Button onClick={handleBack} sx={{ mt: 3, ml: 1 }}>
                    Back
                  </Button>
                )}
                <Button
                  variant="contained"
                  type="submit"
                  sx={{ mt: 3, ml: 1 }}
                >
                  {activeStep === steps.length - 1 ? 'Place order' : 'Next'}
                </Button>
              </Box>
            </form>
          </FormProvider>
        )}
      </Paper>
    </Container>
  );
}
3. Creating the Step Components
Our Checkout component is now the "Master Form". It holds the activeStep state and the React Hook Form methods. Notice the <FormProvider> component—it allows any nested component to access the form methods (like register, control, formState) using a hook called useFormContext.
Now, let's create the actual form components for each step. We'll start with the shipping address.
Create a new file: src/components/ShippingForm.jsx
// src/components/ShippingForm.jsx
import React from 'react';
import { useFormContext } from 'react-hook-form';
import { TextField, Grid, Typography } from '@mui/material';

export default function ShippingForm() {
  const { register } = useFormContext(); // Access the form context

  return (
    <>
      <Typography variant="h6" gutterBottom>
        Shipping address
      </Typography>
      <Grid container spacing={3}>
        <Grid item xs={12} sm={6}>
          <TextField
            required
            id="firstName"
            name="firstName"
            label="First name"
            fullWidth
            autoComplete="given-name"
            variant="standard"
            {...register('firstName')} // Register the field with React Hook Form
          />
        </Grid>
        <Grid item xs={12} sm={6}>
          <TextField
            required
            id="lastName"
            name="lastName"
            label="Last name"
            fullWidth
            autoComplete="family-name"
            variant="standard"
            {...register('lastName')}
          />
        </Grid>
        <Grid item xs={12}>
          <TextField
            required
            id="address1"
            name="address1"
            label="Address line 1"
            fullWidth
            autoComplete="shipping address-line1"
            variant="standard"
            {...register('address1')}
          />
        </Grid>
        {/* Add other fields like city, state, zip, country as needed */}
      </Grid>
    </>
  );
}
Now, update Checkout.jsx to use this new component.
// In src/pages/Checkout.jsx
import ShippingForm from '../components/ShippingForm'; // 1. Import the component

// ...

function getStepContent(step) {
  switch (step) {
    case 0:
      return <ShippingForm />; // 2. Use the component
    // ... rest of the function
  }
}
//...
The article we're following provides the full code for all the step components. Your task now is to build out the PaymentForm and Review components following this same pattern.
Building a Multi-Step Checkout Form with React MUI Stepper and React Hook Form
Let's return to the Kombai article to see the full implementation of all three steps.
Focus on the 'Creating Step Components' subsection. Study the code for CustomerInformationForm (our ShippingForm), ShippingAddressForm (you can merge this into one), PaymentForm, and Confirmation (our Review step). Use this as a guide to create your PaymentForm.jsx and Review.jsx components. Don't worry about the Yup validation part for now; we are focusing on the structure.
4. Handling Navigation and Submission
Currently, our handleNext function only increments the step. React Hook Form's handleSubmit function is more powerful: it first runs validation on the form fields and only calls your function if validation passes.
Let's refine the logic. When the user clicks "Next", we want to:
- Validate the current step's fields.
- If valid, proceed to the next step.
- On the final step, the button should say "Place Order" and trigger the final submission logic.
Our current code already handles the button text and the final submission placeholder. The key is how handleSubmit works.
methods.handleSubmit(handleNext) means: "When this form is submitted, first validate the fields. If they are valid, call handleNext with the form data."
For step-by-step validation, the most robust approach is to provide a validation schema (like with yup, as shown in the article) that changes based on the active step. For simplicity in this lesson, react-hook-form will validate any field that has a required attribute or other standard HTML5 validation rules.
Here are some best practices to keep in mind, which are also highlighted in the resources.
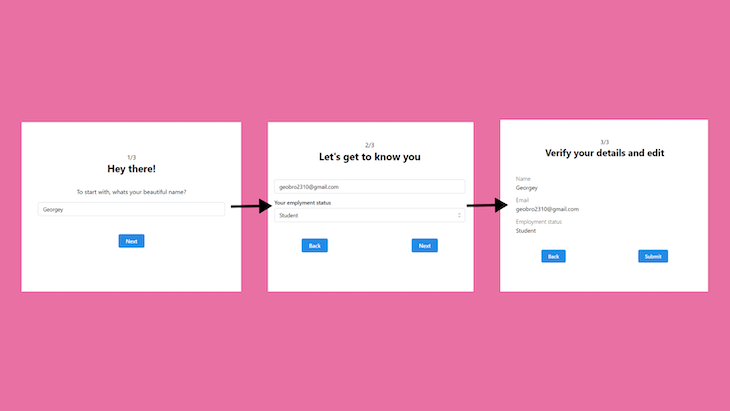
Building a Multi-Step Checkout Form with React MUI Stepper and React Hook Form
The Kombai article concludes with a great list of best practices for multi-step forms.
Quickly review the 'Best Practices for Multi-Step Forms' section. Pay attention to points like 'Validate Each Step Individually', 'Show Progress Clearly', and 'Allow Back Navigation Without Data Loss'. Our current implementation already follows many of these principles.
Conclusion
Excellent work today! You've built the foundation of a robust, user-friendly, multi-step checkout form. This is a significant piece of any e-commerce project and a great exercise in managing more complex state in React.
Key Takeaways:
- Parent Component Control: Multi-step forms are best managed by a parent component that holds the
activeStepand overall form data. - Component-Based Steps: Breaking each step into its own component (
ShippingForm,PaymentForm) keeps your code clean and organized. - React Hook Form: This library dramatically simplifies form state management. Using
FormProvideranduseFormContextis a clean pattern for giving child components access to the form's state. - MUI Stepper: Provides a great out-of-the-box UI for showing users their progress, improving the overall experience.
Preview of the Next Lesson:
Our form looks great, but clicking "Place Order" doesn't do anything yet. In the next lesson, we will submit the final order data from React to a new order-creation endpoint in your Laravel API. This will be the moment we tie your frontend masterpiece to your backend logic.