Hello! Let's get started on the next part of our e-commerce project.
In our last lesson, we set up the basic navigation for our application using React Router. We created a persistent Navbar that appears on every page by placing it outside the <Routes> container. While this works, a more structured and scalable approach is to use a dedicated Layout component.
Today, we will create a reusable Layout component that includes a shared header and footer. This will involve refactoring our routing setup to use one of React Router's most powerful features for clean architecture: nested routes and the <Outlet> component.
Why Use a Layout Component?
In any web application, certain elements like the header, footer, or a sidebar are present on most, if not all, pages. A Layout component acts as a template or "shell" for our pages, defining this shared structure in one place. The page-specific content is then rendered inside this shell.
This approach keeps our code DRY (Don't Repeat Yourself) and makes it much easier to manage the overall structure of the app.
Think of it like a component tree. A main page is composed of smaller, reusable blocks.
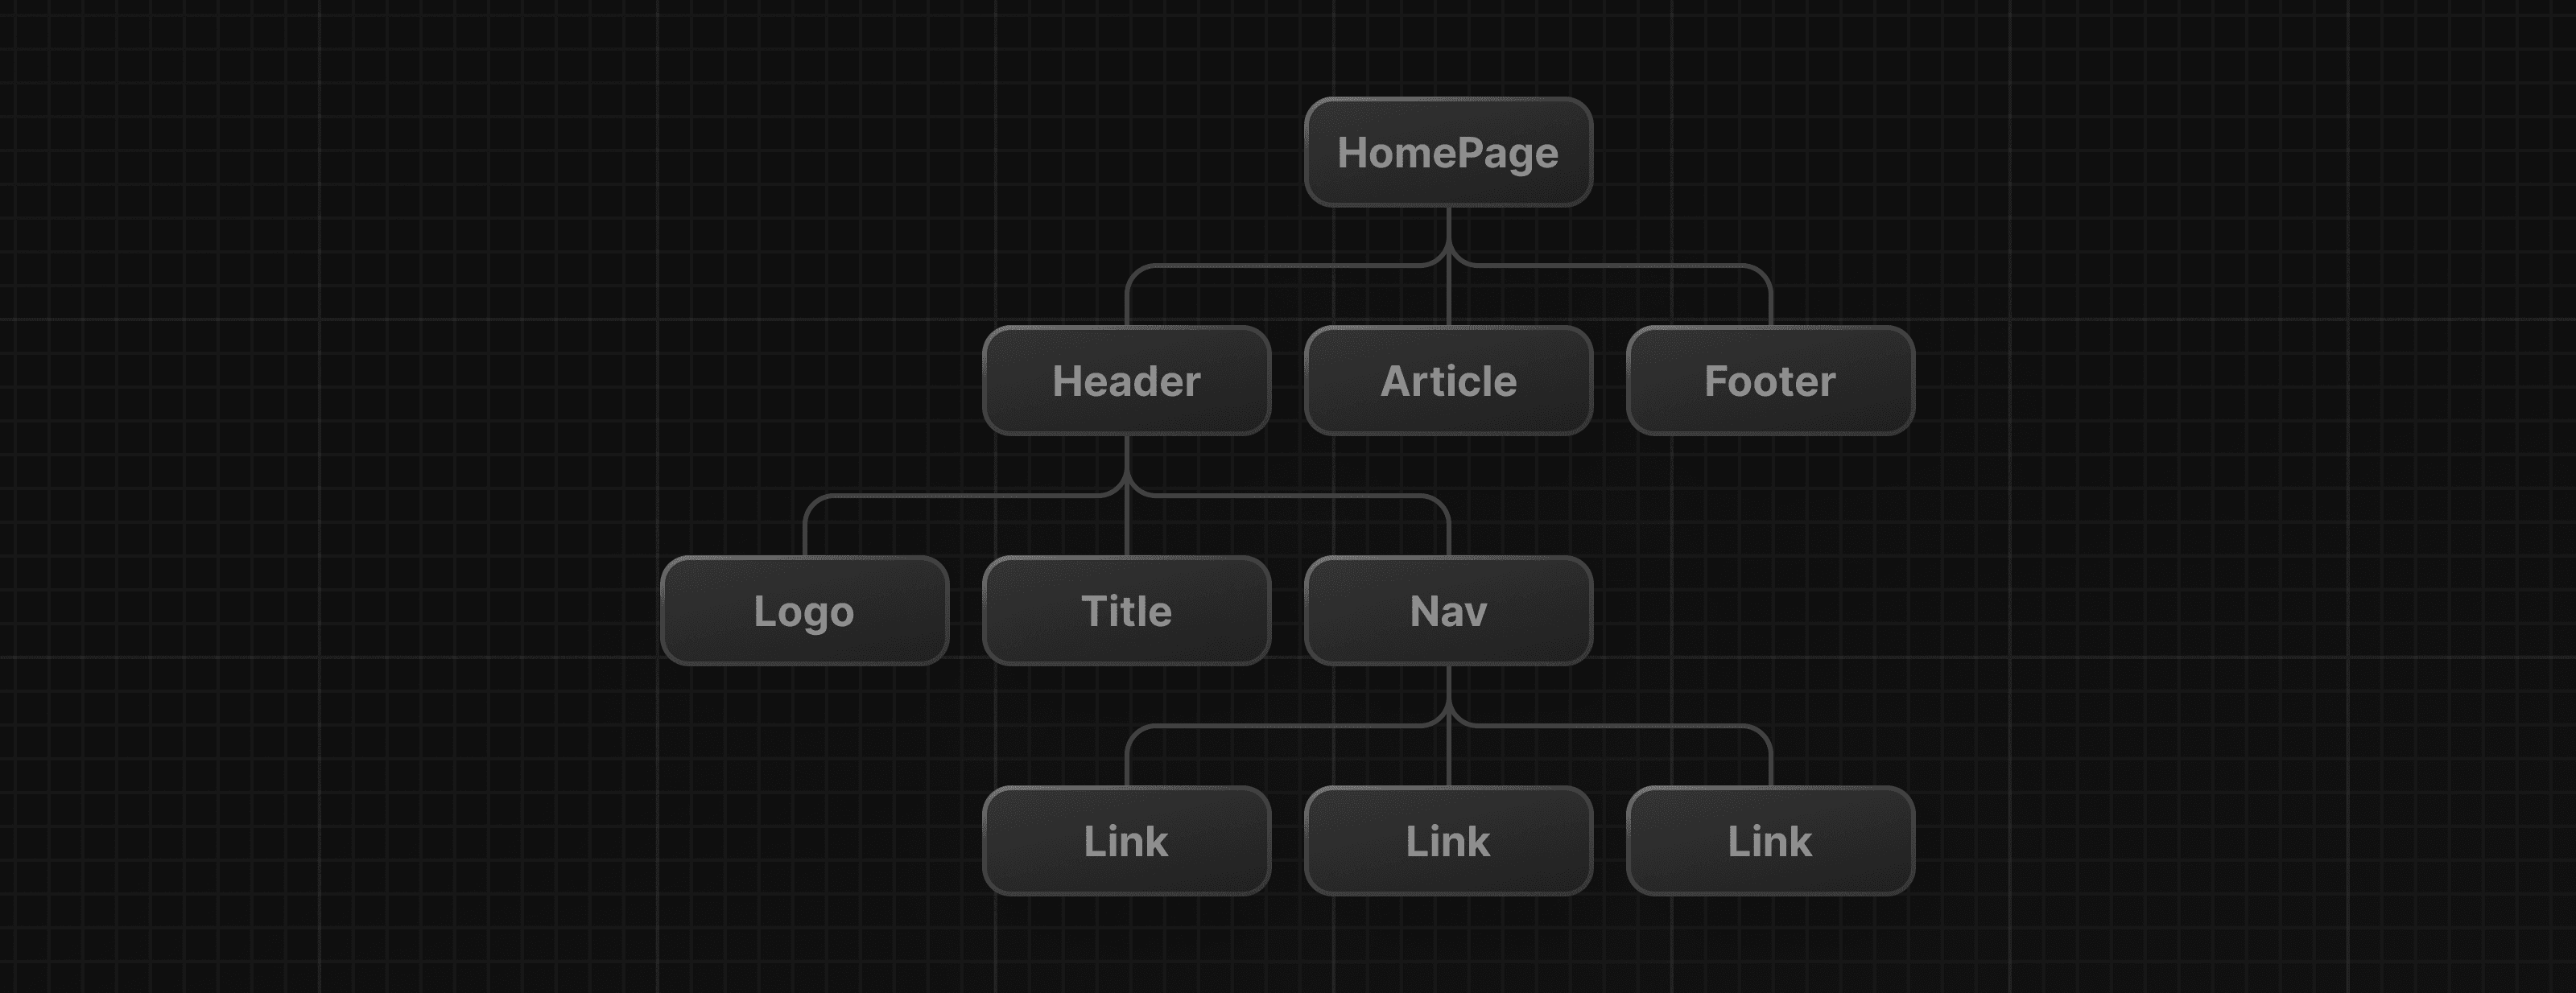
Step 1: Creating the Header and Footer Components
First, let's create the two main pieces of our layout. In the previous lesson, we made a Navbar. We can rename this to Header and also create a brand new Footer component.
For inspiration, you can look at a real-world e-commerce project. The following article provides code for Header and Footer components. Don't worry about the complex state management (useCartContext, token, etc.) in the examples for now; we'll add that functionality later. Focus on the JSX structure and styling.
Build a Full-Stack E-Commerce React App from Scratch
Take a look at the 'Build a Full-Stack E-Commerce React App from Scratch' article on Dev.to. It provides excellent examples of common e-commerce components.
Scan through the sections '1. Header across the app' and '2. Footer across the app'. Pay attention to the JSX structure and how Link is used for navigation in the header. We will create simplified versions of these.
Now, let's create our own versions.
-
Create the Header:
If you have asrc/components/Navbar.jsx, rename it toHeader.jsx. Replace its content with the following, which is a simplified version of the navigation we built last time.// src/components/Header.jsx import { Link } from 'react-router-dom'; export default function Header() { // Basic inline styles for clarity const headerStyle = { background: '#2d3748', // A dark gray padding: '1rem', display: 'flex', justifyContent: 'space-between', alignItems: 'center', }; const linkStyle = { color: 'white', margin: '0 1rem', textDecoration: 'none', }; return ( <header style={headerStyle}> <Link to="/" style={{...linkStyle, fontSize: '1.5rem'}}> MyShop </Link> <nav> <Link to="/" style={linkStyle}>Home</Link> <Link to="/products" style={linkStyle}>Products</Link> <Link to="/cart" style={linkStyle}>Cart</Link> <Link to="/login" style={linkStyle}>Login</Link> </nav> </header> ); } -
Create the Footer:
Create a new filesrc/components/Footer.jsx.// src/components/Footer.jsx export default function Footer() { const footerStyle = { background: '#1a202c', // A very dark gray color: '#a0aec0', // A light gray text padding: '1.5rem', textAlign: 'center', marginTop: 'auto', // Pushes footer to the bottom in a flex container }; return ( <footer style={footerStyle}> <p>© {new Date().getFullYear()} MyShop. All rights reserved.</p> </footer> ); }
Step 2: The <Outlet> for Shared Layouts
Now that we have the pieces, how do we tell React Router to render our page content between the header and footer? The answer is nested routes and the <Outlet> component.
When you nest <Route> components, the parent Route can define a layout element. This layout component then uses <Outlet> as a placeholder to render the matched child route's element.
Let's see how this works.
Ultimate React Router v6 Guide
This article, 'Ultimate React Router v6 Guide', explains the shared layout pattern very clearly.
Read the subsection titled 'Shared Layouts'. It shows exactly how to pass an element prop to a parent route and how the Outlet component works as a placeholder. This is the core concept for this lesson.
Step 3: Creating the Layout Component
Based on what you just read, let's create our Layout.jsx file. This component will import our Header, Footer, and the Outlet from react-router-dom.
Create a new file src/components/Layout.jsx.
// src/components/Layout.jsx
import { Outlet } from 'react-router-dom';
import Header from './Header';
import Footer from './Footer';

export default function Layout() {
  const layoutStyle = {
    display: 'flex',
    flexDirection: 'column',
    minHeight: '100vh', // Ensures the layout takes at least the full viewport height
  };

  const mainStyle = {
    flex: 1, // Allows the main content area to grow and fill available space
    padding: '1rem',
  };

  return (
    <div style={layoutStyle}>
      <Header />
      <main style={mainStyle}>
        <Outlet /> {/* Child routes will be rendered here */}
      </main>
      <Footer />
    </div>
  );
}
Notice the use of <Outlet />. This is where React Router will swap in HomePage, ProductsPage, etc., depending on the URL.
Step 4: Refactoring Your Routes in App.jsx
The final step is to update App.jsx to use our new Layout component and nested route structure. We will no longer render the Header (previously Navbar) directly in App.jsx.
Replace the content of your App.jsx with the following:
// src/App.jsx
import { Routes, Route } from 'react-router-dom';
import Layout from './components/Layout'; // Import the Layout component
import HomePage from './pages/HomePage';
import ProductsPage from './pages/ProductsPage';
import CartPage from './pages/CartPage';
import LoginPage from './pages/LoginPage';

function App() {
  return (
    <Routes>
      {/* Parent Route with the Layout component */}
      <Route path="/" element={<Layout />}>
        {/* Child Routes that will be rendered inside the Outlet */}
        <Route index element={<HomePage />} />
        <Route path="products" element={<ProductsPage />} />
        <Route path="cart" element={<CartPage />} />
        <Route path="login" element={<LoginPage />} />
        {/* We can add a "Not Found" page here later */}
      </Route>
    </Routes>
  );
}

export default App;
Key Changes:
- We have a single parent
<Route>that uses/as its path and renders ourLayoutcomponent. - The page routes are now nested inside this parent
Route. Their paths are now relative to the parent (e.g.,path="products"instead ofpath="/products"). - The route for the homepage uses the
indexprop, which tells the router to render this component when the URL matches the parent's path exactly (/).
Run your application now. The structure should look the same, but your code is much cleaner and more maintainable. The header and footer are now part of a single, reusable Layout component.
Conclusion
Excellent work! You have successfully refactored the application to use a professional layout pattern. This structure is highly scalable and will serve as a solid foundation for the rest of our e-commerce app.
Key Takeaways:
- A
Layoutcomponent is a reusable shell for pages, containing shared UI elements like a header and footer. - React Router's nested routes allow you to apply a layout to a group of pages.
- The
<Outlet>component acts as a placeholder within a layout, rendering the content of the matched child route. - This pattern keeps your
App.jsxclean and centralizes your app's structural logic in theLayoutcomponent.
Preview of the Next Lesson:
Now that our application's skeleton is robust, it's time to bring it to life with data. In the next lesson, we will build a product listing page that fetches product data from an API and handles loading and error states. This will be our first step in creating a dynamic, data-driven catalog.