Welcome to the first lesson of your course on drafting a sewing pattern from scratch. We are starting a focused project to draft the front panel of a woven bralette top, and this lesson lays the essential groundwork. Just as in product design where accurate data and user insights are the foundation for a successful product, precise body measurements and a clear understanding of 'ease' are the non-negotiable starting points for a pattern that fits perfectly.
Today, we will focus entirely on gathering this initial data. By the end of this lesson, you will have identified and taken all the key body measurements required for your bralette and translated them into a set of 'working measurements' by calculating and adding the appropriate amount of ease for your chosen fabric. This will equip you with the exact numbers you'll need to begin drafting in our next session.
Identifying and Taking Key Body Measurements
Before you can translate a three-dimensional form onto a two-dimensional plane, you need to understand its specific topography. For a bodice or bralette, this means capturing not just circumferences, but also the precise location of key landmarks, most importantly the bust apex. This point dictates the placement of darts, which are the primary tool for creating shape.
The essential measurements for your bralette front are:
- Full Bust Circumference: The measurement around the fullest part of your bust.
- Underbust Circumference: The measurement around your ribcage, directly under your bust. This will define the bottom edge of your bralette.
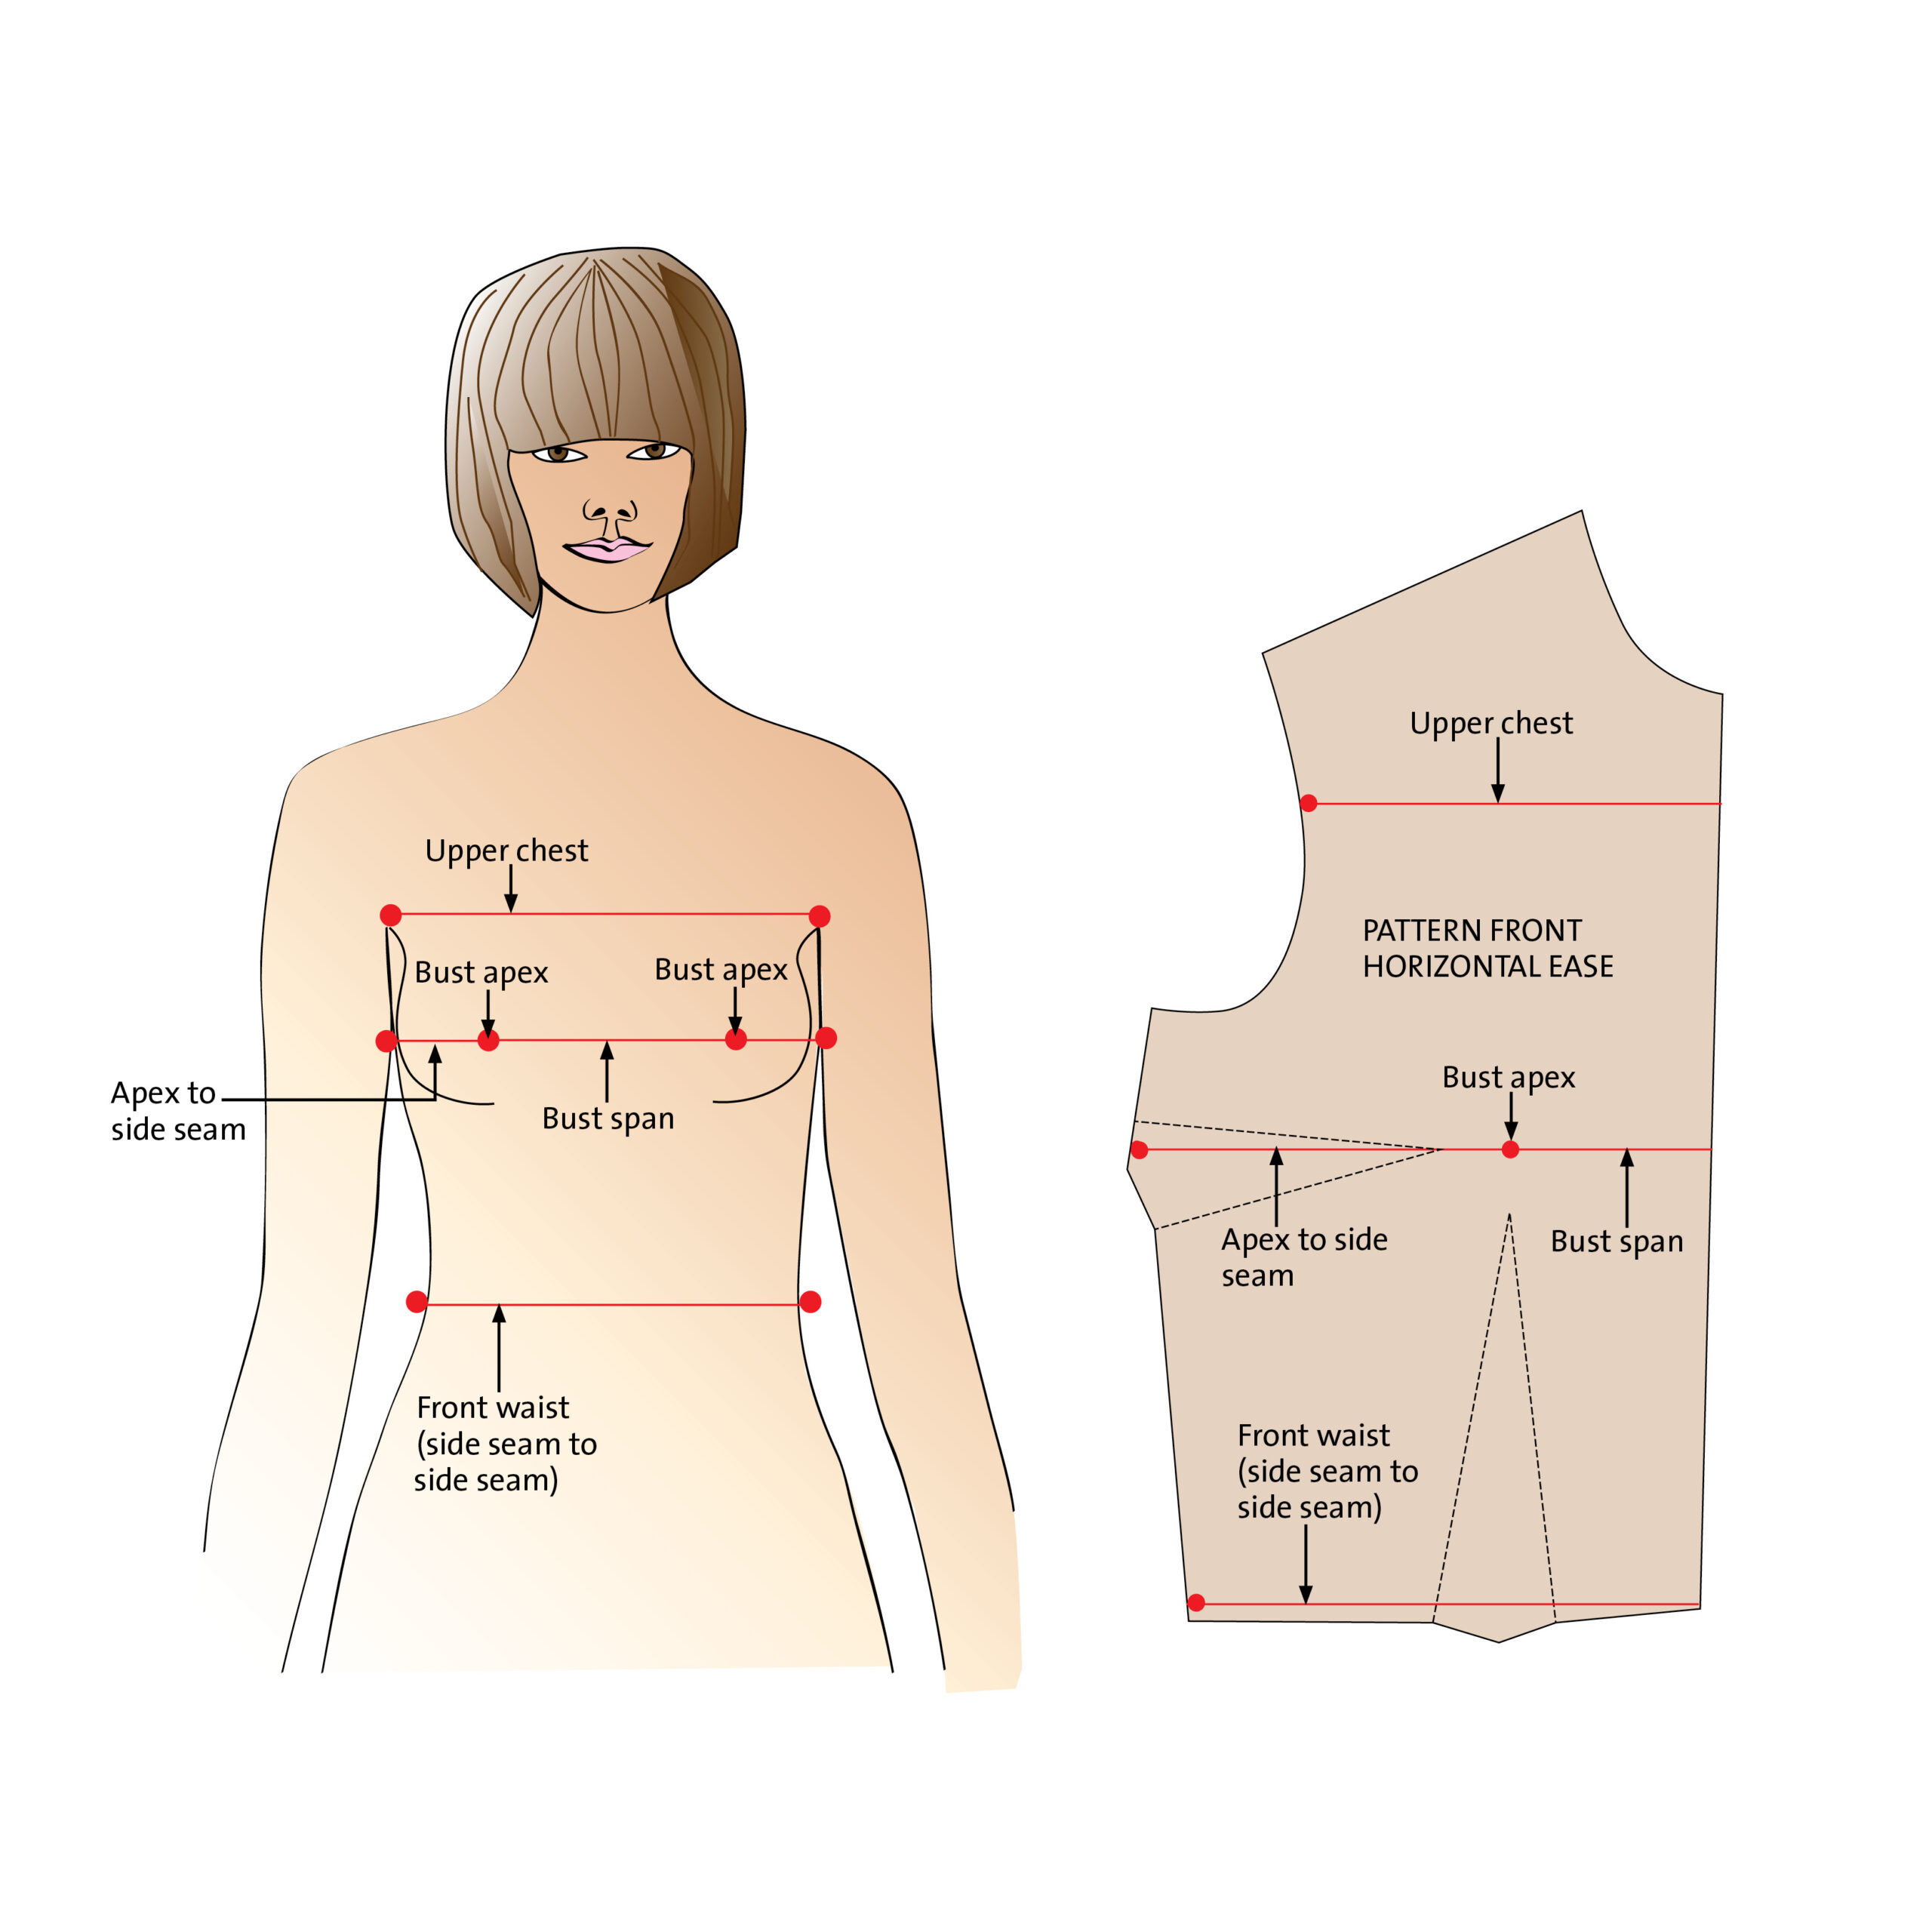
- Apex to Apex (Bust Span): The horizontal distance between the fullest points of each breast.
- Vertical Apex Position: A measurement from a stable point (like your shoulder or underbust) down to your bust apex.
This last point is crucial for positioning the bust dart correctly in the vertical dimension. Let's get these measurements taken accurately.

To guide you through taking these measurements on your own body, the following video provides clear, practical instructions. Pay close attention to the advice on wearing the right undergarments, as this significantly impacts the final fit.
How To: Measure YOUR Bust Apex and Position on a Pattern
Please watch the video "How To: Measure YOUR Bust Apex and Position on a Pattern" by Made to Sew. It provides a detailed, visual guide to capturing the critical measurements for locating your bust apex.
Focus on these specific segments: First, watch the section on preparation, which explains the importance of wearing your intended undergarments. Next, learn how to measure the apex to apex distance. This is the 'Bust Span' shown in the diagram above. The video presents several options for vertical measurements. For our bralette, two are most useful. Watch how to measure from the end of the shoulder down to the bust apex. This provides a reliable upper reference point. Finally, watch how to measure from the center front waist up to the bust apex. You will adapt this method: instead of measuring from your waist, measure from your underbust line (where you took your underbust circumference) up to your bust apex. This gives us the precise height of the cup area for your bralette. Take your time to get these right. It's a good idea to measure a couple of times to ensure consistency.
After watching the video and taking your measurements, you should have the following list of your personal body measurements recorded in either centimeters or inches:
- Full Bust Circumference
- Underbust Circumference
- Apex-to-Apex Distance
- Shoulder-to-Apex Distance
- Underbust-to-Apex Distance
Understanding and Calculating 'Ease'
Now that you have your raw body measurements, we need to introduce the concept of 'ease'. Ease is the extra room built into a garment beyond the body's exact measurements. It's what allows you to breathe, move, and sit comfortably. Since you are working with linen, a woven fabric with no natural stretch, adding wearing ease is critical.
Adding too little ease will make the bralette restrictive, while adding too much will cause it to lose its intended fitted shape. Think of it as the difference between a wireframe and a final, polished user interface—the wireframe might have the core elements, but the final design needs appropriate padding and margins for usability and aesthetics.
The video below gives an excellent overview of ease and provides visual examples of how different amounts of ease look in a finished woven garment.
What is Ease? Understand Ease in a Dressmaking Pattern
Now, watch "What is Ease? Understand Ease in a Dressmaking Pattern" from the Made to Sew channel. This will help you visualize the effect of ease and choose the right amount for your project.
Please focus on these parts: The initial definition of ease. The explanation of how ease differs for woven versus stretch fabrics. This is directly relevant to your choice of linen. Most importantly, watch the visual examples showing garments with 0cm, 4cm, and 9cm of ease. Observe the difference in fit.
As you saw in the video, a small amount of ease can make a big difference in a woven garment. The presenter notes that 4cm (approx. 1.5 inches) of ease around the bust provides a "comfortable minimum" for a fitted look that still allows for movement. For your bralette top, this is a perfect starting point.
Therefore, we will use 4cm (1.5 inches) of ease.
Calculating Your Working Measurements
It's time to combine your body measurements with your chosen ease to create the final "working measurements." These are the numbers you will use to draft the pattern.
We will be drafting a pattern for half of the bralette front (from the center front to the side seam), which is designed to be placed on the fold of the fabric to create a perfectly symmetrical full front piece. This means we need to work with measurements that correspond to a quarter of your total body circumference.
Use the following formulas to calculate your working measurements. Keep all your units consistent (either cm or inches).
- Working Full Bust Width:
(Full Bust Circumference + 4cm Ease) / 4 - Working Underbust Width:
(Underbust Circumference + 4cm Ease) / 4 - Working Apex Position (from Center Front):
Apex-to-Apex Distance / 2
Your vertical measurements do not get divided, as they are not circumferences:
- Shoulder-to-Apex Distance: No change
- Underbust-to-Apex Distance: No change
Take a moment to perform these calculations and write down your final list of working measurements. This list is the technical specification for your design.
Conclusion
In this lesson, you have established the critical data foundation for your pattern. You've taken the five key measurements needed for the bralette front and transformed the circumference measurements into practical working widths by incorporating ease.
You should now have a final list of five working measurements:
- Working Full Bust Width
- Working Underbust Width
- Working Apex Position (from Center Front)
- Shoulder-to-Apex Distance
- Underbust-to-Apex Distance
In our next lesson, we will put these numbers into action. You will learn how to use them to draft the rectangular framework of the bralette front, plot your apex, and begin constructing the side bust dart that will give your garment its crucial three-dimensional shape.