Introduction
Welcome back! In our previous lesson, you successfully configured OBS to produce a high-quality, multi-track recording of your screen and voice. You now have a raw video file with your voiceover on a separate audio track, ready for post-production. This is a critical foundation for creating professional "faceless" content.
Today, we're focusing on that isolated voiceover track. Raw audio, even from a good microphone, can almost always be improved. It might contain low-level background noise, inconsistent volume, or a tone that could be clearer and more pleasant to listen to. As we've discussed, poor audio is one of the fastest ways to lose an audience.
This lesson directly addresses that challenge. Our learning outcome is to: Edit voiceover audio in Audacity or a video editor's audio tools to remove noise and improve clarity.
We'll explore two powerful workflows: one using the free and excellent Audacity, and another using the built-in tools of a professional video editor like Premiere Pro or DaVinci Resolve. By the end of this lesson, you'll have a systematic process to make your voiceovers sound crisp, clear, and professional.
The "Garbage In, Garbage Out" Principle
Before we dive into software, it's crucial to remember that post-processing is for enhancement, not magic. The better your initial recording, the better your final result will be. No amount of editing can fully salvage a recording full of loud background noise or harsh echoes.
The following video from creator Bog does an excellent job of explaining not only why audio is so important but also the key steps you can take before you hit record to get 90% of the way to great sound.
Voiceovers should not sound this good
Watch this first section of Bog's video, "Voiceovers should not sound this good," to understand the best practices for recording. This will reinforce why a good setup saves you a massive amount of time in editing.
Watch from the beginning until 03:24. Pay close attention to his advice on: Controlling your recording environment (quiet, soft objects). Setting your microphone input level to avoid clipping. Proper microphone technique (distance and positioning).
Think of these pre-recording steps as the first line of defense for audio quality. The editing techniques we're about to cover will handle the remaining 10%.
The Core Audio Processing Chain
To improve audio clarity, we'll use a standard sequence of effects known as an "audio chain." Each step addresses a specific problem and prepares the audio for the next stage. A typical chain for voiceovers includes:
- Noise Reduction: Removes unwanted background hum or hiss.
- Equalization (EQ): Sculpts the tonal balance of the voice, removing "muddy" frequencies and boosting those that add clarity.
- Compression: Evens out the volume by making quiet parts louder and loud parts quieter, resulting in a more consistent and listenable experience.
- Normalization / Limiting: Brings the final audio up to a standard volume level without causing distortion (clipping).
Let's start by applying this chain using the free, open-source, and budget-friendly tool, Audacity.
Part 1: Processing in Audacity (The Free Workflow)
Audacity is a powerful digital audio workstation (DAW) that is perfect for this task. If you don't have it installed, you can download it for free from the official website.
For this section, you'll need the audio track of your voiceover. You can export just the audio from your video editor or use a tool like VLC to extract it. For simplicity, you can also just drag the MP4 file from your OBS test recording directly into Audacity, and it will import the audio tracks.
The following guide provides an excellent text-based overview of the key terms and steps we will be following. It's a great reference to have open.
Audio Processing for Voice-overs in Audacity
This article, "Audio Processing for Voice-overs in Audacity," provides clear definitions and step-by-step instructions that complement the video tutorials.
Quickly scan the sections "Basic Audio Processing Terms" to familiarize yourself with the vocabulary. Then, keep the sections on Noise Reduction, Equalization, Compression, Normalization, and Limiting handy as we work through the steps.
Step 1: Noise Reduction
First, we need to tell Audacity what the background noise sounds like.
- Find a few seconds of "silence" in your recording where you aren't speaking. This is your noise profile.
- Highlight this silent section.
- Go to
Effect > Noise Removal and Repair > Noise Reduction. - Click "Get Noise Profile".
- Now, select your entire audio track (press
Cmd+A). - Go back to
Effect > Noise Removal and Repair > Noise Reductionand this time, just click "OK". The default settings are often a good starting point.
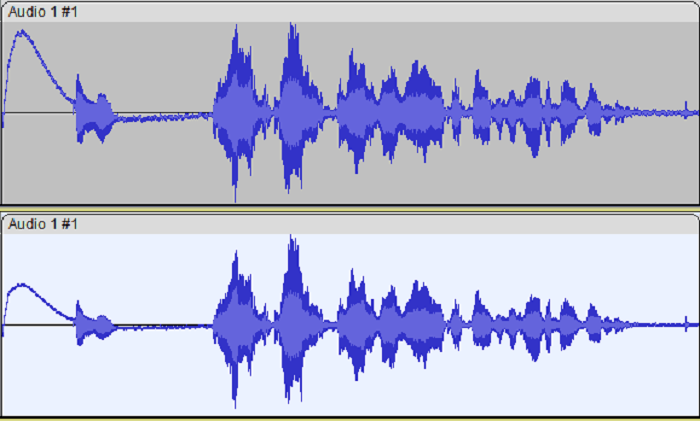
Be careful not to overdo it; aggressive noise reduction can create a robotic, "watery" sound. The goal is to reduce the noise, not eliminate it entirely at the cost of your vocal quality.
Step 2: Equalization (EQ)
EQ is where you shape the tone of your voice. We'll use the "Filter Curve EQ" for precise control. The goal is to cut problematic frequencies and boost pleasing ones.
The video below gives an excellent demonstration of this process.
5 EASY Steps For Sounding Better in Audacity
Mike Russell provides a masterclass on using Audacity's EQ for vocals in this clip. This is the most important step for improving clarity.
Watch from 01:05 to 03:06. Focus on the four key adjustments he makes to the EQ curve: High-Pass Filter: Rolling off low-end rumble below ~100 Hz. Warmth Boost: A gentle boost around 200 Hz for body. Nasality Cut: A slight dip in the mid-range to reduce a "nasally" sound. Clarity Boost: A boost in the high-end for crispness.
Apply these principles to your own voiceover. Use the "Preview" button in the Filter Curve EQ window to listen as you make adjustments. Every voice is different, so your curve may vary slightly.
Step 3: Compression
A compressor acts like an automatic volume fader. It makes your voice sound more consistent and "punchy."
Voiceovers should not sound this good
Next, let's watch Bog's simple approach to compression in Audacity. He also covers a few other steps that we'll integrate into a complete workflow.
Watch from 03:24 to 05:40. He applies a Compressor, manually fixes a peak with Amplify, and then Normalizes. Note his compressor settings—they are a good starting point.
To apply compression:
- Select the entire track (
Cmd+A). - Go to
Effect > Volume and Compression > Compressor.... - Start with the settings Bog suggests, or use these common defaults:
- Threshold: ~ -20 dB
- Ratio: ~ 3:1
- Attack Time: A fast setting, ~5 ms
- Release Time: ~100-200 ms
- Make sure "Make-up gain for 0 dB after compressing" is checked.
- Click "Apply". You should see the waveform look "thicker" as the quieter parts are brought up.
Step 4: Normalize
Finally, we bring the overall volume up to a standard level for distribution.
- Select the entire track (
Cmd+A). - Go to
Effect > Volume and Compression > Normalize.... - Set the Peak Amplitude to -1.0 dB. This boosts the entire track so the loudest peak is just below the point of distortion.
- Click "Apply".
Your audio is now processed! Use File > Export Audio... to save it as a high-quality WAV file to bring back into your video editor.
Part 2: Processing in a Video Editor (The Integrated Workflow)
You can also perform this entire audio chain directly within your video editor. This has the advantage of being non-destructive (you can tweak settings anytime) and keeps your entire project in one place. The concepts are identical, but the tools are slightly different.
Bog's video also demonstrates a great workflow for Premiere Pro, and the principles apply directly to the Fairlight page in DaVinci Resolve.
Voiceovers should not sound this good
Now, let's look at how to apply these same concepts using a video editor's track-based effects. This is a very efficient workflow.
Watch from 07:41 to 11:30. Pay close attention to how he uses the Audio Track Mixer to apply effects to the entire track, not just individual clips. The key effects he uses are: Denoise: To clean up background noise. Multiband Compressor: To compress the audio and even out dynamics. He uses the "Broadcast" preset, which is a great starting point.
The Integrated Effects Chain:
In Premiere Pro (Audio Track Mixer) or DaVinci Resolve (Fairlight > Mixer > Effects), you'll add effects to your voiceover track in this order:
- Noise Reduction: Add a "Denoise" (Premiere) or "Noise Reduction" (Resolve) effect. Apply it lightly, around 5-15%, to avoid artifacts.
- Equalizer: Add an "EQ" or "Equalizer" effect. Create a curve similar to the one you learned in the Audacity section (cut lows, dip mids, boost highs).
- Compressor: Add a "Compressor" or "Multiband Compressor." The "Broadcast" preset is an excellent one-click solution for voiceovers.
- Limiter: As the final effect in the chain, add a "Hard Limiter" (Premiere) or "Limiter" (Resolve) and set the ceiling to -1.0 dB. This ensures your final audio never clips.
This track-based approach is incredibly efficient. Any audio clip you place on this track will automatically have the entire effects chain applied to it.
Your Turn: Process Your Voiceover
It's time to put this into practice.
- Take the voiceover track from the test recording you made in the last lesson.
- Choose your path:
- Path A (Audacity): Import the audio into Audacity and apply the 4-step chain: Noise Reduction, EQ, Compression, and Normalization. Export the result as a WAV file.
- Path B (Video Editor): Import your OBS recording into Premiere Pro or DaVinci Resolve. On the voiceover track, build an effects chain: Noise Reduction, EQ, Compressor, and Limiter.
- Listen carefully to the "before" and "after" versions. Can you hear the difference? The noise should be gone, your voice should sound clearer and more present, and the volume should be consistent.
Conclusion
You've just learned one of the most critical skills in digital content creation: how to professionally process voiceover audio. Mastering this systematic workflow will dramatically increase the production value of your videos.
Key Takeaways:
- Great audio starts with a great recording. Control your environment and microphone technique.
- A standard audio processing chain for voiceovers is Noise Reduction → EQ → Compression → Normalization/Limiting.
- Audacity provides a powerful, free workflow for audio processing.
- Applying an effects chain to an audio track in your video editor (Premiere Pro, DaVinci Resolve) is an efficient, non-destructive alternative.
- The goal is clarity and consistency, not creating an artificial or over-processed sound.
Preview of the Next Lesson
You now have high-quality video and high-quality audio components. The next step is to bring them all together into a cohesive narrative. In the next lesson, we will focus on the learning outcome: Assemble a multi-track video with b-roll, screen recordings, and background music in your chosen editor. We'll start putting the pieces together to build your final product walkthrough video.