Hello! Welcome back to our project.
In the last lesson, you did the crucial work of connecting the frontend controls to the backend API endpoints. Your application is now alive—it can take user input, send it to the server for processing, and display the result. This is a huge step!
Today, we will build on that by improving the user experience. This lesson focuses on a small but very useful feature that you'll find in many professional web applications: adding a 'copy to clipboard' button for the AI-generated results. Instead of users needing to manually highlight and copy the text, they can do it with a single click.
Why Add a "Copy to Clipboard" Button?
A "copy" button is a classic example of a good user interface (UI) design. It makes your application more efficient and convenient. For your AI writing assistant, it means users can quickly take the summarized or corrected text and paste it wherever they need it.
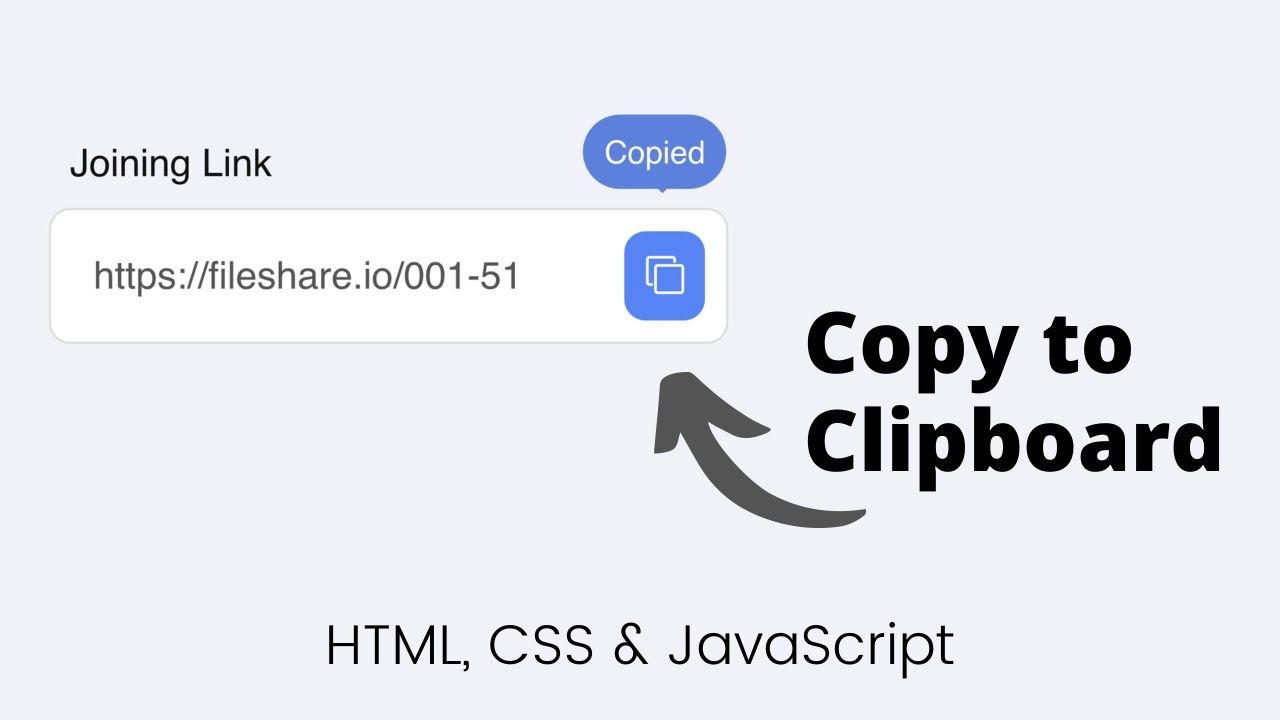
Let's look at what we're aiming to build.
Step 1: Updating the HTML
First, we need to add the copy button to our index.html file. It makes sense to place this button right next to the result that it's meant to copy. We also want the button to appear only after a result is generated.
Let's modify the HTML for the "Summarize" feature. Find the result-box inside the "summary" tab content. We will add a <p> tag to hold the result text and a <button> for copying.
Here is the updated structure for the summary div:
<!-- The content for the 'Summarize' tab -->
<div id="summary" class="tab-content active">
    <h3>Summarize Text</h3>
    <button id="submit-summary">Get Summary</button>
    <div class="result-box">
        <!-- The summary from the AI will go inside this paragraph -->
        <p id="summary-result"></p>

        <!-- NEW: The copy button, initially hidden -->
        <button id="copy-summary-btn" class="copy-btn" style="display: none;">Copy Summary</button>
    </div>
</div>
Key Changes:
- We've placed the AI result into a
<p>element with the IDsummary-result. This gives us a specific container for the text. - We added a
<button>with the IDcopy-summary-btn. - We've used an inline style
style="display: none;"to hide the button by default. We'll use JavaScript to show it once we have a result to copy.
Step 2: The JavaScript for Copying
The magic behind this feature happens in JavaScript. We'll use a modern browser API called the Clipboard API. Specifically, we will use the navigator.clipboard.writeText() method. It's a secure and straightforward way to programmatically copy text.
To understand how this method works, the following article provides a very clear and concise explanation.
How to Copy Text to the Clipboard with JavaScript
This article from freeCodeCamp, 'How to Copy Text to the Clipboard with JavaScript', introduces the modern Clipboard API we will be using.
Please read the section 'How to Copy Text to the Clipboard'. Focus on the navigator.clipboard.writeText() method and the async/await example. This is the exact pattern we will implement in our project.
Now that you understand the core API, let's see it in action. The following video gives a complete demonstration of building a copy button, including giving the user feedback.
How To EASILY Add a COPY BUTTON to Your Website With HTML, CSS & JS
This video by dcode, 'How To EASILY Add a COPY BUTTON...', provides a full walkthrough of creating a copy button, from the HTML and CSS to the final JavaScript logic.
Please watch the JavaScript section from 06:31 to 12:40. Pay close attention to these steps: Adding a click event listener to the button. Getting the text from the target element using .textContent. Calling navigator.clipboard.writeText() with that text. Changing the button's text to 'Copied!' to give the user immediate feedback. Using setTimeout to change the text back after a short delay.
Step 3: Integrating the Code into Our Project
Let's apply these concepts to our script.js file. We will modify the code from the previous lesson.
- Show the button: In the
fetchsuccess block, after we display the summary, we'll make the copy button visible. - Add the event listener: We'll add a new event listener for our copy button that performs the copy action.
Here is the updated JavaScript for the "Summarize" feature. Add this inside your DOMContentLoaded listener.
// --- Start of updated 'Summarize' feature code ---

// 1. Select the necessary elements
const mainTextInput = document.getElementById('main-text-input');
const submitSummaryBtn = document.getElementById('submit-summary');
const summaryResultP = document.getElementById('summary-result'); // Changed to the <p> tag
const copySummaryBtn = document.getElementById('copy-summary-btn'); // Our new button

// 2. Event listener for the 'Get Summary' button (from last lesson)
submitSummaryBtn.addEventListener('click', async () => {
    const textToSummarize = mainTextInput.value;

    if (!textToSummarize.trim()) {
        summaryResultP.textContent = 'Please enter some text to summarize.';
        copySummaryBtn.style.display = 'none'; // Hide button if no input
        return;
    }

    try {
        const response = await fetch('/summarize', {
            method: 'POST',
            headers: { 'Content-Type': 'application/json' },
            body: JSON.stringify({ text: textToSummarize }),
        });

        if (response.ok) {
            const data = await response.json();
            summaryResultP.textContent = data.summary;
            copySummaryBtn.style.display = 'inline-block'; // <-- NEW: Show the copy button
        } else {
            const errorData = await response.json();
            summaryResultP.textContent = `Error: ${errorData.error || 'Something went wrong.'}`;
            copySummaryBtn.style.display = 'none'; // Hide button on error
        }
    } catch (error) {
        console.error('Fetch error:', error);
        summaryResultP.textContent = 'A network error occurred. Please check your connection.';
        copySummaryBtn.style.display = 'none'; // Hide button on error
    }
});

// 3. --- NEW: Event listener for the 'Copy Summary' button ---
copySummaryBtn.addEventListener('click', async () => {
    const textToCopy = summaryResultP.textContent;

    try {
        await navigator.clipboard.writeText(textToCopy);

        // Provide feedback to the user
        const originalText = copySummaryBtn.textContent;
        copySummaryBtn.textContent = 'Copied!';

        // Change it back after 2 seconds
        setTimeout(() => {
            copySummaryBtn.textContent = originalText;
        }, 2000);

    } catch (err) {
        console.error('Failed to copy text: ', err);
        // You could add user feedback for the error here as well
    }
});
Code Breakdown:
- We now select the new
<p>and<button>elements. - When the
fetchrequest is successful, we setcopySummaryBtn.style.display = 'inline-block';to make it visible. We also hide it if there's an error or no input. - The new event listener for
copySummaryBtnisasyncbecausewriteText()is an asynchronous operation. - Inside the listener, we grab the
textContentof our result paragraph. await navigator.clipboard.writeText(textToCopy)performs the copy action.- The code then temporarily changes the button's text to "Copied!" and uses
setTimeoutto revert it after 2000 milliseconds (2 seconds), just like in the video.
Test your understanding!
Now it's your turn to apply this pattern. Assume your HTML for the "Correct Grammar" feature looks like this:
<div id="grammar" class="tab-content">
    <h3>Correct Grammar</h3>
    <button id="submit-grammar">Correct Grammar</button>
    <div class="result-box">
        <p id="grammar-result"></p>
        <button id="copy-grammar-btn" class="copy-btn" style="display: none;">Copy Correction</button>
    </div>
</div>
How would you add the JavaScript code to make the copy-grammar-btn work? You'll need to:
- Select the button.
- Add a
clickevent listener to it. - Inside the listener, copy the text from the
grammar-resultparagraph. - Provide "Copied!" feedback.
Show answer
Your code should be very similar to the summary example, just targeting the elements for the grammar feature.
// Select the grammar-specific elements first
const grammarResultP = document.getElementById('grammar-result');
const copyGrammarBtn = document.getElementById('copy-grammar-btn');

// Then, add the event listener for the new copy button
copyGrammarBtn.addEventListener('click', async () => {
    const textToCopy = grammarResultP.textContent;

    try {
        await navigator.clipboard.writeText(textToCopy);

        // Provide feedback
        const originalText = copyGrammarBtn.textContent;
        copyGrammarBtn.textContent = 'Copied!';

        setTimeout(() => {
            copyGrammarBtn.textContent = originalText;
        }, 2000);

    } catch (err) {
        console.error('Failed to copy text: ', err);
    }
});
Don't forget to also modify the fetch event listener for the submit-grammar button to show copyGrammarBtn on success, just like we did for the summary feature!
Conclusion
Great job! You've just added another layer of polish and professionalism to your application. By implementing a "copy to clipboard" button, you've made the app significantly more user-friendly.
Key Takeaways:
- You can enhance user experience with small but thoughtful features like a copy button.
- The modern
navigator.clipboard.writeText()API is the standard way to programmatically copy text to the clipboard. - Providing immediate visual feedback (like changing button text to "Copied!") is crucial for letting the user know their action was successful.
setTimeoutis a useful tool for creating temporary states in your UI, such as feedback messages that disappear on their own.
In the next lesson, we will continue to refine the UI by adding another helpful feature: an input character counter for the text area. This will help users keep track of their text length, which can be important for certain AI tasks.