Hello! Welcome back to our course on building APIs with FastAPI.
In the last lesson, you successfully implemented a login endpoint that issues a JSON Web Token (JWT) upon successful authentication. This was a major milestone, but a token is only useful if you use it to control access.
Today, we'll put that token to work. You'll learn how to create a reusable dependency that verifies a JWT on incoming requests. This will allow us to "lock down" certain endpoints, ensuring that only authenticated users can access them. This is the real payoff for all the authentication setup we've done so far.
By the end of this lesson, you will be able to:
- Create a FastAPI dependency to validate a JWT and fetch the current user.
- Protect specific API endpoints by requiring a valid token.
- Distinguish between
401 Unauthorizedand403 Forbiddenerrors.
This is a fundamental skill for building secure APIs, which is essential for your goal of deploying AI models that may handle sensitive data or user-specific tasks.
Step 1: Understanding the JWT Verification Flow
Before we write any code, let's visualize what's about to happen. When a client wants to access a protected endpoint, it must include the JWT in the request headers, like this:
Authorization: Bearer <your_jwt_token_here>
Our FastAPI application will then perform the following steps for each request to a protected route:
- Extract the Token: FastAPI will automatically look for this
Authorizationheader and extract the token string. - Verify the Signature: The dependency we build will use the
SECRET_KEYyou defined in the last lesson to decode the token. If the token has been tampered with or the signature is invalid, the process stops here. - Check for Expiration: The dependency will inspect the
exp(expiration) claim inside the token to ensure it's still valid. - Fetch the User: The dependency will extract the user's identifier (e.g., their username or ID) from the token's
sub(subject) claim. It will then query the database to confirm this user still exists and fetch their full details. - Provide Access: If all checks pass, the user's data is made available to the endpoint's main logic. If any check fails, an
HTTPExceptionis raised immediately, and the endpoint's code never runs.
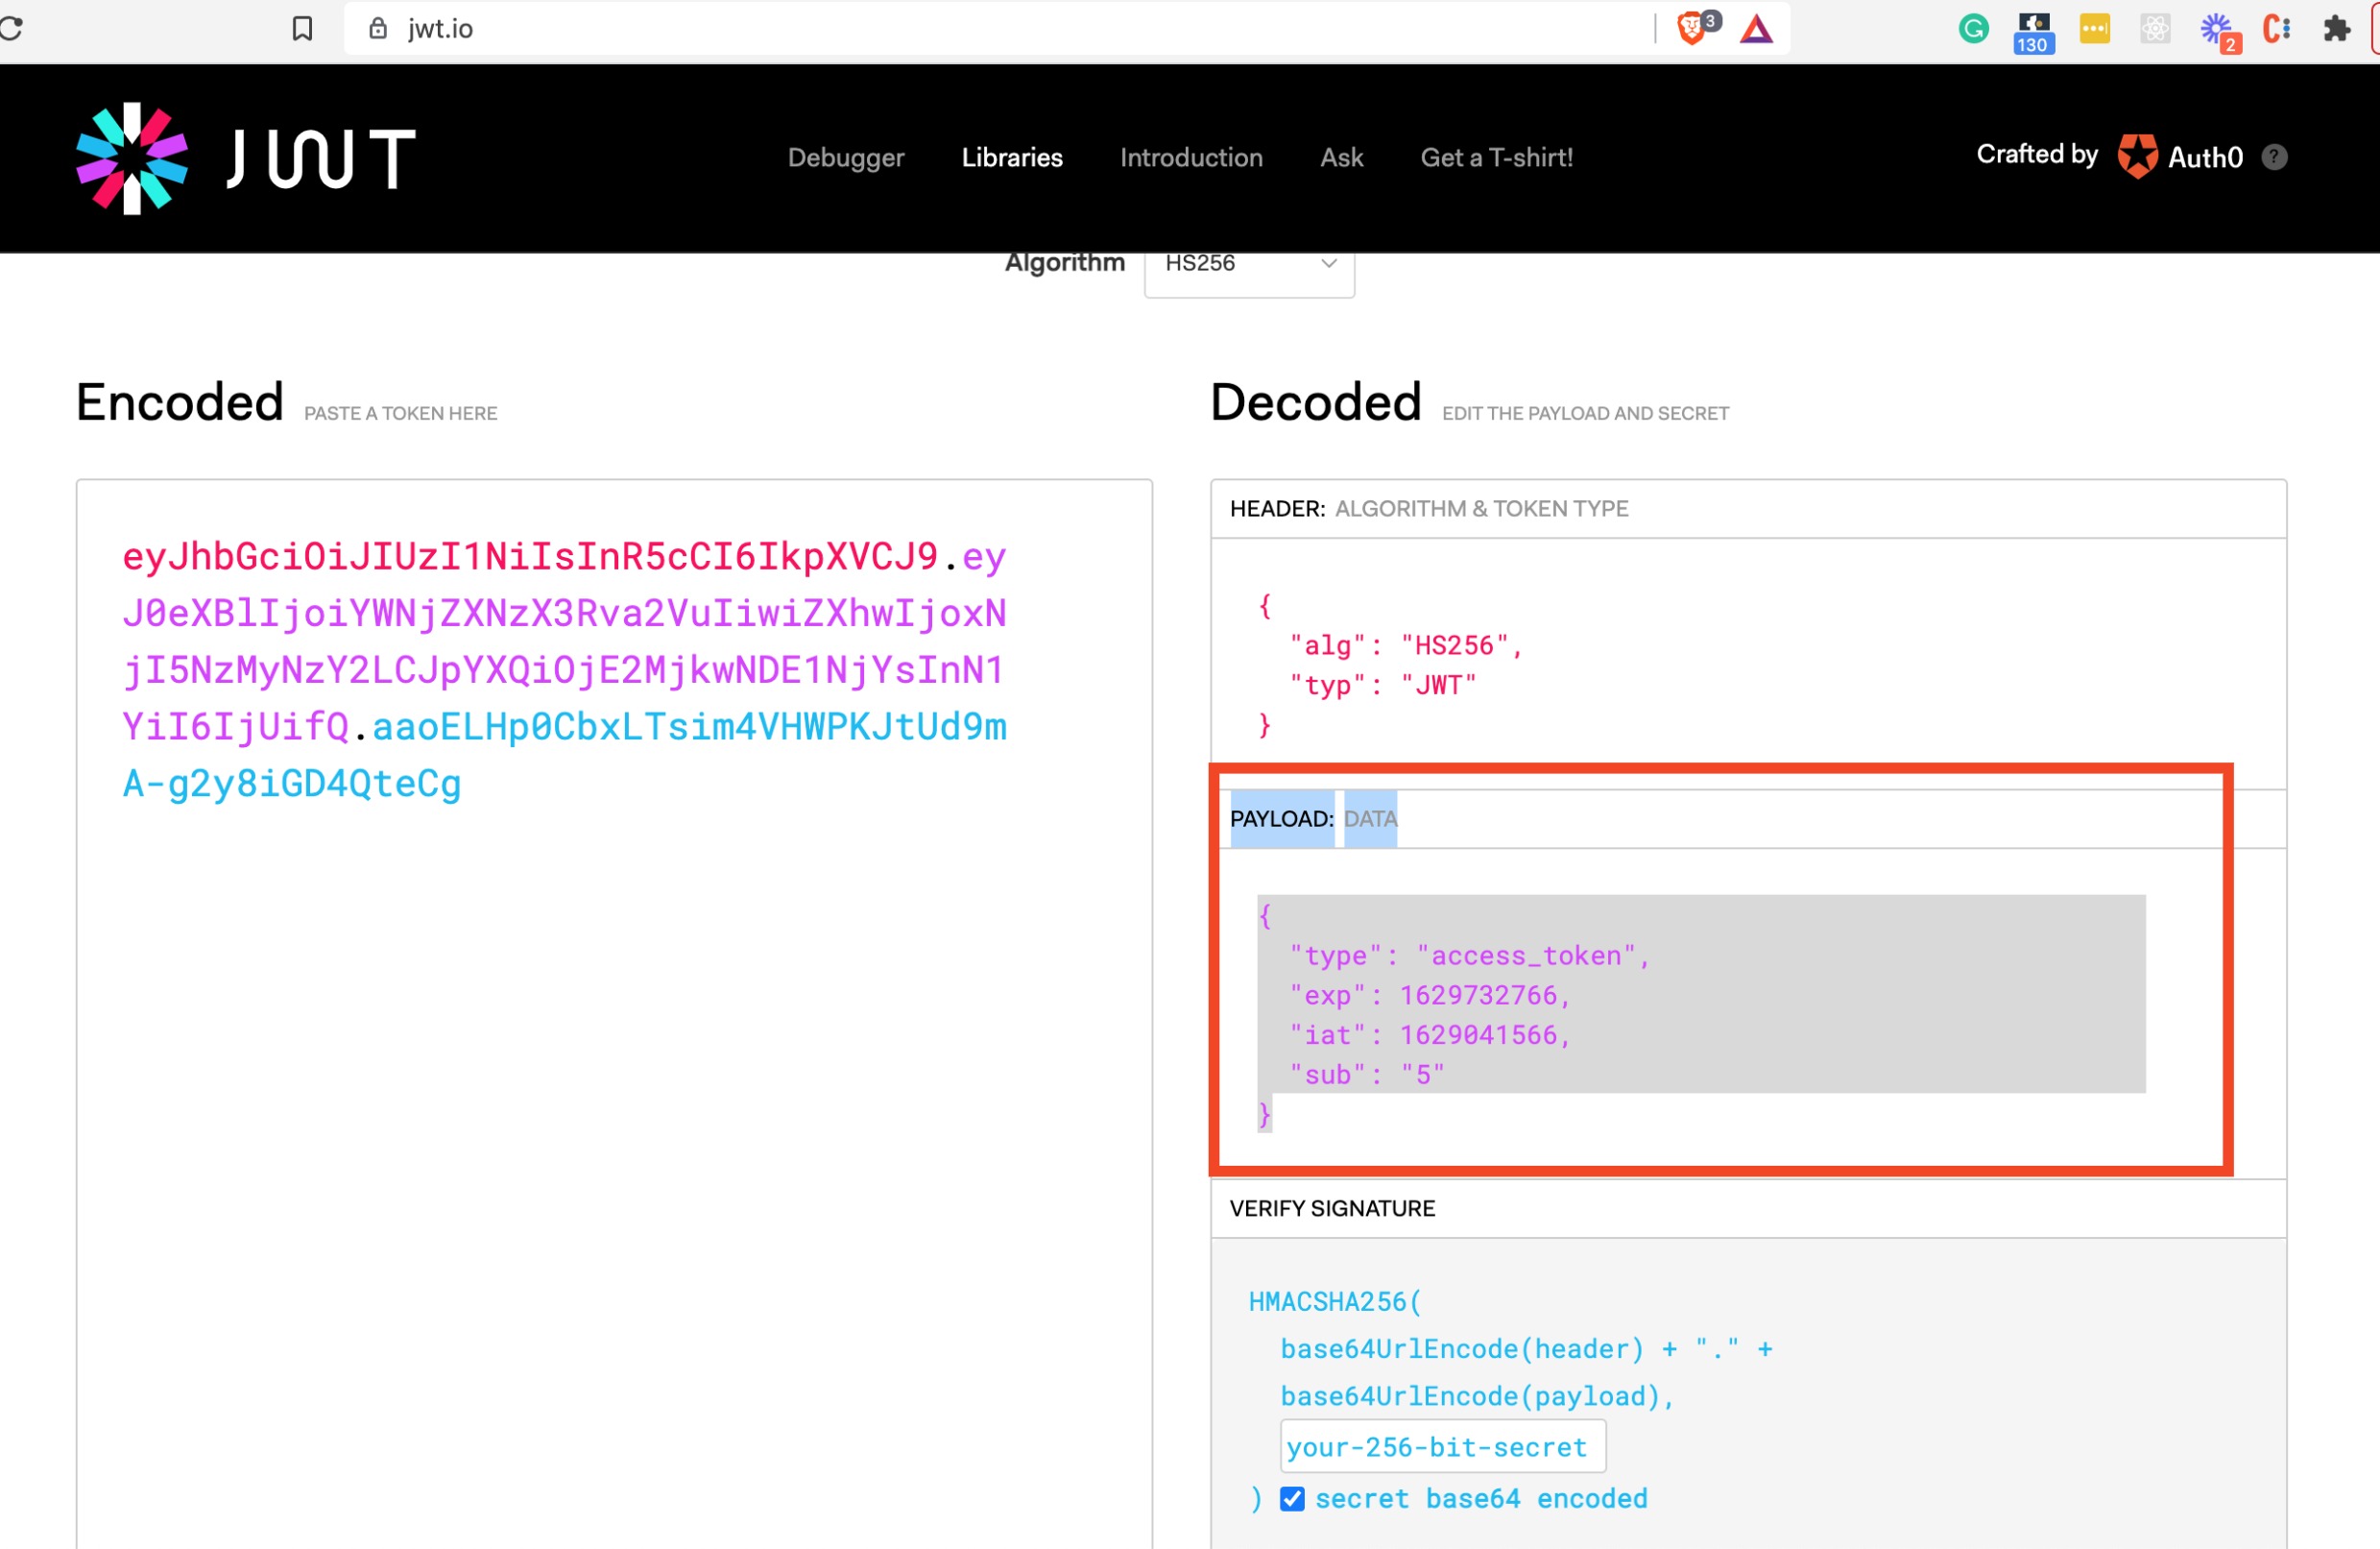
This diagram shows the three parts of a JWT: the header, the payload (with our sub and exp claims), and the signature which verifies its integrity.
Step 2: Creating the get_current_user Dependency
The logic we just described is a perfect candidate for a FastAPI dependency. It's a piece of reusable logic that FastAPI can inject into our path operation functions. We will create a single function, get_current_user, that handles the entire verification process.
Let's place this logic in a central place. You can add it to your auth_utils.py file or create a new dependencies.py file. For simplicity, let's stick with auth_utils.py for now.
You will need to import a few more things at the top of that file:
# In auth_utils.py
from fastapi import Depends, HTTPException, status
from fastapi.security import OAuth2PasswordBearer
from sqlalchemy.orm import Session
from . import crud, database, models # Ensure you have these imports


# This points to your login endpoint
oauth2_scheme = OAuth2PasswordBearer(tokenUrl="/auth/token")
Now, let's define the dependency function itself. This function will depend on the oauth2_scheme to get the token and on get_db to get a database session.
# Add this function to auth_utils.py
def get_current_user(token: str = Depends(oauth2_scheme), db: Session = Depends(database.get_db)):
    credentials_exception = HTTPException(
        status_code=status.HTTP_401_UNAUTHORIZED,
        detail="Could not validate credentials",
        headers={"WWW-Authenticate": "Bearer"},
    )
    try:
        payload = jwt.decode(token, SECRET_KEY, algorithms=[ALGORITHM])
        username: str = payload.get("sub")
        if username is None:
            raise credentials_exception
    except JWTError:
        raise credentials_exception

    user = crud.get_user_by_username(db, username=username)
    if user is None:
        raise credentials_exception

    return user
Let's break down this powerful function:
token: str = Depends(oauth2_scheme): This is the key. It tells FastAPI to use ouroauth2_schemeto look in the request for anAuthorizationheader with a "Bearer" token and pass that token string to this function.credentials_exception: We pre-define a standard401 Unauthorizederror to use whenever something goes wrong.jwt.decode(...): We attempt to decode the token. If it's invalid (bad signature, expired, etc.), thejoselibrary will raise aJWTError.payload.get("sub"): We safely get the username from the token's subject claim.crud.get_user_by_username(...): We query the database to ensure the user identified by the token actually exists. This protects against tokens that might be valid but belong to a deleted user.return user: If everything succeeds, we return the completeuserORM model object.
For a detailed walkthrough of creating this dependency and integrating it, the following video is an excellent guide. It follows the same best practices we've outlined.
Python FastAPI Tutorial (Part 11): Authorization - Protecting Routes and Verifying Current User
The video "Python FastAPI Tutorial (Part 11): Authorization" by Corey Schafer provides a clear, step-by-step implementation of a get_current_user dependency that combines token verification with a database lookup.
Starting just before the two-minute mark, watch the dependency implementation. This part covers: The necessary imports. The complete implementation of the get_current_user function, explaining each step. A useful tip on creating a type alias with Annotated for cleaner endpoint signatures.
Step 3: Protecting Your Endpoints
With our dependency ready, protecting an endpoint becomes incredibly simple. All you have to do is add it to the function signature of any path operation you want to secure.
Let's create a new endpoint that's only accessible to logged-in users: /users/me. This endpoint will return the details of the currently authenticated user.
In your users_router.py (or wherever your user-related routes are), add the following:
# In your user router file
from .. import schemas, models, auth_utils # Adjust imports as needed


# ... (your existing router setup)

@router.get("/me", response_model=schemas.User)
async def read_users_me(current_user: models.User = Depends(auth_utils.get_current_user)):
    """
    Get the details of the currently logged-in user.
    """
    return current_user
That's it!
current_user: models.User = Depends(auth_utils.get_current_user): FastAPI sees this and runs ourget_current_userdependency before executingread_users_me.- If the dependency succeeds, it returns a
Userobject, which FastAPI assigns to thecurrent_userparameter. - Our function body is now just one line:
return current_user. All the complex authentication logic is handled by the dependency.
This is a powerful pattern for code reuse and separation of concerns.
To see this in action and also learn how to protect other routes (like creating, updating, or deleting content), the next part of the video is invaluable. It also introduces the important concept of ownership checks.
Python FastAPI Tutorial (Part 11): Authorization - Protecting Routes and Verifying Current User
Continuing with the same video, this segment shows how to apply the new dependency to protect various endpoints and how to implement authorization logic.
Watch the route protection. Pay close attention to: How the 'create post' endpoint is modified to use the current_user.id instead of taking a user ID from the request body. The distinction between 401 Unauthorized and 403 Forbidden status codes. How an 'ownership check' is added to the update/delete endpoints to ensure users can only modify their own content. The elegant refactoring of the /me endpoint using the new dependency.
401 vs. 403: A Quick Explanation
401 Unauthorized: You sent no credentials, or the ones you sent are invalid (bad token, expired token). The server is saying, "I don't know who you are."403 Forbidden: You are successfully authenticated (the server knows who you are), but you do not have permission to perform the requested action. The server is saying, "I know who you are, but you're not allowed to do this."
Step 4: Testing Your Protected API
Now for the most important part: seeing it work. Your hands-on approach will benefit from testing these scenarios directly in the interactive docs.
- Run your FastAPI application and navigate to
/docs. - You should now see a padlock 🔒 icon next to your
/users/meendpoint. - Test 1 (Failure): Try to execute the
/users/meendpoint without authenticating. Click "Try it out" and "Execute". You should receive a401 Unauthorizederror. - Test 2 (Login): Go to your
/auth/tokenendpoint, provide valid credentials, and execute it to get an access token. - Test 3 (Authorize): Click the "Authorize" button at the top-right of the page. In the popup, type
Bearerfollowed by your token (e.g.,Bearer eyJhbGciOi...) and click "Authorize". - Test 4 (Success): Go back to the
/users/meendpoint and execute it again. This time, you should get a200 OKresponse with the user's details.
The following resources provide excellent textual reinforcement of this entire process, from creating the dependency to applying it to a route.
Authentication in FastAPI | Part 1
The article "Authentication in FastAPI" from FastAPITutorial.com provides a concise, code-focused explanation of creating and using an authentication dependency.
Read the sections titled "The Authentication Dependency", "JWT Token Validation", "Database User Lookup", and "Protecting Your Routes". These sections perfectly match the steps we just took to build and apply our get_current_user function.
Python FastAPI Tutorial (Part 11): Authorization - Protecting Routes and Verifying Current User
To see the testing flow demonstrated visually, this segment from Corey Schafer's video is perfect.
Starting around the 16-minute mark, watch a live demonstration of testing the protected endpoints in the Swagger UI, including both unauthorized and authorized requests.
Conclusion
Congratulations! You have now implemented the core of a secure API. You can issue tokens and, more importantly, you can validate those tokens to protect your resources.
Key Takeaways:
- FastAPI Dependencies are reusable functions that run before your path operation functions, perfect for handling authentication.
- The
get_current_userdependency centralizes the logic for token validation and database lookup. - Protecting an endpoint is as simple as adding
Depends(get_current_user)to its signature. - You can now enforce not just authentication (who the user is) but also basic authorization (what the user is allowed to do) using ownership checks.
In our next lesson, we will build on this foundation. Now that we can reliably get the authenticated user object in our protected endpoints, we'll see how to use it to perform actions on their behalf, such as retrieving data that belongs only to them.