Hello! In our previous lesson, we established the logical foundation of all bookkeeping: the fundamental accounting equation. You learned how every financial element of a business can be classified as an Asset, Liability, or Equity, and how these three components must always remain in balance.
Today, we transition from the "what" and "why" to the "how" and "where." We will take those theoretical concepts and give them a practical home by building a basic digital ledger. This ledger will be the central tool for organizing a business's financial data. Given your technical background, you'll appreciate that we are essentially designing a simple database schema from scratch using a spreadsheet—a foundational skill that will clarify how more complex accounting software operates under the hood. By the end of this session, you will have set up a functional digital ledger in Google Sheets or Excel, ready for recording transactions.
The Digital Filing Cabinet: Why Start with a Spreadsheet?
Before diving into specialized accounting software like Xero or Wave (which we'll cover later), it's incredibly valuable to build a bookkeeping system manually. Doing so demystifies the process and gives you complete control. For a small service business like a travel agency or a virtual assistant, a well-structured spreadsheet is often all that's needed. It's cost-effective, universally accessible, and infinitely customizable.
The image below outlines the basic steps we'll follow to construct our digital ledger. We are building a system to capture data, apply rules (categories), and prepare for future analysis (formulas).
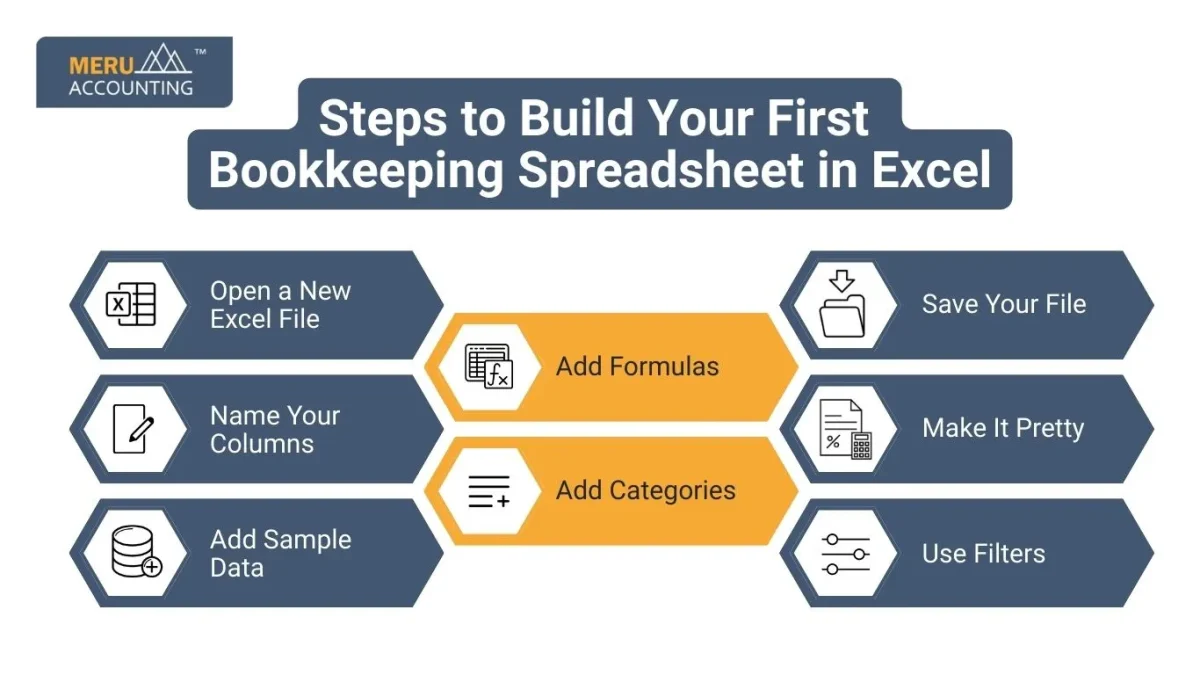
Building Your Ledger: Structure is Everything
A well-organized ledger has two primary components that work together:
- A Transactions Log: A chronological list of every single financial event—every sale, every purchase, every transfer. This is the diary of the business's financial life.
- A Chart of Accounts: The official list of categories (like "Service Revenue," "Office Supplies," "Bank Loans") that you will use to classify the transactions. This is the legend for your financial map.
Let's watch a video from Jamie Trull at Balance CFO, who provides an excellent walkthrough of how to set up these core components in Google Sheets.
How to Start Bookkeeping for Free (Easy Google Sheets Tutorial)
This video, "How to Start Bookkeeping for Free," is a perfect practical guide. It demonstrates how to create the necessary tabs, set up the columns, and use data validation to link your transactions to your categories.
Please watch the following segments carefully: First, watch the section on creating the first tab for the Chart of Accounts and understanding its purpose. Next, jump to where she explains how to create the transaction tab and what columns are essential (Account, Date, Description, Amount, Category). Finally, watch the key step of using data validation to create a dropdown menu. This is a crucial technique for ensuring data consistency.
Deconstructing the Steps
As you saw in the video, the process is logical and straightforward. Let's recap the key steps to create your ledger.
-
Create Your Spreadsheet:
- Open a new Google Sheet (or Excel file).
- Name it something clear, like
[Client Business Name] Bookkeeping. - Create two tabs at the bottom. Rename the first tab
Transactionsand the second tabChart of Accounts.
-
Set Up the
Chart of AccountsTab:- This tab will be a simple list. For now, you can just create a single column titled
Account Name. - We will populate this list in detail in our next lesson, but for setup purposes, you can add a few starter accounts like:
- Service Revenue
- Office Supplies
- Owner's Contribution
- Owner's Draw
- This tab will be a simple list. For now, you can just create a single column titled
-
Set Up the
TransactionsTab:- This is where you'll spend most of your time as a bookkeeper. Create the following columns in the first row:
- Date: The date the transaction occurred.
- Account: Which bank or credit card account was used (e.g., "Business Checking," "Chase Credit Card").
- Description: A brief note about the transaction (e.g., "Client payment - Smith," "Canva Pro Subscription").
- Amount: The value of the transaction. A common convention is to use positive numbers for money coming in (income) and negative numbers for money going out (expenses).
- Category: This is where you'll classify the transaction using your Chart of Accounts.
- Notes: An optional column for any extra details.
- This is where you'll spend most of your time as a bookkeeper. Create the following columns in the first row:
-
Create the Data Validation Link:
- In the
Transactionstab, select the entireCategorycolumn (click the column header, e.g., 'E'). - Go to Data > Data validation.
- Click "+ Add rule".
- Under "Criteria," select "Dropdown (from a range)."
- Click the "Select data range" icon and navigate to your
Chart of Accountstab. Select all the cells in the column containing your account names. - Click "Done."
- In the
Now, when you click on any cell in the Category column of your Transactions sheet, a dropdown menu will appear with the list from your Chart of Accounts. This prevents typos and ensures every transaction is categorized consistently.
The final Transactions tab will look something like this, ready for data entry:

Your Actionable Task: Build the Ledger
Now it's your turn to apply these steps.
- Create a new Google Sheet and name it "Sunshine Getaways Bookkeeping." This will be for your first mock client.
- Create and name the two tabs:
TransactionsandChart of Accounts. - Set up the columns in the
Transactionstab as described above. - In the
Chart of Accountstab, add the following as a starting list in a single column:- Service Revenue - Planning Fees
- Commission Income
- Software & Subscriptions
- Marketing & Advertising
- Owner's Contribution
- Owner's Draw
- Implement the Data Validation rule to link the
Categorycolumn in theTransactionstab to your list in theChart of Accountstab. - To test your setup, enter the following two transactions:
- Transaction 1: Date:
01/01/2025, Account:Business Checking, Description:Initial owner investment, Amount:1500, Category:Owner's Contribution. - Transaction 2: Date:
01/02/2025, Account:Business Credit Card, Description:Annual subscription for travel CRM, Amount:-250, Category:Software & Subscriptions.
- Transaction 1: Date:
Confirm that you can select the categories from the dropdown menu you created. Congratulations, you've just built a functional digital ledger!
Conclusion
In this lesson, we put theory into practice by constructing the essential framework for bookkeeping: the digital ledger. You've created a structured system with a transaction log and a chart of accounts, and importantly, you've linked them in a way that ensures data integrity.
Key Takeaways:
- A spreadsheet-based digital ledger consists of two main parts: a
Transactionslog and aChart of Accounts. - The
Transactionstab is the detailed, chronological record of all financial activity. - The
Chart of Accountstab serves as the master list of categories, providing the structure for financial reporting. - Using Data Validation to create dropdown menus is a simple but powerful way to enforce consistency and prevent errors.
In our next lesson, we will focus on the heart of a travel business's finances. We'll expand on the Chart of Accounts you just started, creating a comprehensive, travel-specific version that will allow you to properly categorize all the unique income and expense streams of a travel agency.