Introduction
Welcome to the next lesson in our journey to master Python's data model. In the previous lessons, you've learned how to make your custom objects integrate seamlessly with Python's built-in behaviors, such as iteration with __iter__ and __next__, and indexing and slicing with __getitem__. You've focused on making your objects readable like native types.
This lesson tackles a core concept for anyone transitioning from a Java background: attribute management. In Java, it's standard practice to hide attributes behind getX() and setX() methods. While you can do this in Python, it's considered verbose and un-Pythonic.
Today, we'll cover the Pythonic solution: the @property decorator. You will learn how to use it to create managed attributes. This powerful feature gives you the clean, direct access syntax of a public attribute (obj.x) while retaining the control and logic of a method, effectively replacing the need for explicit getter and setter methods.
The Problem: The Java-ism of Getters and Setters
Coming from Java, your instinct for encapsulation might be to write classes with "private" attributes (using the _ convention in Python) and public getter/setter methods. Let's see what that looks like.
# The verbose, "Java-style" way in Python
class Circle:
    def __init__(self, radius):
        self._radius = radius  # A "non-public" attribute

    def get_radius(self):
        return self._radius

    def set_radius(self, value):
        if value < 0:
            raise ValueError("Radius cannot be negative.")
        self._radius = value

c = Circle(10)
print(c.get_radius())  # -> 10

c.set_radius(12)
print(c.get_radius())  # -> 12
This works, but it's not the Pythonic way. It leads to verbose code. An expression like c.set_radius(c.get_radius() + 5) is much clumsier than the simple, intuitive c.radius += 5.
The following short video segment introduces this pattern and the _ naming convention.
THIS Is How You Should Be Making Getters & Setters In Python
Watch this video from Indently to see a demonstration of this Java-style getter/setter pattern in Python. It highlights the verbosity we aim to eliminate.
Watch from the beginning until 03:14. The first part (until 01:59) explains the _ convention for non-public attributes. The second part (01:59 to 03:14) demonstrates implementing explicit get_name() and set_name() methods.
The core dilemma is this:
- Simple public attributes (
c.radius) are clean and easy to use. - But what if you later need to add logic, like the validation in
set_radius? Changing a public attribute to a method (c.radiusbecomesc.get_radius()) is a breaking change that forces everyone using your class to update their code.
This is the exact problem that properties solve.
The Solution: @property for Managed Attributes
The @property decorator lets you start with a simple public attribute interface and add the logic of methods later, without changing how users interact with your class. It offers the best of both worlds.

A property is composed of up to three methods that share the same name:
- Getter: A method decorated with
@propertythat is called when the attribute is read. - Setter: A method decorated with
@<property_name>.setterthat is called when a value is assigned to the attribute. - Deleter: A method decorated with
@<property_name>.deleterthat is called when the attribute is deleted withdel.
Let's refactor our Circle class to use a property.
# The Pythonic way using @property
class Circle:
    def __init__(self, radius):


        # This assignment automatically calls the setter method below
        self.radius = radius

    @property
    def radius(self):
        """The radius of the circle. Cannot be negative."""
        print("Getting radius...")
        return self._radius

    @radius.setter
    def radius(self, value):
        print("Setting radius...")
        if value < 0:
            raise ValueError("Radius cannot be negative.")
        self._radius = value


# --- Usage ---
c = Circle(10)      # "Setting radius..." is printed
print(c.radius)     # "Getting radius..." is printed, output is 10

c.radius = 12       # "Setting radius..." is printed


# c.radius = -5     # This would raise a ValueError
Notice how the user code remains simple and intuitive (c.radius), but we have full control over the get and set operations.
To understand the mechanics of this decorator syntax in detail, the following article provides an excellent explanation.
Python's property(): Add Managed Attributes to Your Classes
This article from Real Python explains exactly how the @property decorator and its associated .setter and .deleter decorators work under the hood.
Read the section "Using property() as a Decorator". It breaks down how the three decorators (@property, @radius.setter, @radius.deleter) work together to build a complete managed attribute.
Use Case 1: Validation
As we saw in the Circle example, one of the most common uses for properties is to validate data on assignment. This ensures the object remains in a valid state.
Here is another clear, self-contained example.
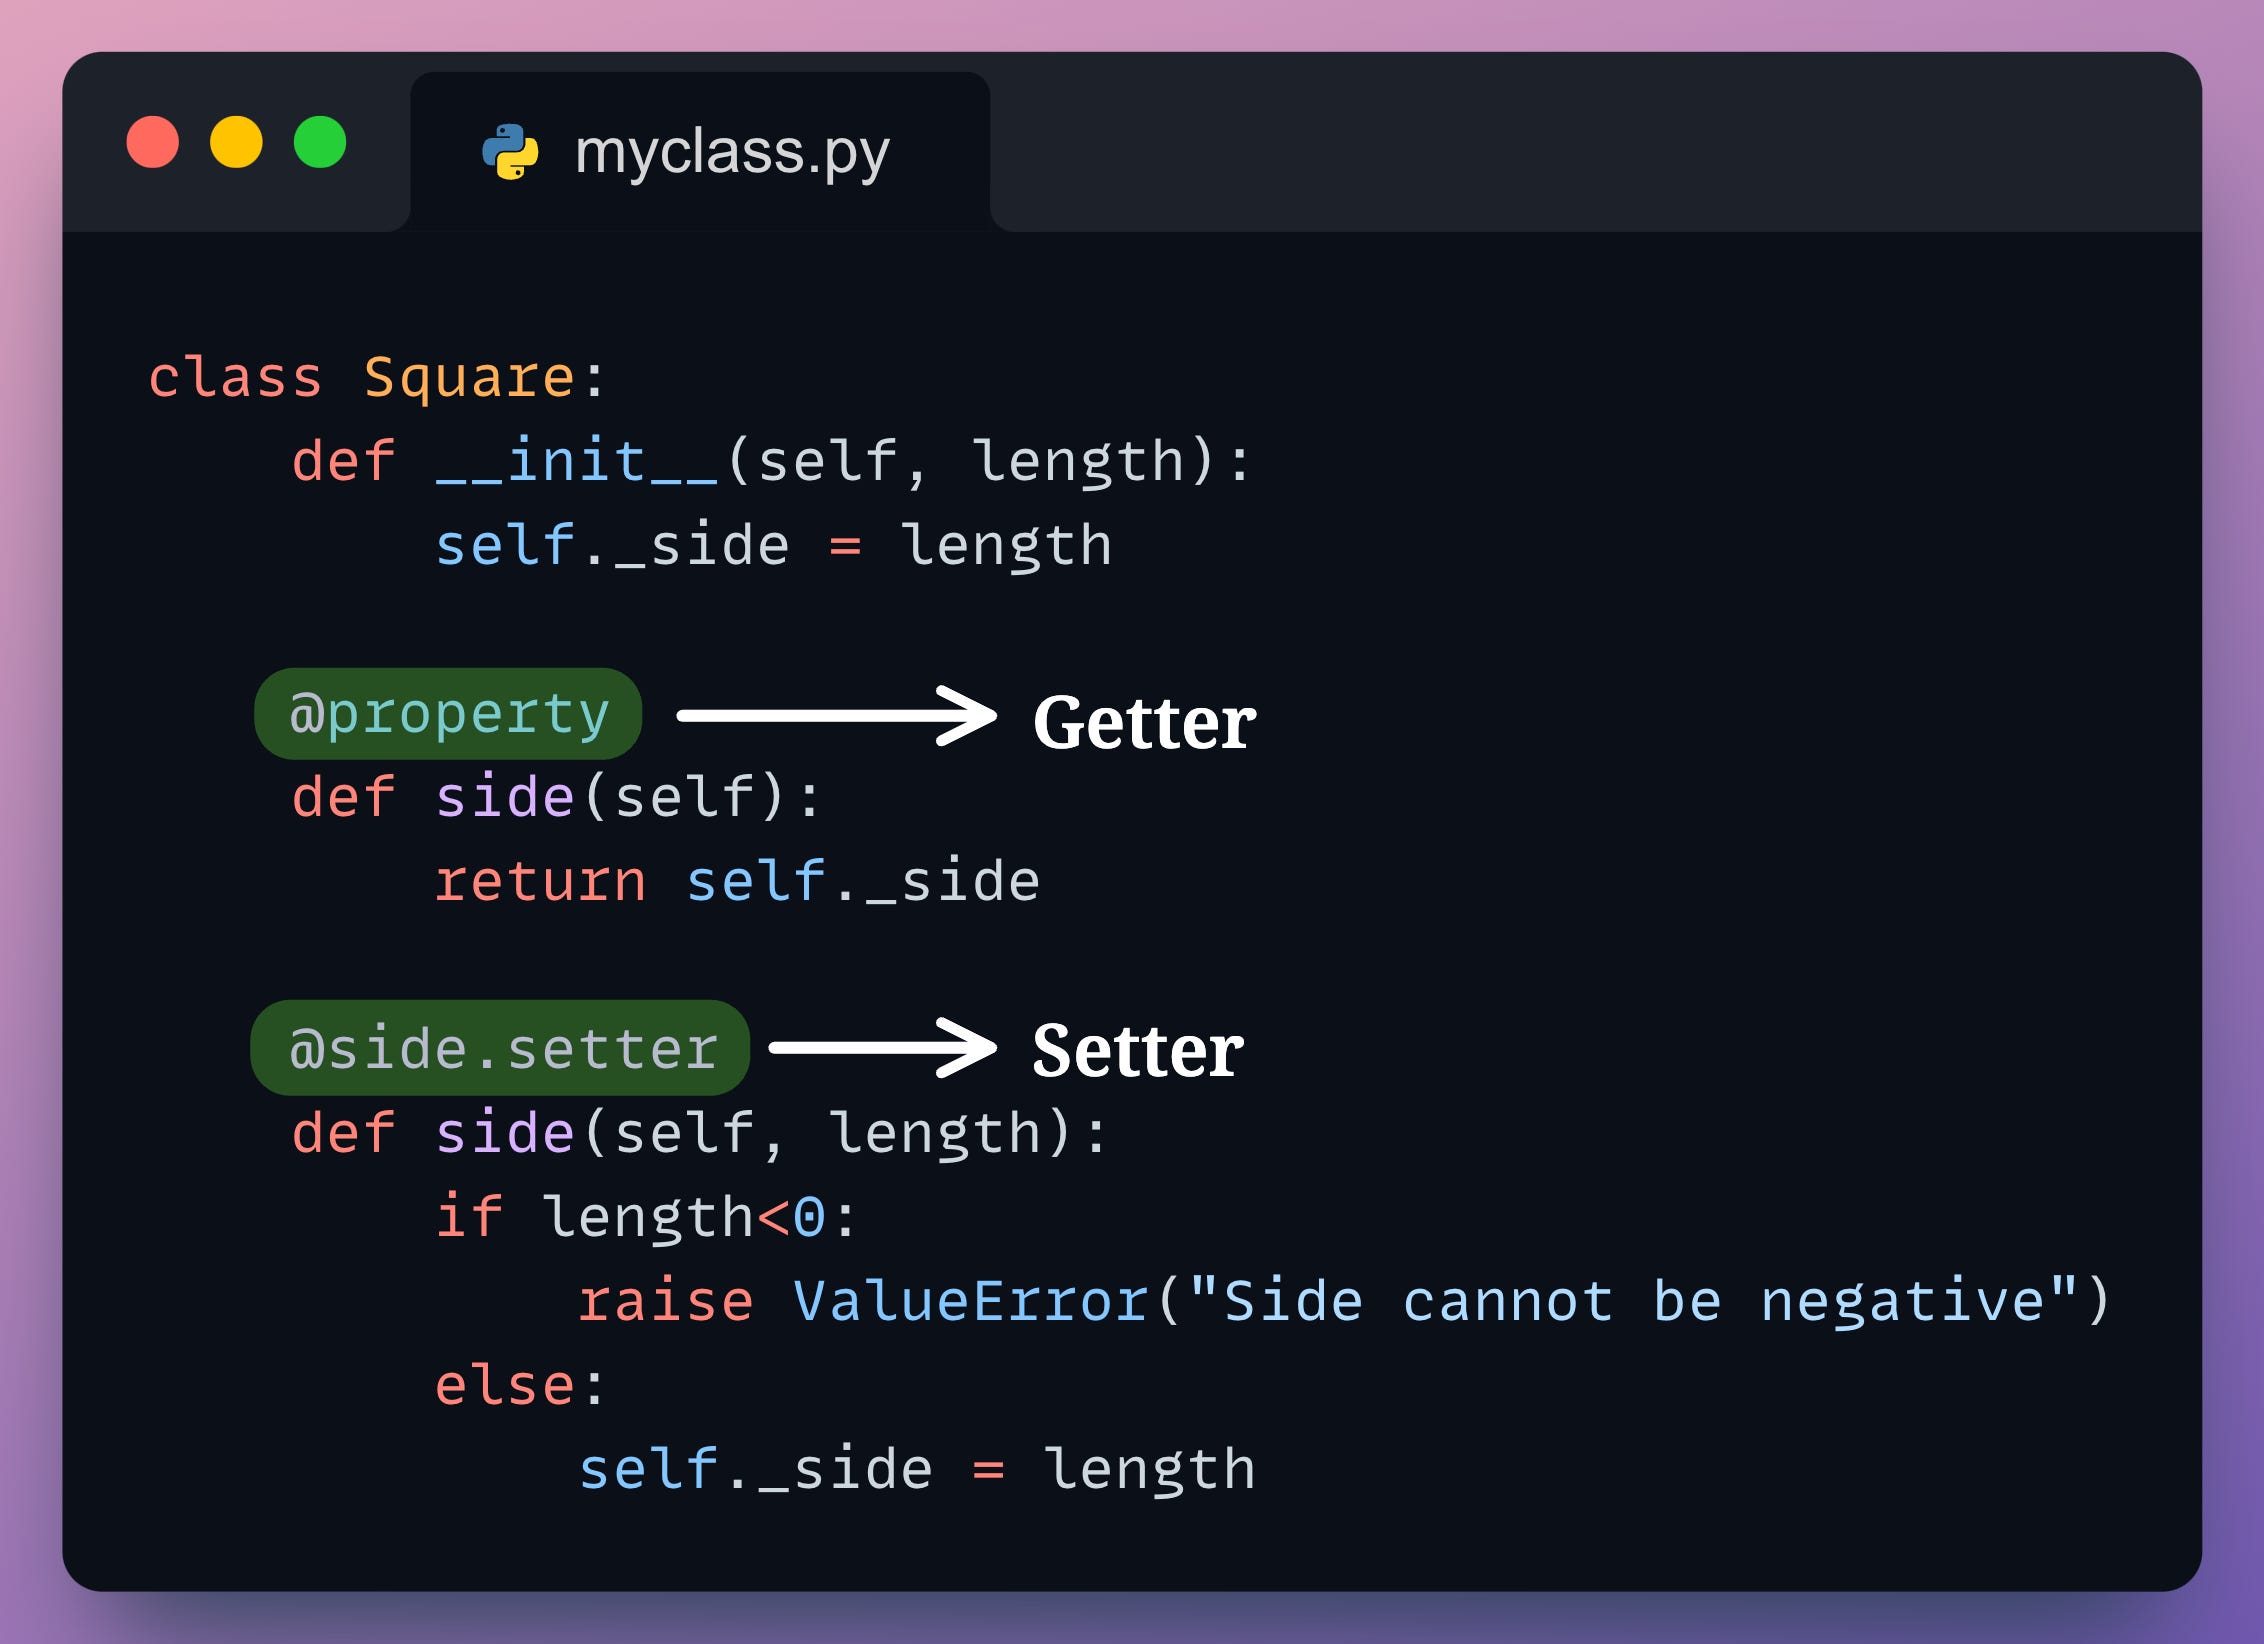
The most powerful feature of properties is that you can introduce them later without breaking your API. You could have started with a simple class:
# Version 1: Simple public attribute
class Square:
    def __init__(self, side):
        self.side = side
When you realize you need validation, you can refactor it to use a property without changing any of the code that uses the Square class.
# Version 2: Added validation without changing the API
class Square:
    def __init__(self, side):
        self.side = side  # No change for the user

    @property
    def side(self):
        return self._side

    @side.setter
    def side(self, value):
        if value < 0:
            raise ValueError("Side cannot be negative")
        self._side = value
This backward-compatibility is a cornerstone of Pythonic design.
Use Case 2: Computed Attributes
Properties are not just for managing stored attributes. They are also perfect for computed attributes—attributes whose values are derived from other data in the object.
A classic example is an Employee class where the email is generated from the first and last names. You don't want to store the email separately, because it would become outdated if the name changes. A property solves this elegantly.
The following video provides an excellent walkthrough of this exact scenario.
Python OOP Tutorial 6: Property Decorators - Getters, Setters, and Deleters
Corey Schafer's tutorial provides a practical, real-world example of using properties for computed attributes. It demonstrates both a read-only computed property (email) and a read-write computed property (fullname).
Watch from the beginning to 07:08. Pay close attention to: The problem setup: how the email becomes stale when the first name is changed (0:00-2:12). How @property turns the email() method into a dynamic attribute (2:12-4:21). The clever use of a @fullname.setter to parse a full name and update the underlying first and last attributes (4:21-7:08).
Exercise: Refactor a Temperature Class
It's your turn to apply these concepts. Below is a Temperature class that stores a value in Celsius. It has a method, get_fahrenheit(), to perform a conversion.
Your task is to refactor this class to use properties. The goals are:
- The internal storage should be a single non-public attribute,
_celsius. - Create a read-write property named
celsius. - Create a read-write, computed property named
fahrenheit. - Setting
celsiusshould be possible. - Setting
fahrenheitshould automatically update the internal_celsiusvalue.
The conversion formulas are:
- Fahrenheit to Celsius:
- Celsius to Fahrenheit:
# initial_code.py

class Temperature:
    def __init__(self, celsius):
        self._celsius = float(celsius)

    def get_fahrenheit(self):
        return self._celsius * (9 / 5) + 32


    # TODO: Add your property-based implementation here.
    # Replace the need for get_fahrenheit() and allow both
    # celsius and fahrenheit to be accessed and set like attributes.


# --- Tests ---
t = Temperature(25)


# Test 1: Getting Celsius
assert t.celsius == 25


# Test 2: Getting Fahrenheit (computed property)
assert t.fahrenheit == 77.0


# Test 3: Setting Celsius
t.celsius = 0
assert t.celsius == 0
assert t.fahrenheit == 32.0


# Test 4: Setting Fahrenheit (should update Celsius)
t.fahrenheit = 212
assert t.celsius == 100.0
assert t.fahrenheit == 212.0


# Test 5: Check floating point precision
t.fahrenheit = 50
assert round(t.celsius, 2) == 10.00
assert t.fahrenheit == 50.0

print("All tests passed!")
Click to see the solution
# solution_code.py

class Temperature:
    def __init__(self, celsius):


        # Directly use the property setter for initial validation/conversion
        self.celsius = celsius

    @property
    def celsius(self):
        """The temperature in degrees Celsius."""
        return self._celsius

    @celsius.setter
    def celsius(self, value):
        self._celsius = float(value)

    @property
    def fahrenheit(self):
        """The temperature in degrees Fahrenheit (computed)."""
        return self._celsius * (9 / 5) + 32

    @fahrenheit.setter
    def fahrenheit(self, value):


        # When fahrenheit is set, update the internal _celsius value
        self._celsius = (float(value) - 32) * (5 / 9)


# --- Tests ---
t = Temperature(25)


# Test 1: Getting Celsius
assert t.celsius == 25


# Test 2: Getting Fahrenheit (computed property)
assert t.fahrenheit == 77.0


# Test 3: Setting Celsius
t.celsius = 0
assert t.celsius == 0
assert t.fahrenheit == 32.0


# Test 4: Setting Fahrenheit (should update Celsius)
t.fahrenheit = 212
assert t.celsius == 100.0
assert t.fahrenheit == 212.0


# Test 5: Check floating point precision
t.fahrenheit = 50
assert round(t.celsius, 2) == 10.00
assert t.fahrenheit == 50.0

print("All tests passed!")
Conclusion
You have now learned the Pythonic replacement for Java-style getters and setters. The @property decorator is a powerful tool for creating clean, maintainable, and readable classes.
Key Takeaways:
- Avoid explicit getters and setters: Start with public attributes for simplicity.
- Use
@propertyfor managed attributes: When you need to add logic (like validation or computation) to an attribute, refactor it into a property. - Maintain a clean API: Properties allow you to add this logic without changing the public interface of your class, ensuring backward compatibility.
- Properties can be computed: They don't have to correspond directly to a stored value; they can be calculated on the fly from other object state.
In this lesson, you created logic for individual attributes. But what if you have multiple attributes in a class that all need the same kind of validation? Writing a separate property for each one would be repetitive.
In the next lesson, we will dive deeper into the mechanism that powers properties themselves: descriptors. You will learn how to implement a custom descriptor to create reusable attribute logic, following the Don't Repeat Yourself (DRY) principle.