Hello! Welcome to your first lesson.
Given your extensive experience with dynamic CMS platforms like WordPress, Joomla, and Magento, you're already familiar with the end result of web development: a functional website. However, the way those systems build a page—often by querying a database and rendering a template on-the-fly for every single visitor—is fundamentally different from how a Static Site Generator (SSG) like Hugo operates.
This lesson will introduce you to Hugo's core "mental model." By the end, you'll be able to explain its static site generation process: how it takes raw content and templates and transforms them into a complete, fast, and secure website. Understanding this foundation is the first and most crucial step before we dive into using AI to accelerate the workflow.
What is a Static Site Generator?
At its heart, a static site generator builds your website once, ahead of time. The output is a collection of plain HTML, CSS, and JavaScript files that can be hosted anywhere with extreme efficiency. This contrasts with a dynamic CMS, which builds the page every time a user requests it.
To get a clearer picture of this distinction and its benefits, let's start with a short video.
Getting Started With Hugo | FREE COURSE
The following clip from the 'Getting Started With Hugo' course by Envato Tuts+ provides a great comparison between static and dynamic websites, a concept that will resonate with your background in various CMS technologies.
Please watch from the timestamp 03:09 to 05:24. Pay attention to the discussion on speed and ease of use, as these are key motivators for using Hugo.
The diagram below visualizes this process. With a static site, all the heavy lifting (the "Build Time") happens once on your machine. The user's browser at "Request Time" simply downloads a pre-built file, which is incredibly fast.
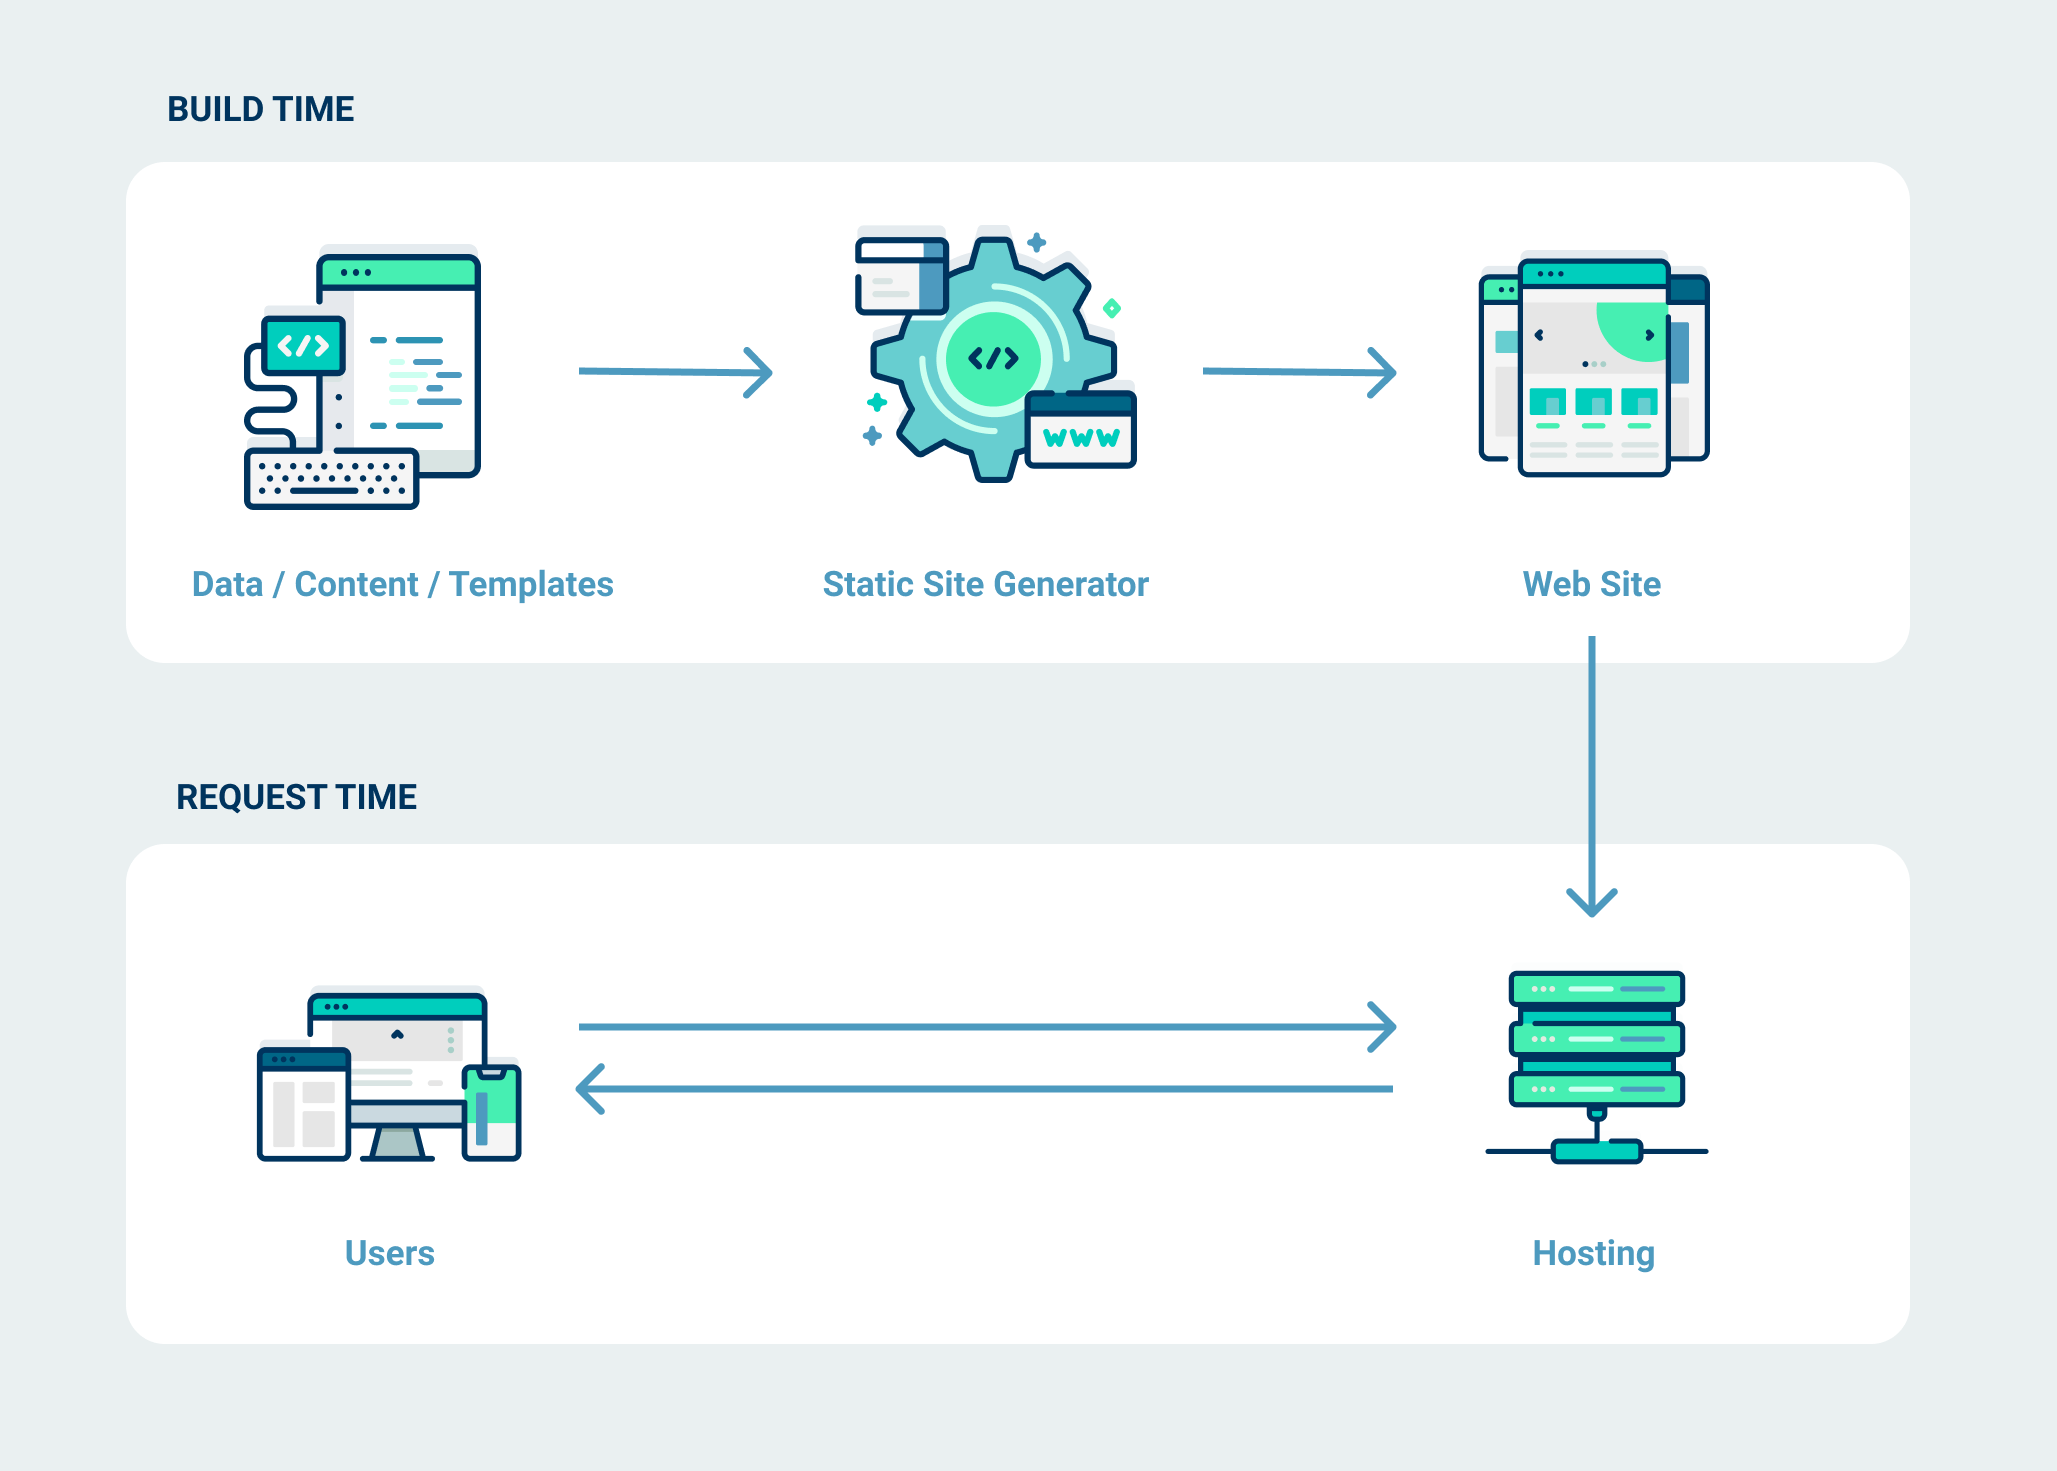
Hugo's Core Process: Content → Templates → HTML
Now, let's zoom in on the "Build Time" box and see exactly how Hugo works. The entire process can be boiled down to a simple, powerful flow: Hugo takes your content, merges it with your templates, and generates the final HTML pages.
A fantastic article on dev.to, "Building a Hugo Theme," provides a mental model that perfectly captures this flow.
This article provides a clear, high-level mental model for how Hugo works. We will focus on the first part which explains the core data flow.
Please read the section titled 'Mental model', starting from the beginning of the article down to just before the 'Providing information' section. The diagram in this section is particularly helpful for visualizing the process.
Let's break down those three components:
1. Content: The Raw Material
This is the information you want to display. In Hugo, content is typically written in Markdown (.md files). This makes writing accessible, even for non-developers, which you'll leverage later when setting up workflows for content teams.
Each content file usually consists of two parts:
- Front Matter: A block of metadata at the very top of the file, like
title,date, or custom parameters. You'll use this extensively to structure data from your Google Sheets. - Body: The main content of the page, written in Markdown.
2. Templates: The Blueprint
Templates are the HTML files that define the structure and layout of your website. They act as blueprints, telling Hugo where to put the content. They live in the layouts directory of your project.
Templates are brought to life using Go's templating language. You create placeholders for your content using variables wrapped in double curly braces, like {{ .Title }} and {{ .Content }}.
When Hugo builds the site, it replaces these variables with the actual data from your content files' front matter and body.
This video clip provides a perfect, concise demonstration of this concept.
Hugo Actually Explained (Websites, Themes, Layouts, and Intro to Scripting)
In this segment from 'Hugo Actually Explained', the presenter shows a simple template and explains how variables like .Content and .Title pull information from your Markdown files into the final HTML.
Watch from 00:23:54 to 00:24:54. This will give you a concrete example of how the template placeholders work.
This principle doesn't just apply to page content. It's also how you'll achieve your goal of using Google Sheets as a CMS. You'll sync your sheet to a data file (like a CSV or JSON file), and then create a template to loop over that data and render it as HTML.
The image below shows a real-world example of a Hugo template reading data from a CSV file and dynamically building an HTML table. This is the same core principle: data → template → HTML.

3. HTML: The Final Product
The final step is the output. When you run the hugo command, the generator performs the magic: it reads all your content files, finds the corresponding template for each one, injects the data, and renders a complete, static HTML file.
All these generated files, along with your CSS, JavaScript, and images, are placed in a single directory called public. This directory contains your entire finished website, ready to be deployed to a web server.
Test your understanding!
Imagine you have a content file content/services/seo-consulting.md with the front matter title: "Expert SEO Consulting". Hugo uses a template at layouts/_default/single.html which contains the line <h1>{{ .Title }}</h1>.
What will be the resulting HTML snippet, and where will the final generated file likely be located?
Show answer
The resulting HTML will be <h1>Expert SEO Consulting</h1>.
The final HTML file will be located in the public directory, likely at public/services/seo-consulting/index.html. Hugo generates "pretty" URLs by creating a folder for the page and placing an index.html file inside it.
Putting It All Together: The Hugo Commands
You now understand the conceptual flow. The two primary commands you'll use to trigger this process are:
-
hugo server: This starts a local development server. It runs the generation process in memory and lets you preview your site in a web browser. Crucially, it watches for file changes and rebuilds the site automatically and instantly, allowing you to see your edits in real-time. This is the command you'll use constantly during development. -
hugo: This is the build command. When you run it, Hugo performs thecontent -> template -> HTMLprocess for your entire site and saves the output to thepublicfolder. You run this command when you're ready to deploy your site.
To see these commands in action, watch the following short clips.
Getting Started With Hugo | FREE COURSE
These two clips will show you what the development and build commands look like in the terminal.
First, watch from 00:12:28 to 00:13:18 to see the hugo server command in action. Then, watch from 00:37:15 to 00:38:06 to see the final hugo build command and the resulting public folder.
Conclusion
This lesson covered the essential theory of how Hugo functions. You are now equipped with the foundational knowledge to begin your journey.
Here are the key takeaways:
- Static vs. Dynamic: Hugo builds your site once, ahead of time, resulting in faster performance and better security compared to dynamic CMSs that build pages on every request.
- The Core Flow: Hugo's process is a three-step transformation: it takes Content (Markdown files with front matter), applies Templates (HTML with placeholders), and generates the final static HTML files.
- The Output: The entire generated website is placed in the
publicdirectory, ready for deployment. - Key Commands: You'll use
hugo serverfor live-preview development andhugoto build the final site for production.
Preview of the next lesson:
In the next lesson, we will move from theory to practice. You will set up your first Hugo project from scratch and run the local development server, giving you a hands-on feel for the process we've discussed today.