Introduction
Welcome to the final module of our course, "Prototyping, Fitting, and Finalization." In our previous lesson, we established a rigorous, data-driven system for documenting test results and design modifications, transforming your tech pack into a powerful analytical library. Today, we put that system to its first real test by creating the initial physical artifact that generates the data: the toile.
A toile, or muslin, is far more than a simple practice run. For a designer with your analytical background, it's best understood as a low-cost, high-information physical experiment. It's the first moment your 2D pattern—a set of hypotheses about fit and form—is translated into a 3D reality. This lesson focuses on constructing a toile for a complex bra design, not for aesthetic perfection, but for an initial structural and fit assessment. We will treat the process as an engineering task, aimed at testing the physics of your design before committing to costly materials.
1. The Toile as an Engineering Prototype
In couture and high-performance costume design, fit is not an accident; it is an engineered outcome. The toile is the primary tool for this engineering process. Its purpose is to test the core structural integrity of the design—how it manages load, behaves in motion, and balances on the body—separate from the distractions of fashion fabric and fine finishing.
The academic paper "Engineering Fit and Comfort in Luxury Bridal and Stage Costumes" provides an excellent framework for this mindset. It reframes garment construction as a technical discipline.
[PDF] Engineering Fit and Comfort in Luxury Bridal and Stage Costumes
This paper formalizes the principles behind creating high-performance garments. It will help us define exactly what we are testing for when we create and assess a toile.
Please read the following sections: Start with the introduction to fit as an engineering task. Focus on the concepts of vertical and horizontal balance, and especially kinetic fit, which is crucial for Bollywood dance choreography. Next, read the section on load distribution. This explains how internal structures like boning and reinforced channels function to support the garment's weight and stabilize its silhouette. Finally, read the section titled Iterative Fitting. This reinforces the idea that fitting a toile is a controlled process with checklists and modification logs—exactly the system we designed in our last lesson.
This paper establishes the "why" behind making a toile. We aren't just checking if the pieces sew together. We are conducting a non-destructive test of the pattern's ability to manage forces and motion. For a complex Bollywood bra, this means assessing:
- Load Distribution: Does the band, not the straps, carry the majority of the weight?
- Structural Stability: Do the cups maintain their shape? Does the boning prevent the band from rolling? Does the bridge (gore) sit flat against the sternum?
- Kinetic Fit: How does the garment behave during a simulated torso twist or arm lift? Does the underwire shift? Do the cups gape?
2. Preparing the Experiment: Toile Materials and Construction
A toile is built for analysis, not for a premiere. Therefore, every choice in its construction should optimize for information gathering, speed, and low cost.
Materials:
The goal is to choose inexpensive materials that mimic the structural properties (specifically, the stretch and stability) of your final fashion fabrics.
- Base Fabric: Instead of silk or delicate lace, use a stable, non-stretch fabric like cotton muslin (calico) or coutil for the frame and bridge. This gives you a clear read on the pattern's baseline shape without the variable of fabric stretch.
- Stretch Panels: For parts of the band that require stretch, use a basic powernet. Have a few different weights on hand if possible, as their firmness dramatically affects fit.
- Cups: If your final design uses cut-and-sew foam, you must use it in the toile. The foam itself is a primary structural component. You can use a less expensive foam for the prototype.
Construction Shortcuts:
- Contrasting Thread: Use a brightly colored thread (like the red thread in the image below) that stands out against your fabric. This makes every seamline, dart, and topstitch clearly visible for analysis.
- External Seams: In some cases, you can even press seam allowances to the outside of the garment to make them easier to access and adjust during a fitting.
- Simplified Hardware: Use basic ribbon for strap placeholders and a spare hook-and-eye closure. You're testing placement and function, not the final look.
- Markings: Transfer all pattern markings clearly. Use a disappearing ink pen to draw the wire line, apex, and balance lines directly onto the fabric.
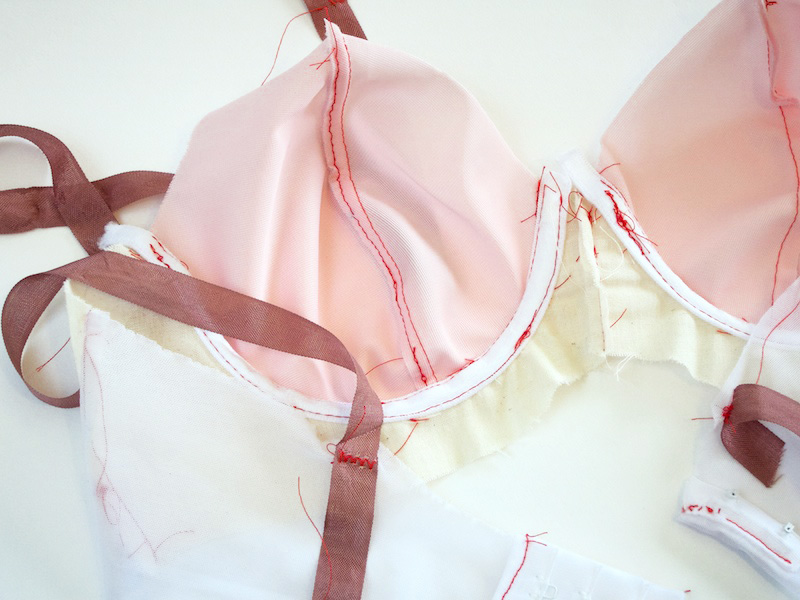
This toile showcases key prototyping techniques. Notice the contrasting red thread for visibility, the raw seam allowances, and the focus on pure construction over finishing. This is a garment built for data collection.
3. Case Study: Iterative Prototyping in Action
The process of developing a complex design is rarely linear. It's a series of experiments, where each toile provides data that informs the next iteration. The following blog post from Cashmerette is a fantastic, transparent case study of this exact process for a complex strapless bra.
Behind the scenes: how to design a strapless bra sewing pattern for ...
This article documents the real-world journey of prototyping, with all its initial failures and gradual refinements. It's a perfect illustration of how to learn from a toile.
Read through the post from the beginning to Step 5. Pay close attention to the visual evolution of the prototypes and the specific problems identified at each stage: Step 1: The initial attempt, simply removing the straps from an existing pattern, results in complete structural failure ("sad puppies"). This is a failed experiment, but it yields critical information: the existing cup structure is inadequate. Step 2: A new hypothesis is tested: introducing cut-and-sew foam with a vertical seam. The result is a "massive improvement," validating the new direction. Steps 3 & 4: Further variables are introduced and tested: adding boning to seams, and tweaking the proportions of the cup panels to refine the shape and lift. Notice how they isolate and test one change at a time. Step 5: After multiple iterations, a "winning prototype" is achieved. The design now passes the initial structural assessment.
This case study is a perfect embodiment of the design cycle. It shows that the first toile is not expected to be perfect. Its value lies in its ability to fail clearly and informatively, guiding you toward a successful solution.
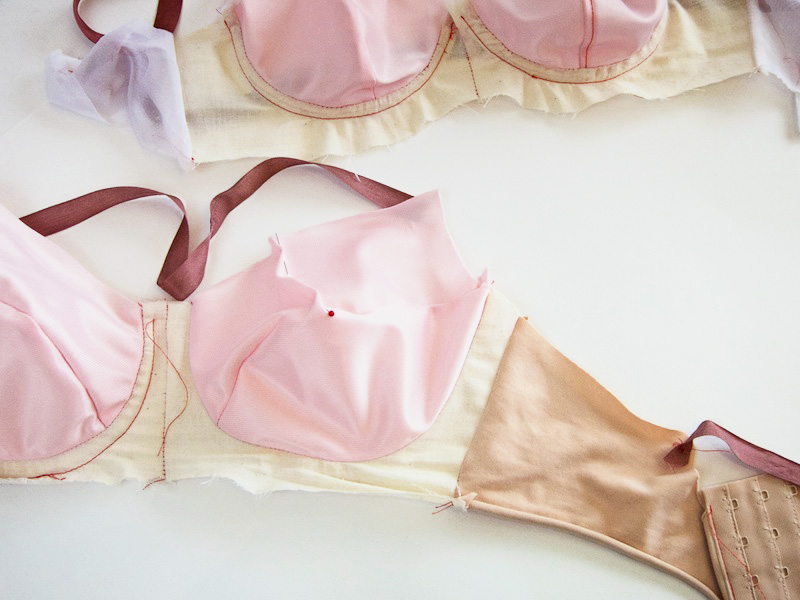
These partial constructions show the iterative nature of toiling. A designer might work on one cup to test a new seam shape while comparing it directly to the previous version on the same band.
4. Practical Application: Constructing and Assessing a Mock-up
Now let's see this process in a video format. The following resource demonstrates not only the construction of a longline bra mock-up but, crucially, the creator's real-time assessment of the first prototype's failures and the successful correction in the second version.
Pattern instructions & mockup sup. 1.1.8
This video provides a tangible example of constructing a toile, identifying its flaws, and iterating to a better solution.
Watch the section from the mock-up assessment. The creator has just finished sewing her first toile. Focus on her diagnostic process: Initial Assessment: She puts on the toile and immediately identifies problems. Problem Diagnosis: She observes "absolutely horrendous lines" and notes that the stretchy side panels are not providing the necessary support. She hypothesizes that the powernet is not firm enough. Experimental Solution: She creates a second toile using the exact same pattern but replacing the failed stretchy fabric with a stable, non-stretch material. Result Validation: The second toile "fits and looks so much better." The cups are now properly supported, and the weird lines are gone. Her hypothesis is confirmed.
This is a textbook example of using a toile as an experimental tool. The "mistake" with the powernet wasn't a waste; it was a necessary test that revealed a critical flaw in her initial material assumption. This finding would be documented in the "Test & Modification Log" we discussed in the last lesson.
Conclusion
In this lesson, we have shifted from the theoretical to the practical, treating the toile not as a sewing exercise but as a core component of your design engineering process. You now understand that its construction is a means to an end: gathering clear, unambiguous data about the structural performance of your pattern.
Key Takeaways:
- The toile is an engineering prototype used to test the physics of a design, including load distribution, stability, and kinetic fit.
- Toile construction prioritizes information over aesthetics, using inexpensive materials that mimic final properties and shortcuts like contrast thread to aid analysis.
- The process is iterative. The first toile is expected to reveal flaws. Its purpose is to fail informatively, guiding the modifications for the next version.
- Assessing the toile is a diagnostic process where you identify problems, form hypotheses about their causes, and plan the experiment for your next iteration.
Next Lesson Preview
You have now constructed your first experimental prototype. The next logical step is to conduct a formal fitting to systematically collect data on its performance. In our next lesson, "Conducting a fitting on a model or dress form," we will learn how to identify key fit issues like band tension, cup gaping, and wire springing, and how to translate those physical observations into precise pattern adjustments.