Introduction
In our last lesson, we covered the fundamentals of configuring a Spring Boot application using application.properties and application.yml files. You learned how to define properties, access them in your code, and—crucially—how to override them using external sources like command-line arguments. This ability to externalize configuration is vital for deploying the same application artifact across different environments.
However, as you know from your system design experience, managing configurations for development, staging, and production involves more than just changing a single database URL or port. Each environment often requires a distinct set of configurations related to logging, database behavior, security, and connections to external services. Relying solely on individual property overrides for this can become unwieldy and error-prone.
This lesson introduces Spring Profiles, the framework's elegant solution for this exact problem. You will learn how to use Spring Boot profiles to manage environment-specific configurations effectively. Profiles allow you to group configurations by environment and switch between them seamlessly, bringing clarity and robustness to your deployment pipeline.
The Core Concept: Segregating Configuration
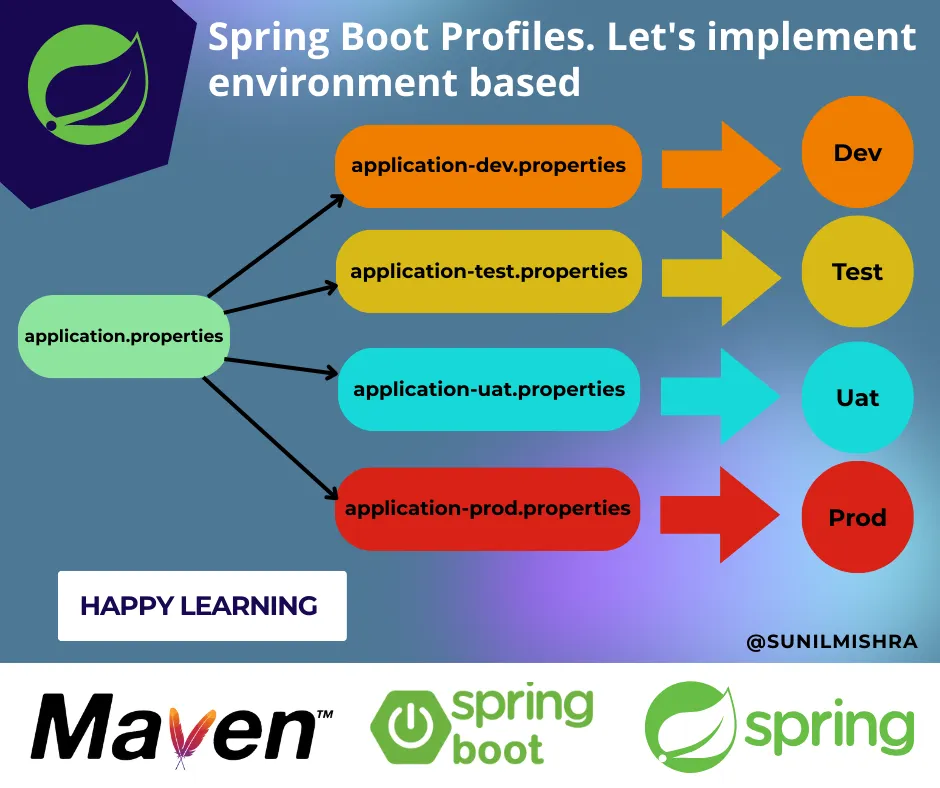
The fundamental idea behind Spring Profiles is to segregate parts of your application configuration and make them available only in certain environments. Instead of having one large configuration file with commented-out sections or complex logic, you can define separate configurations for each target environment, such as dev, staging, and prod.
Spring Boot makes this incredibly intuitive through a file naming convention.
application.yml(or.properties) contains your base configuration—properties that are common across all environments or serve as defaults.application-{profile}.ymlcontains profile-specific overrides. For example,application-dev.ymlholds properties exclusively for thedevenvironment.
When a profile (e.g., dev) is activated, Spring Boot loads both application.yml and application-dev.yml. If a property exists in both files, the value from the profile-specific file (application-dev.yml) takes precedence.
To start, let's watch a short video that introduces the problem Spring Profiles solve and the basic mechanics of how they work.
Spring profiles explained - Microservice configuration with Spring Boot [08]
This video from Java Brains clearly explains the motivation behind profiles and introduces the concept of a 'default' profile that is active when no other profile is specified.
Watch the first 2 minutes and 32 seconds of the video. Focus on the drawbacks of managing property files manually and how profiles are introduced as a solution.
Creating and Activating Profiles
Now that you understand the "why," let's get into the "how."
1. Creating Profile-Specific Files
In your project's src/main/resources directory, alongside your base application.yml, you can create new files following the application-{profile}.yml pattern.
application.yml (Base Configuration)
server:
  port: 8080 # Default port

logging:
  level:
    root: INFO # Default logging level

app:
  message: "Hello from the default profile!"
application-dev.yml (Development Profile)
# Overrides the port for development
server:
  port: 8088


# More verbose logging for development
logging:
  level:
    com.yourcompany: DEBUG


# Profile-specific message
app:
  message: "Hello from the DEV profile!"
application-prod.yml (Production Profile)
# Use environment variables for sensitive data
spring:
  datasource:
    url: ${DATABASE_URL}
    username: ${DATABASE_USER}
    password: ${DATABASE_PASSWORD}


# Stricter logging for production
logging:
  level:
    root: WARN
    com.yourcompany: INFO

app:
  message: "Hello from the PROD profile!"
2. Activating a Profile
Spring needs to be told which profile to activate. If you don't specify one, it uses the default profile (loading only application.yml). There are several ways to activate a profile, but the most common and flexible methods are done externally, without changing your code.
The following resource provides a comprehensive list of activation methods.
How to Use Spring Profiles for Environment Configuration
The article 'How to Use Spring Profiles for Environment Configuration' from OneUptime gives a clear, consolidated list of the different ways to activate a profile.
First, skim the YAML examples under 'Creating Profile-Specific Properties Files' to reinforce what we just discussed. Then, read the section 'Activating Profiles' carefully. Pay special attention to the Command Line Argument and Environment Variable methods, as these are critical for deployment automation.
As highlighted in the article, the most practical way to activate a profile when running your packaged application is via a command-line argument:
# Run the application with the 'prod' profile active
java -jar my-application.jar --spring.profiles.active=prod


# Run the application with the 'dev' profile active
java -jar my-application.jar --spring.profiles.active=dev
This single command-line switch determines which entire set of configurations is loaded, allowing you to deploy the exact same jar file to any environment.
The following video demonstrates creating, configuring, and activating profiles, including the crucial override behavior.
Spring profiles explained - Microservice configuration with Spring Boot [08]
This segment from the Java Brains video provides a hands-on demonstration of creating a new profile and activating it to see the configuration changes take effect.
Watch from 02:32 to 10:26 to see how a profile file is created and activated using spring.profiles.active inside the main YAML file. Then, jump to 11:31 – 13:13 to see the more practical approach of activating the profile via a command-line argument.
A Practical Walkthrough: Dev, Staging, & Prod
Let's ground this theory in a more realistic scenario that reflects a typical microservice deployment pipeline. We'll look at specific configurations for dev, staging, and prod environments.
The next video provides an excellent walkthrough of setting up these three environments with distinct, practical configurations.
Spring Boot Profiles: Manage Dev, Staging & Production Environments Easily
Philipp Lackner's tutorial provides a detailed, practical example of configuring three separate environments with considerations for databases, logging, and security.
Watch from 01:57 to 15:12. You don't need to code along, but focus on the types of configurations chosen for each environment: Development (dev): Notice the hardcoded database credentials, permissive Flyway settings (clean disabled), and DEBUG logging. Staging: See how credentials are now externalized using environment variables and logging is less verbose (INFO). Production (prod): Observe the focus on security—minimal logging (WARN) and restricting sensitive Actuator endpoints.
Here's a summary of the key principles demonstrated:
| Environment | Database Configuration | Logging | Other Considerations |
|---|---|---|---|
| Development | In-memory or local DB. Credentials can be in the file. ddl-auto: update is common. |
DEBUG level for verbose output. |
All dev tools enabled. Security might be relaxed. |
| Staging | Production-like DB, but a separate instance. Credentials from environment variables. | INFO level to see application flow without excessive detail. |
As close to production as possible. |
| Production | Production DB. Credentials must be externalized (env vars, secret manager). ddl-auto: validate. |
WARN or ERROR level to minimize log volume and cost. |
Performance-tuned. Security hardened (e.g., actuator endpoints secured). |
Beyond Properties: Profile-Specific Beans with @Profile
Profiles can do more than just switch property values. They can also determine which Spring beans are created and loaded into the ApplicationContext. This is a powerful feature for implementing different behaviors based on the environment.
A classic use case is providing a mock implementation of a service for local development or testing, while the real implementation is used in production. This is done with the @Profile annotation.
import org.springframework.context.annotation.Configuration;
import org.springframework.context.annotation.Profile;
import org.springframework.stereotype.Service;

// Interface defining the service contract
public interface NotificationService {
    void sendNotification(String message);
}

// A mock implementation that only logs the message
// This bean will only be created if the 'dev' or 'test' profile is active
@Service
@Profile({"dev", "test"})
public class MockNotificationService implements NotificationService {
    @Override
    public void sendNotification(String message) {
        System.out.println("MOCK NOTIFICATION: " + message);
    }
}

// The real implementation that connects to an external service (e.g., Twilio, SendGrid)
// This bean will only be created if the 'prod' profile is active
@Service
@Profile("prod")
public class SmsNotificationService implements NotificationService {
    // ... logic to connect to a real SMS gateway ...
    @Override
    public void sendNotification(String message) {
        // Real implementation sends an SMS
    }
}
Spring will only instantiate the bean whose @Profile annotation matches the active profile. If you run with --spring.profiles.active=dev, the MockNotificationService is used. If you run with prod, the SmsNotificationService is used. This prevents your application from even trying to connect to a real SMS gateway during local development.
The @Profile annotation also supports more complex logic:
@Profile("!prod"): Active if theprodprofile is not active.@Profile("prod & cloud"): Active only if bothprodandcloudprofiles are active.
How to Use Spring Profiles for Environment Configuration
The OneUptime article provides excellent examples of using @Profile on beans and configuration classes, including the use of profile expressions.
Read the section 'Profile-Specific Beans with @Profile'. Pay attention to the syntax for basic usage, profile expressions (like !prod), and applying the annotation to an entire @Configuration class.
An Alternative: Multi-Document YAML Files
While using separate files is the most common approach, Spring Boot (since version 2.4) also supports defining multiple profiles within a single application.yml file. This can be convenient for smaller projects where you want to see all configurations in one place.
You use three dashes (---) to separate the documents within the file.
# Default properties (no profile)
app:
  message: "Hello from the default profile!"
server:
  port: 8080
---


# 'dev' profile configuration
spring:
  config:
    activate:
      on-profile: dev
server:
  port: 8088
app:
  message: "Hello from the DEV profile!"
---


# 'prod' profile configuration
spring:
  config:
    activate:
      on-profile: prod
logging:
  level:
    root: WARN
app:
  message: "Hello from the PROD profile!"
This is functionally equivalent to using separate files. The choice between separate files and a single multi-document file is largely a matter of team preference and project complexity. For larger projects, separate files are often easier to manage.
Using application.yml vs application.properties in Spring Boot
This Baeldung article explains this alternative multi-document structure for both YAML and properties files.
Briefly read sections '2.3. Multiple Profiles' (for .properties files) and '3.3. Multiple Profiles' (for .yml files) to understand the syntax. This is a good-to-know alternative.
Conclusion
In this lesson, we've explored Spring Profiles, a cornerstone feature for building and deploying robust, real-world applications. You are now equipped to manage configurations across multiple environments in a clean, scalable, and maintainable way.
Key Takeaways:
- Purpose: Spring Profiles allow you to group and segregate configurations for different environments like development, testing, and production.
- File-based Convention: The standard approach is to use a base
application.ymlfor shared properties andapplication-{profile}.ymlfor environment-specific overrides. - Activation: Profiles are typically activated externally via the
--spring.profiles.active=...command-line argument or theSPRING_PROFILES_ACTIVEenvironment variable. This allows a single application artifact to be used across all environments. - Property Overriding: Properties defined in an active profile always take precedence over those in the default
application.ymlfile. - Conditional Bean Creation: The
@Profileannotation is a powerful tool for conditionally creating beans, enabling different application behavior (e.g., using mocks vs. real services) depending on the active environment.
With your understanding of application configuration now solidified, we are ready to move on to building the web layer of our application. In the next lesson, we will begin our dive into Spring Web MVC, starting with its core architecture and the DispatcherServlet that handles all incoming HTTP requests.