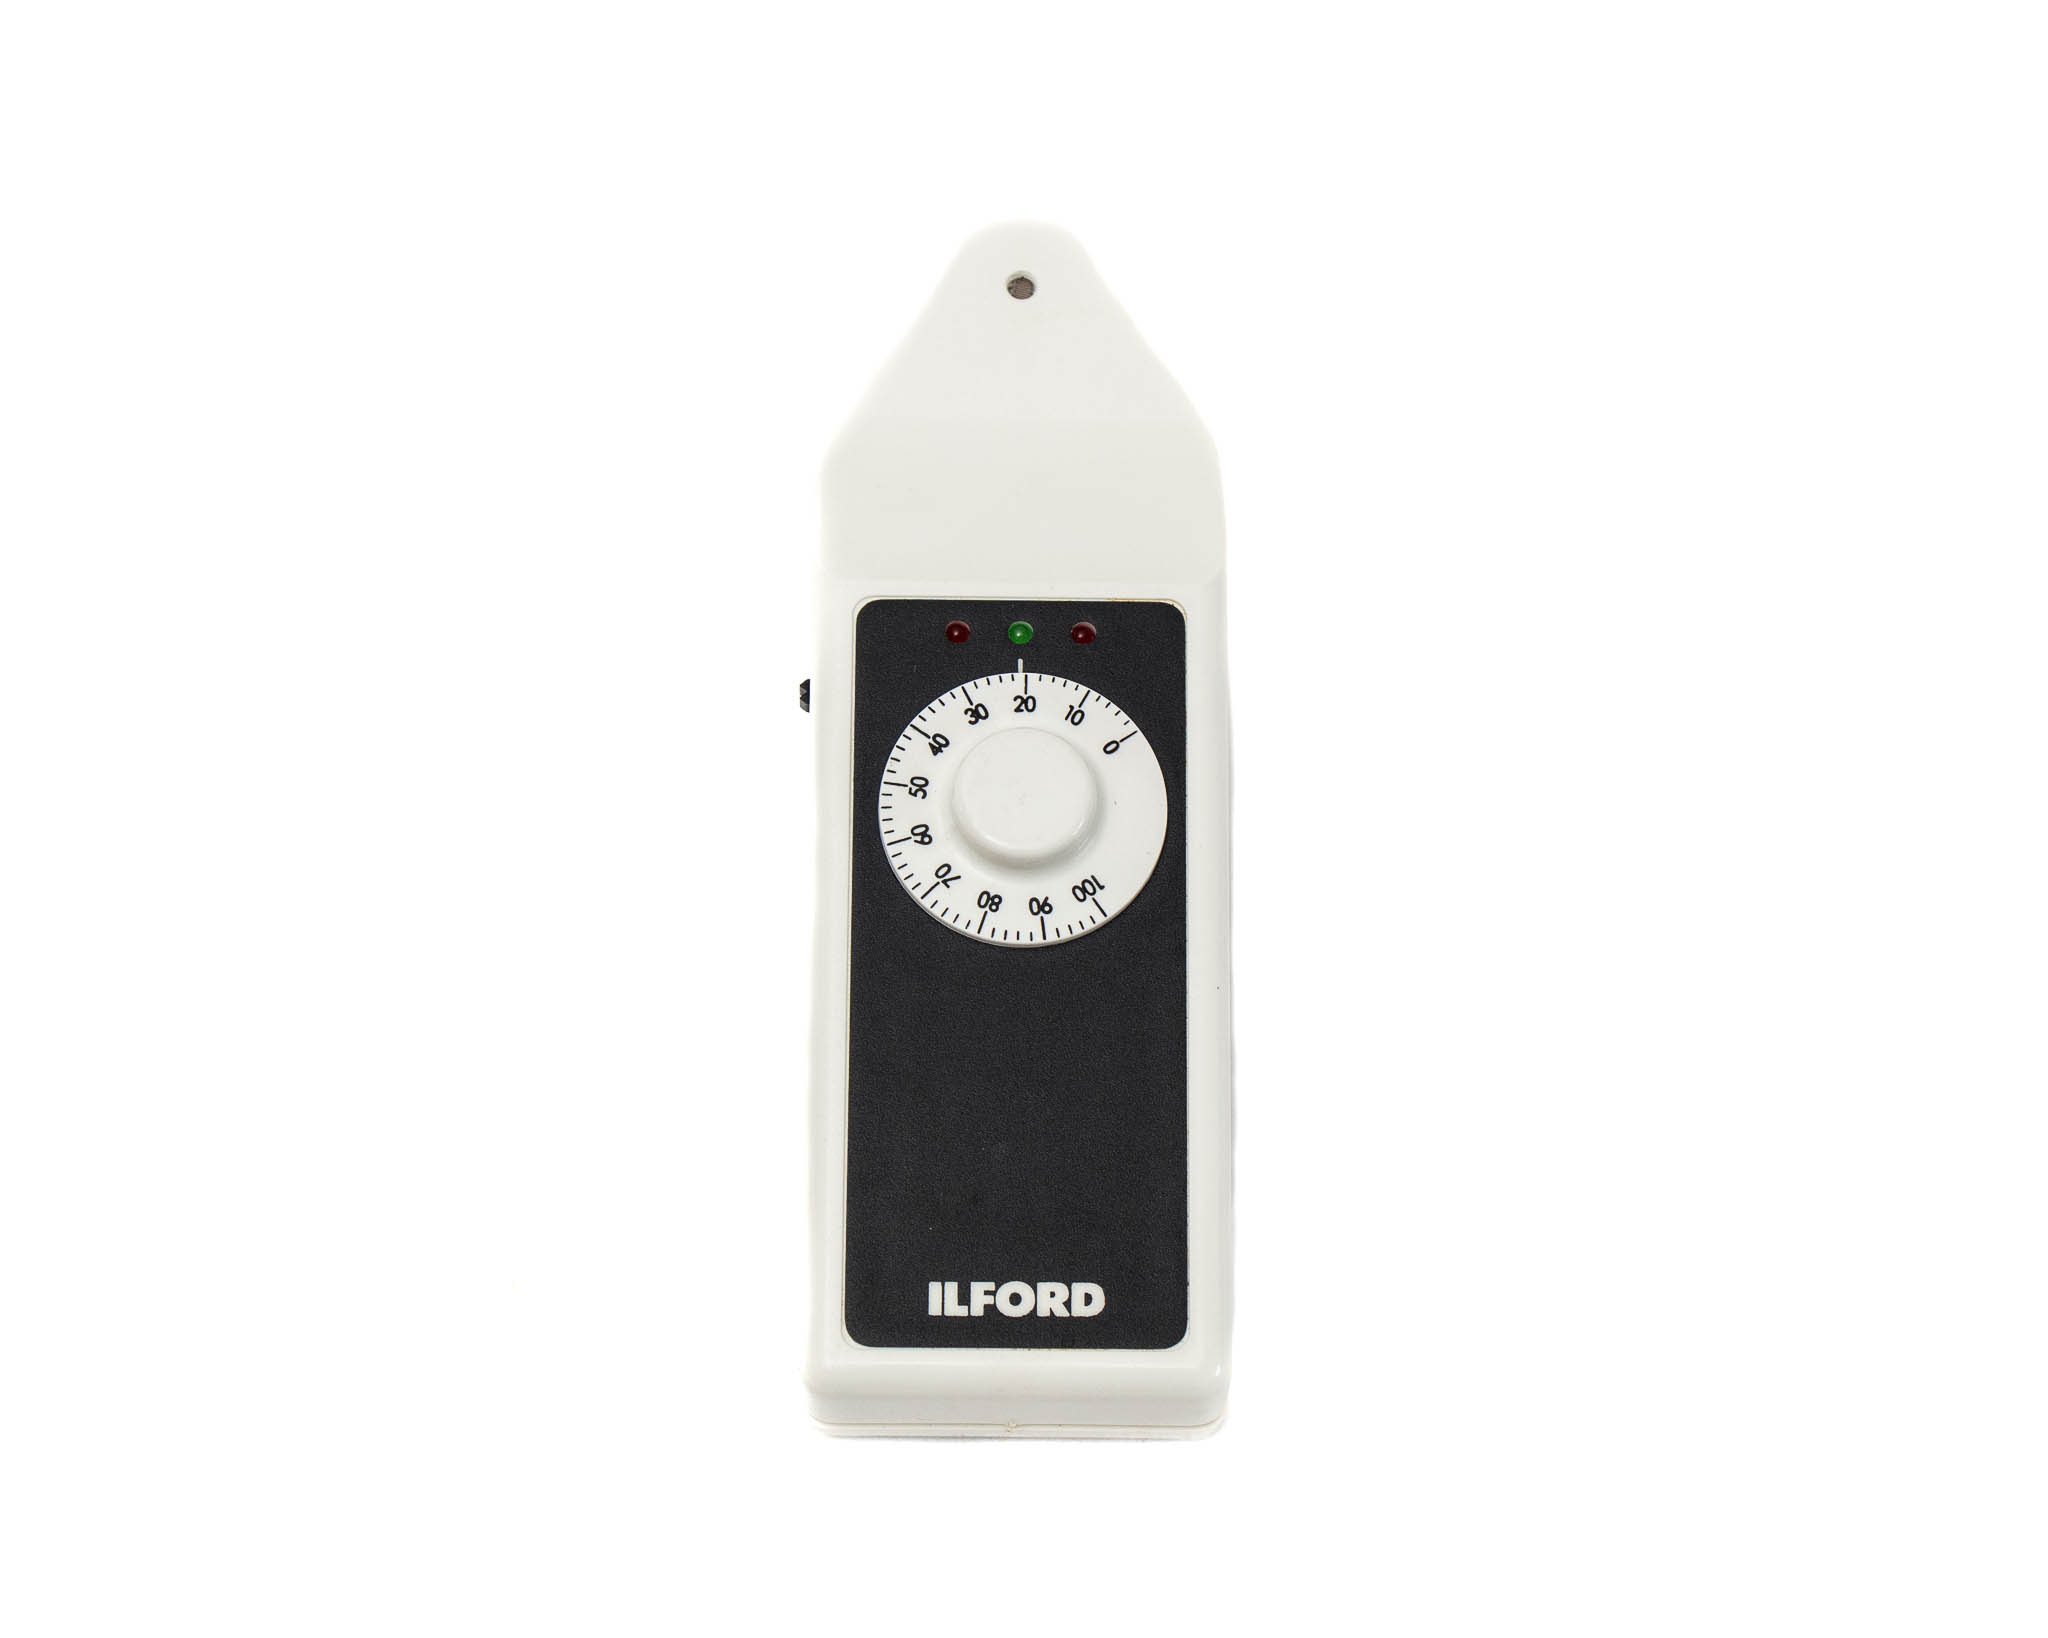
Welcome back. In our previous lesson, we delved into the theoretical underpinnings of the Ilford EM10, exploring the physics of its photoresistor and the logic of its comparator circuit. You now know how it measures light. Today, we bridge that theory with practice. We will perform the single most important procedure for making the EM10 a useful part of your workflow: calibration.
This lesson will guide you through the process of "teaching" your EM10 what a correct exposure looks like for your specific darkroom setup. By calibrating the meter, you are creating a reliable reference that links a measured light intensity to a known good print. This procedure transforms the EM10 from a simple light-measuring device into a predictive tool that will dramatically increase your efficiency, a goal you've expressed particular interest in.
The Goal of Calibration
Calibration is the process of finding the correct number on the EM10's dial that corresponds to a perfect exposure for a given paper, developer, and contrast filter at a set exposure time. Think of it as creating a "golden standard" for your personal printing environment.
The process forges a link between three key variables:
- A specific enlarger setup (lens, aperture, height).
- A chosen exposure time that produces a good print with that setup.
- A specific reading on the EM10 dial.
Once calibrated, you have a target. For any future negative, you can set the dial to your calibration number, set your timer to the calibrated exposure time, and simply adjust the lens aperture until the green light comes on. This will give you a very strong starting exposure, often eliminating the need for test strips entirely.
The Calibration Procedure
The most effective way to calibrate is by using a negative that has already produced a print you are happy with—the 'work print' we created in a previous module serves this purpose perfectly. We will now meticulously recreate the conditions that made that print, and use the EM10 to measure and record the light intensity.
The following guide from "Darkroom Dave" provides an excellent, practical walkthrough of this exact process.
[PDF] using the ilford em 10 exposure monitor - Darkroom Dave
This guide offers a clear, step-by-step procedure for calibrating the EM10 using a previously successful print.
Read the section titled "Calibrating the Ilford EM10 Exposure Monitor". Pay close attention to the sequence of events and the specific advice on where to place the meter's probe.
Let's break down those steps with some added context based on what we already know.
Step 1: Select Your 'Standard' Negative and Print
Choose the work print from Module 3 that you were satisfied with. It should have good highlight and shadow detail, made with a single contrast filter (e.g., Grade 2 or 2.5). Locate the negative that was used to make this print. This pair—the negative and its "correct" exposure data—is your foundation.
Step 2: Recreate the Printing Conditions
This step is about precision. You must set up your enlarger exactly as it was when you made that successful work print.
- Place the standard negative in the carrier.
- Set the enlarger head to the same height to get the same print size.
- Insert the same multigrade filter you used for the work print.
- Set the lens to the same aperture (e.g., f/8) and focus the image.
- Make a note of the exposure time that produced the work print (e.g., 18 seconds). You won't use the timer for calibration, but this time becomes part of your calibrated standard.
Step 3: Measure the Key Area
This is the most critical part of the physical process. As the guide mentions, for negative printing, you must choose where to place the probe.
- Turn off all room lights, including your safelight, to prevent stray light from affecting the meter.
- Turn on the enlarger lamp (using the "focus" or constant-on setting).
- Place the EM10 on the baseboard within the projected image. Position the probe over the brightest area of the image that should still contain detail in the final print.
This area on the baseboard corresponds to the thinnest (least dense) part of your negative where you want to retain texture. In the final print, this will be a deep shadow, but not pure, detail-less black. By calibrating to this spot, you are anchoring your exposure to the principle of ensuring adequate shadow detail.
Step 4: Set the Calibration Dial
Now you will "teach" the meter.
- With the probe in position on the key shadow area, turn on the EM10.
- Do not touch the enlarger settings.
- Slowly rotate the dial on the EM10 until the green LED lights up. You may see the red LEDs light up as you pass the correct point. Fine-tune the dial until only the green light is illuminated.
- The number the dial is pointing to is your calibration number.
You have now successfully calibrated your EM10 for that specific paper, developer, and contrast grade combination.
Calibrating for Multiple Contrast Grades
As we discussed in the last lesson, the spectral sensitivity of the CdS cell in the EM10 is not the same as that of your multigrade paper. When you change contrast filters, you change the color of the light hitting both the paper and the meter, but they don't respond in a perfectly parallel way.
Therefore, you must perform a separate calibration for each contrast grade you plan to use.
[PDF] EM10 Instructions - Ilford Photo
The official Ilford manual confirms this necessity and describes the general procedure.
First, quickly review section 2.2, which describes the same basic calibration process we just covered. Then, read the first half of section 5 on using the meter with black and white papers. This explicitly states that "a separate calibration will be required for each of the MULTIGRADE filters."
The process is simple. Leaving your enlarger setup untouched from the initial calibration (same negative, height, aperture):
- Swap the contrast filter from, for example, Grade 2 to Grade 4.
- Place the EM10 probe on the exact same key shadow area.
- The green light will likely be off now because the new filter has a different density and color.
- Re-adjust the dial (and only the dial) until the green light is on again.
- This new number is your calibration for Grade 4.
For an efficient workflow, you should do this for the filters you use most often—perhaps Grades 0, 2, and 4.
Recording Your Data
Your calibration numbers are valuable data. Given your engineering background, you'll appreciate the importance of systematically recording this information. Create a calibration table in a notebook or on a chart you can post in your darkroom.
Here is a sample table:
| Paper | Developer | Contrast Filter | Standard Time | Calibration Number |
|---|---|---|---|---|
| Ilford MG RC Pearl | Ilford Multigrade | Grade 2 | 18s | 50 |
| Ilford MG RC Pearl | Ilford Multigrade | Grade 4 | 18s | 58 |
| Ilford MG RC Pearl | Ilford Multigrade | Grade 0 | 18s | 45 |
This table now serves as your master reference. The "Standard Time" is the exposure duration you will use for future prints made with this calibrated setup.
Conclusion
You have now transformed your EM10 from a generic device into a precision instrument customized for your darkroom. By linking a known-good print to a specific light intensity measurement, you have established a powerful and repeatable standard.
Key Takeaways:
- Calibration involves using a successful 'work print' and its negative to set a reference on the EM10.
- The procedure requires recreating the exact enlarger settings of the good print, placing the meter probe on a key shadow area, and adjusting the EM10 dial until the green LED is lit.
- The resulting number on the dial is the calibration number for that specific paper and contrast filter.
- Due to differences in spectral sensitivity, a separate calibration must be performed for each contrast grade you intend to use.
- Systematically recording your calibration numbers in a table is crucial for an efficient workflow.
Next Lesson Preview:
With your EM10 now calibrated, the next logical step is to put it to work. In our next lesson, you will learn how to use these calibration numbers to determine the correct base exposure for a completely new negative, allowing you to bypass the traditional test strip process and move directly to a confident first print.