Hello! Welcome to the final lesson in our first module, "Foundations of Visual Communication."
In our last session, you did a fantastic job bringing together images and text to create a cohesive digital poster for "Aura Fest." You now have a complete design sitting in your Figma file, ready to be shared. This leads us perfectly to today's topic, which is the crucial final step in any design project: getting your work out of Figma and into the world.
Today, you will learn how to export your designs from Figma in appropriate formats and sizes for web use, specifically JPG, PNG, and SVG. Understanding which format to use and when is a vital skill for any graphic designer, as it directly impacts how your designs look online, how quickly they load, and how they can be used.
1. Choosing the Right Tool: Understanding Web File Formats
Before we export, we need to answer a critical question: which file format should I choose? The answer depends on what you're exporting and where it will be used. The three most common formats for web design are JPG, PNG, and SVG. They each have distinct strengths and weaknesses.
The main differences come down to three key concepts:
- Raster vs. Vector: Raster images (like JPG and PNG) are made of pixels. When you scale them up, they lose quality and look blurry. Vector images (like SVG) are made of mathematical paths. They can be scaled to any size—from a tiny icon to a huge billboard—with no loss of quality.
- Lossy vs. Lossless Compression: Compression reduces file size. Lossy compression (JPG) permanently removes some data to make files much smaller, which can slightly reduce quality. Lossless compression (PNG) reduces file size without losing any data, preserving perfect quality but resulting in larger files.
- Transparency: Some formats (PNG, SVG) can have transparent backgrounds, allowing them to be placed over different colors or images. Others (JPG) cannot and will always have a solid background.
Let's get a clear overview of when to use each format.
Master Figma compression and exports: tips for smaller file ...
The article 'Master Figma compression and exports' provides an excellent summary of the most common file formats and clear recommendations for their use. This will help you build a mental model for making quick, effective decisions.
Please read the following two sections: 'What file format is the best for Figma exports?': Focus on the descriptions for JPG, PNG, and SVG. 'Image file format summary and recommendations': Pay close attention to the specific rationale for using SVG for vector images and PNG for transparency. This will give you a practical guide for choosing the right format for the job.
To go a bit deeper, the official Figma documentation provides precise details on how Figma handles each format.
Now, let's explore the technical details in Figma's official help center. Understanding this will clarify why certain options are available for different formats.
Read the sections titled 'PNG (Portable Network Graphics)', 'JPG (Joint Photographic Group)', and 'SVG (Scalable Vector Graphics)'. As you read, try to fill in this mental checklist for each format: Is it raster or vector? Does it use lossy or lossless compression? Does it support transparency? What is its primary use case?
To summarize, here is a quick reference table based on what you've just read:
| Feature | JPG (Joint Photographic Group) | PNG (Portable Network Graphics) | SVG (Scalable Vector Graphics) |
|---|---|---|---|
| Type | Raster (pixels) | Raster (pixels) | Vector (paths) |
| Compression | Lossy (smaller file size) | Lossless (perfect quality) | Lossless |
| Transparency | No | Yes (Alpha transparency) | Yes |
| Best For | Photographs, complex images for web pages where file size is a priority. | Logos, icons, and graphics with text where transparency or perfect quality is needed. | Logos, icons, and illustrations that need to be scaled to any size without quality loss. |
2. The Export Process in Figma
Now that you understand the why, let's focus on the how. Exporting in Figma is a straightforward process.
- Select What to Export: Click on the layer, group, or frame you want to export in the Layers panel on the left or directly on the canvas. To export your whole poster, you should select its main Frame.
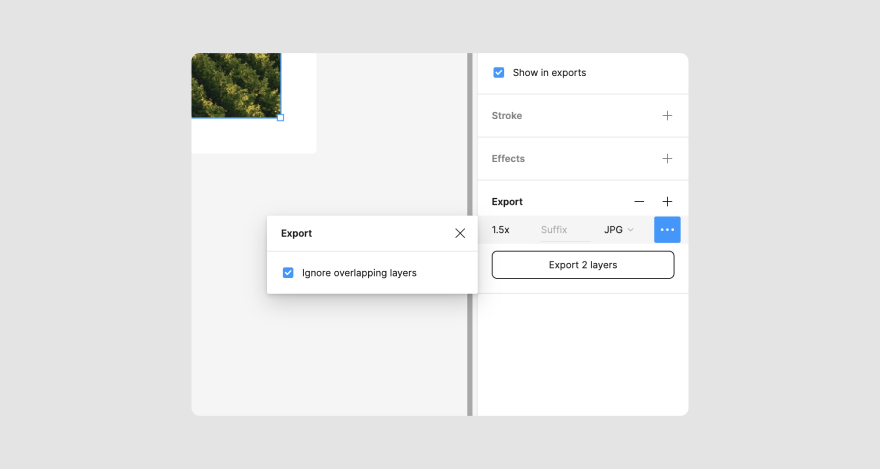
- Open the Export Panel: With your item selected, scroll to the very bottom of the Design panel on the right. You will see a section titled Export. Click the
+icon to add an export setting.

-
Choose Your Settings:
- Format: Use the dropdown to select JPG, PNG, or SVG.
- Scale (Size): You can export at
1x(the original size),2x,3x, etc. Exporting at2xcreates an image twice the resolution, which will look much sharper on high-density screens (like modern smartphones and "Retina" displays). You can also specify a fixed width (e.g.,800w) or height (e.g.,1000h). - Suffix: You can add text to the end of your file name here (e.g., adding
@2xfor scaled-up assets).
-
Export: Click the "Export [layer name]" button. Figma will prompt you to choose where to save the file on your computer.
Let's see a quick video demonstration of the process.
Create a Vector Icon & Export as SVG in Figma | Beginner-Friendly Tutorial
This brief clip from CryeStudio Design Tutorials shows the export process for an SVG icon. The steps are the same for any format.
Watch from 01:23 to 02:03. Notice how the user selects the object, navigates to the export panel at the bottom right, chooses the format, and clicks the export button.
3. Practical Exercise: Exporting Your Poster
It's time to apply this to the "Aura Fest" poster you designed in the last lesson. Open that Figma file and follow along.
Scenario 1: Exporting for a Social Media Post
You need to post your poster on Instagram. The image needs to load quickly but also look sharp on modern phone screens.
- Choice: JPG is a great choice because its lossy compression will result in a smaller file size, which is ideal for social media feeds.
- Action:
- Select the main Frame of your poster.
- In the Export panel, click
+. - Set the format to JPG.
- Click the
+again to add a second export setting. - For this second setting, change the scale from
1xto2xand add@2xin the Suffix field. - Click the "Export Frame..." button. Figma will export two files:
YourFrameName.jpgandYourFrameName@2x.jpg. The@2xversion is the one you'd ideally use for a high-quality post.
Scenario 2: Exporting a Logo for the Website
The festival website needs a scalable version of the "Aura Fest" title to use as a logo in the header.
- Choice: SVG is the only correct choice. As a vector format, it will remain perfectly crisp at any size and its file size will be tiny.
- Action:
- On your poster, click to select only the text layer containing "Aura Fest".
- In the Export panel, click
+. - Set the format to SVG.
- Click the "Export..." button and save your file as
aura-fest-logo.svg.
Scenario 3: Exporting a Graphic with a Transparent Background
You want to place the festival name over different background photos on a webpage, so you need the text with a transparent background.
- Choice: PNG is perfect for this. A JPG would add a solid-colored box around your text, but a PNG will preserve the transparency.
- Action:
- In the Layers panel, find the background image or color layer of your poster and click the "eye" icon next to it to hide it. You should now see your text on the gray checkered background, which indicates transparency.
- Select the "Aura Fest" text layer (or a group containing all the text you want).
- In the Export panel, click
+. - Set the format to PNG.
- Click the "Export..." button and save your file as
aura-fest-transparent.png.
Test your understanding!
You have designed a set of 5 custom icons for a mobile app's navigation bar. The icons are simple shapes, need to be sharp on all screen sizes, and must have transparent backgrounds. Which format (JPG, PNG, or SVG) is the best choice for exporting them, and why?
Show answer
SVG is the best choice. Here's why:
- Scalability: As vector graphics, SVGs can be scaled to any size without losing quality. This is essential for adapting to the many different screen resolutions on mobile devices.
- Transparency: SVGs inherently support transparent backgrounds.
- File Size: For simple shapes like icons, SVGs typically have a very small file size, which helps with app performance.
Conclusion
Congratulations on completing the first module of your graphic design journey! You've gone from setting up an account to creating and exporting a finished design. Getting your work out of the design tool and into a usable format is a fundamental skill, and now you have it.
Here are the key takeaways from today's lesson:
- Use JPG for Photos: It's best for complex raster images like photographs where small file size is important for web performance.
- Use PNG for Transparency: It's the go-to for graphics that need a transparent background or require perfect, lossless quality.
- Use SVG for Scalability: It is the standard for logos, icons, and any vector illustration that needs to look crisp at any size.
- Export at 2x: For raster formats (JPG, PNG), always consider exporting a
2xversion to ensure your designs look sharp on high-resolution displays.
You now have the foundational skills to navigate Figma and bring a design from concept to a shareable file. In our next module, we'll shift our focus from the tool to the theory, diving deep into the timeless Core Principles of Design. We'll start by exploring the fundamental building blocks of any visual composition: line, shape, form, texture, and space. This will equip you with the vocabulary and understanding to make more intentional and effective design decisions.
See you in the next lesson