In the previous lesson, you took a significant step by defining the fundamental data structures for your multitool platform: the Tool and Category data types. This gave your app a blueprint for its long-term memory. However, we ended with a cliffhanger—that for a fixed list like categories, there might be a more efficient method than using a full-fledged data type.
Today, we'll explore that better method. This lesson is all about Option Sets, a powerful Bubble feature designed specifically for managing predefined, static lists. You will learn what Option Sets are, why they are often superior to data types for lists like categories, and how to implement them. By the end, you'll refactor your database to use a Category Option Set, making your app's foundation faster and better organized.
Data Types vs. Option Sets: The "Why"
Before we build, it's crucial to understand the strategic choice you're making. In Bubble, both Data Types and Option Sets can hold a list of things. So, when should you use which?
-
Data Types (like the
Tooltype you created) are for dynamic data. This is information that will be created, modified, and deleted regularly, often by your app's users. Think of blog posts, products in a store, or the tools themselves on your platform. This data lives in your app's database and is queried when needed. -
Option Sets are for static data. This is a fixed list of choices that you, the app administrator, define. They rarely change. Think of days of the week, user account types (Admin, Member, Guest), or, in our case, tool categories. This data is not stored in the main database but is bundled with the application's code, making it load much faster.
The official Bubble channel has a fantastic video that breaks down these concepts.
How to Use Option Sets | Bubble Tutorial
This tutorial from Bubble provides a clear introduction to Option Sets, their advantages, and a practical example of how they are used for categories.
First, watch the introduction from the beginning to understand the core purpose of Option Sets. Next, jump to the section that summarizes the key considerations for using them, paying close attention to the points about speed and deployment. Finally, watch the practical example of using an Option Set for recipe categories. This directly mirrors what we are about to do for your tool categories.
Making the Strategic Choice for Scalability
For your goal of building a scalable platform, choosing the right tool for the job is essential. While you could use a Data Type for categories, the video you just watched highlights why an Option Set is better for performance. But there are more nuances to consider.
This next video from Coaching No Code Apps offers a masterclass in the strategic differences between the two, which will help you make these decisions with confidence in the future.
Option Sets in Bubble (are you using them correctly?)
This video dives deep into the strategic pros and cons of Option Sets vs. Data Types, helping you understand the architectural implications of your choice.
First, focus on the table that breaks down the key differences. This is a dense but incredibly valuable section that covers user-generated content, privacy rules, and deployment requirements. Then, watch the final section that provides a "rule of thumb" with specific use cases. Notice where "Categories" falls—it's a good use case, but with a caution about the size of the list.
Based on that video, let's confirm that an Option Set is the right choice for your project:
- Who creates categories? You, the admin. Users won't be adding their own. This fits Option Sets perfectly.
- Is the data sensitive? No, category names are public. The lack of privacy rules on Option Sets is not an issue here.
- How large will the list be? You'll likely have a few dozen categories at most. As the video advises, this is a great size for Option Sets. If you were building a marketplace with thousands of niche categories, a Data Type might become easier to manage.
For your multitool platform, the choice is clear: Option Sets will give you better performance and a cleaner data structure.
Hands-On: Building the 'Category' Option Set
Now, let's put this theory into practice. You'll create an Option Set for your tool categories.
The process is very similar to creating a data type. You navigate to the Data tab, but instead of staying on "Data types," you'll click over to the Option sets tab.
How to Use Option Sets in Bubble.io (Complete Guide)
This guide from Building with Bubble provides a detailed walkthrough of creating and configuring Option Sets. We will follow its steps.
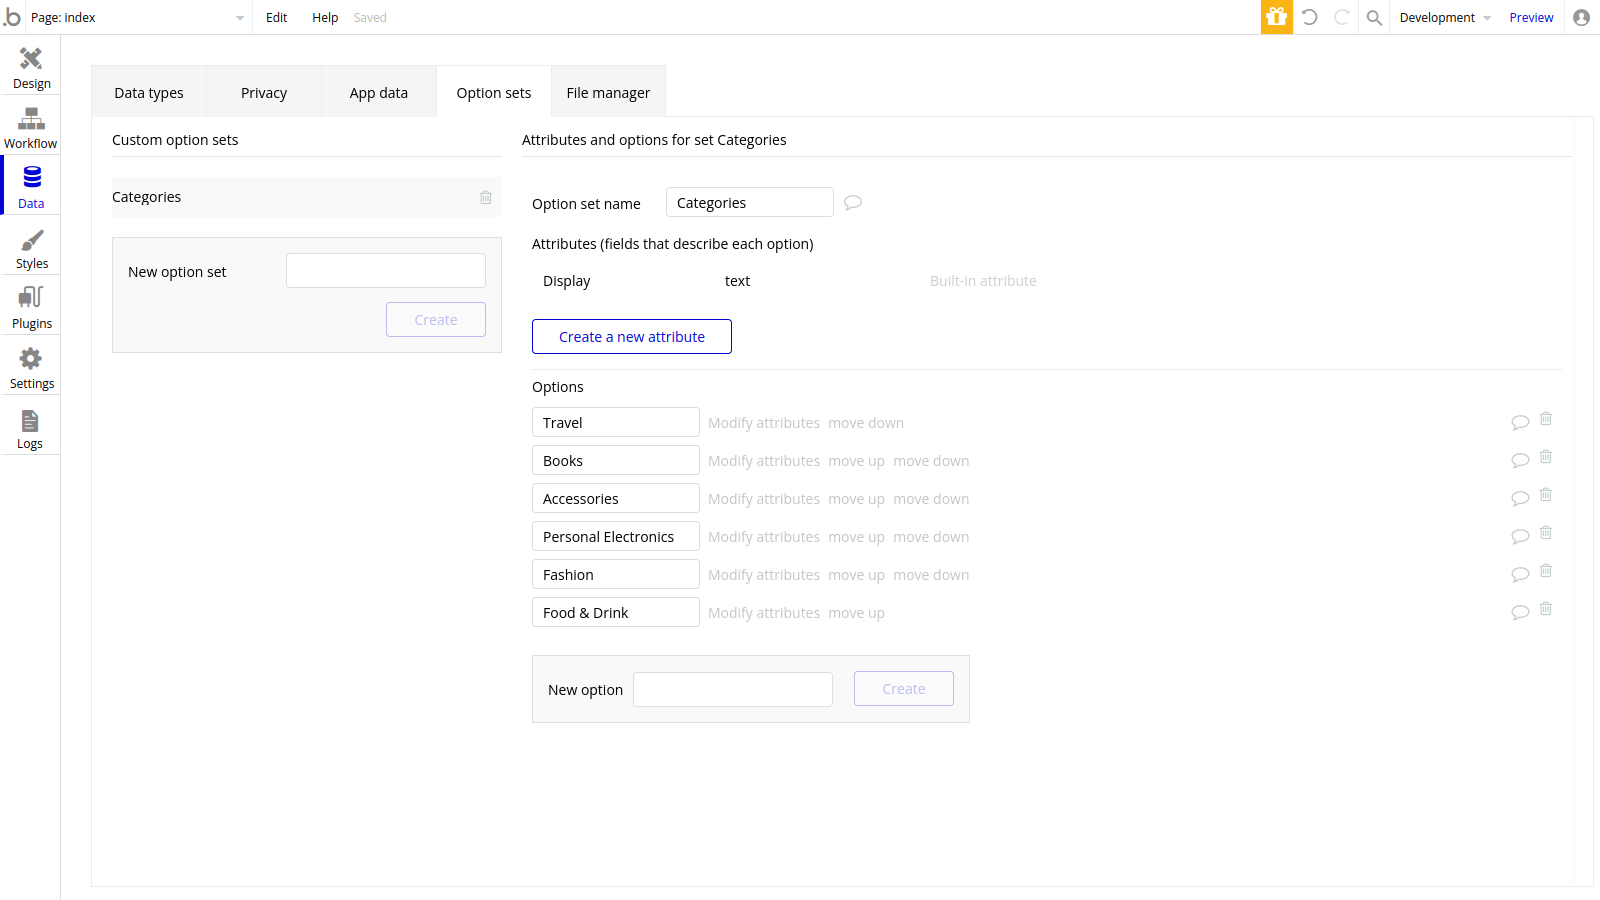
First, read the section on creating option sets. Follow these steps in your Bubble editor to create a new Option Set called Category. Once created, add a few options that would be relevant for your multitool platform. For example: Text Tools, Calculators, Converters, Image Tools, Generators. Next, read about modifying attributes. Attributes are like fields for your options. This is a powerful feature. Let's add an attribute to our Category Option Set. Click "Create a new attribute", name it Icon, and set its type to image. This will allow you to associate a unique icon with each category later.
Your Option Set editor should now look something like this, showing your list of categories and the ability to modify their attributes.
Refactoring Your 'Tool' Data Type
The final and most important step is to connect this new Option Set back to your Tool data type. In the last lesson, you created a field on Tool named Category which linked to the Category data type. We need to update this to link to our new Category option set.
- Navigate back to the Data tab and select the Data types sub-tab.
- Click on your
Tooldata type. - Find the
Categoryfield you created previously (its type will beCategory). Delete this field. Since we haven't added any data yet, this is a safe operation. - Now, click "Create a new field".
- Name the new field
Category(we can reuse the name). - For the "Field type," click the dropdown. Scroll past all your custom data types until you find the section for Option Sets. Select your
Categoryoption set. - Ensure the "This field is a list" checkbox is not checked, as a tool will only belong to one category. Click "Create".
You have now successfully refactored your database. A Tool is now officially linked to an option from your Category option set. The following video segment shows this exact process of linking a data type to an option set.
How to Use Option Sets | Bubble Tutorial
Watch this short clip to see how an Option Set is used as a field type within a custom data type.
Watch from this section where a favorite color field is added to the User data type, with the field type being set to the Colors option set. This is exactly what you just did for your Tool.
Conclusion
In this lesson, you moved beyond simply creating data structures and started making strategic architectural decisions. You've learned one of the most important structural concepts in Bubble: when to use an Option Set versus a Data Type.
Here are your key takeaways:
- Option Sets are for static, predefined lists (like your tool categories). They are fast, globally accessible, and keep your database clean.
- Data Types are for dynamic information that users will create and change (like the tools themselves).
- The choice between them depends on list size, whether users can add to the list, and data sensitivity. For your categories, Option Sets are the optimal choice.
- You have successfully created a
CategoryOption Set and refactored yourTooldata type to use it, establishing a robust and scalable foundation for your app.
Now that your data architecture is sound, the next step is to breathe some life into it. In our upcoming lesson, we will begin populating the database with some sample tools, linking them to the categories you've just defined.