Welcome back! In our last session, you mastered conditional visibility, creating separate header experiences for logged-in and logged-out users. This was a crucial step in making your platform feel personalized and laid the groundwork for offering special features to registered members.
Today, we're going to build the database foundation for one of those key features: a "favorites" system. Before a user can click a button to "favorite" a tool, your application's database needs a place to store that information. This lesson is all about preparing that structure. By the end of our session, you will have successfully modified Bubble's built-in User data type to include a dedicated list for each user's favorite tools.
Your App's Filing System: Data Types and Fields
Every app needs a database to store and retrieve information. In Bubble, this database is organized into Data types and Fields.
- Data Types are like the main folders in a filing cabinet. You've already created some, like
ToolandCategory, to organize your platform's content. - Fields are like the individual pieces of paper inside each folder, holding specific information. For your
Tooldata type, you likely have fields forName,Description, andCategory.
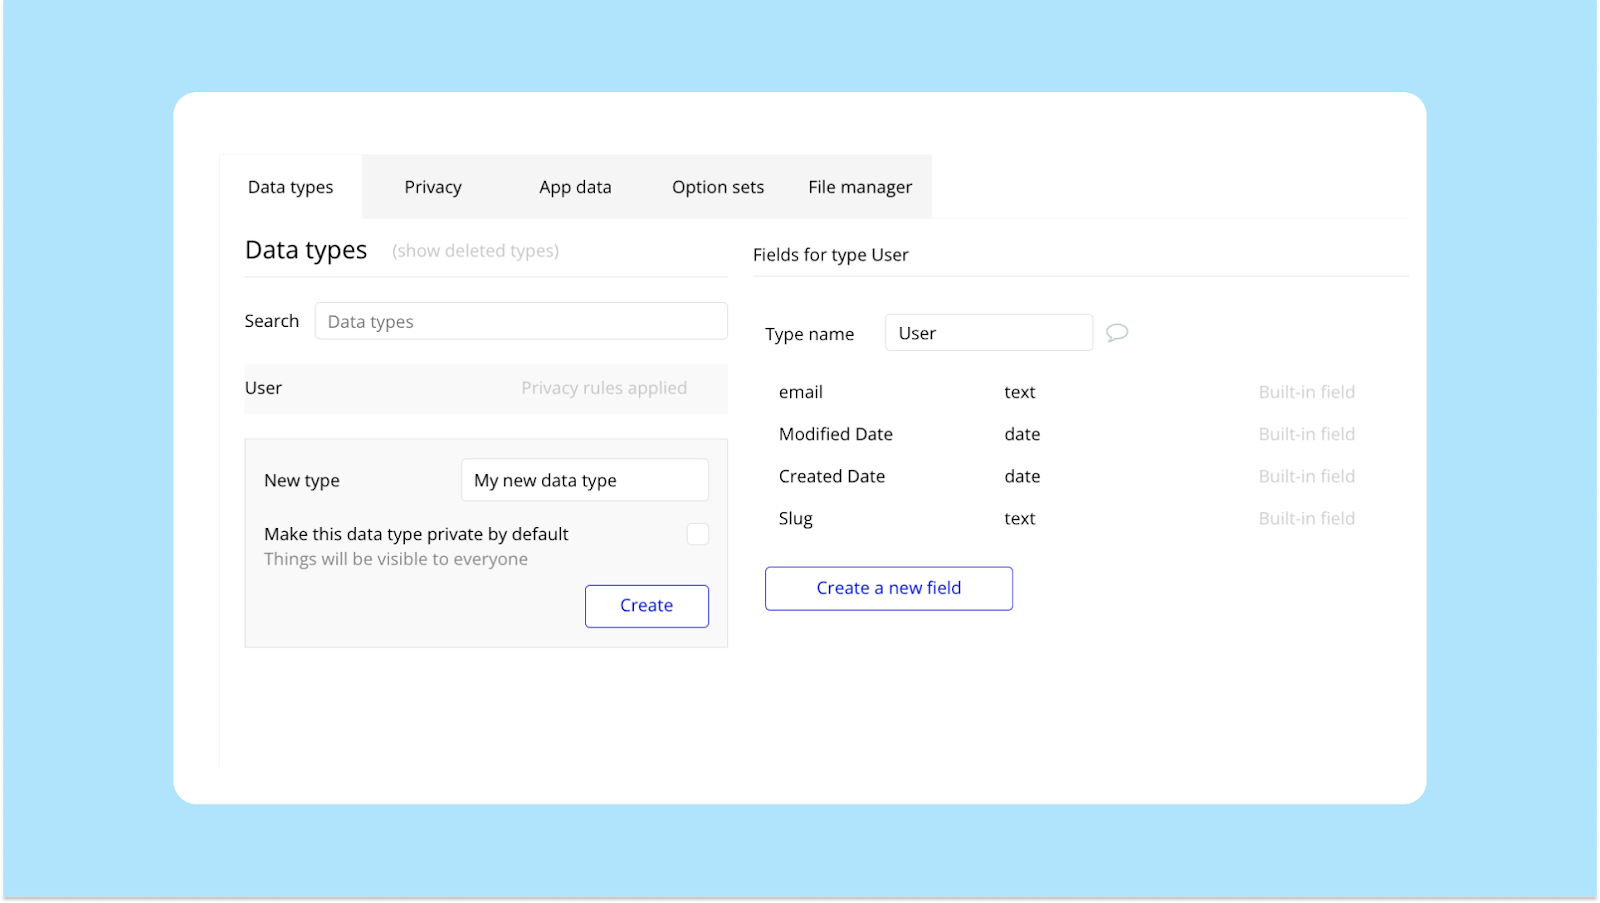
Bubble provides a special, pre-built data type called User. This is where all information about your app's registered users is stored. By default, it handles essentials like email and password, but its real power comes from the fact that you can add your own custom fields to it.
This short video provides an excellent overview of how data types and fields work, specifically mentioning the customizable User type.
Bubble.io Database Guide for Beginners (for Scale & Performance)
This guide from Coaching No Code Apps explains the fundamental concepts of Bubble's database structure.
Watch the first segment, which introduces data types and fields. Then, jump to the section where the presenter discusses adding custom fields to the built-in User type.
Creating Relationships with Lists
So, how do we connect a User to their favorite Tools? We could add a text field to the User and just store the names of the tools. However, this is inefficient and inflexible. What if a tool's name changes?
A much better way is to create a direct link between the data types. We can create a field on the User data type whose "Field type" is Tool. This tells Bubble that the field won't store text or a number, but a reference to an actual entry in the Tool data type.
Even better, we can configure this field to hold a list of Tools. This creates a "one-to-many" relationship: one user can have many favorite tools. This is the core technique for building features like shopping carts, tagged posts, and, of course, favorites lists.
The Bubble documentation explains this concept clearly.
This article from the official Bubble manual is the definitive guide to structuring your database.
Please read the following sections: Start with the explanation of Fields to understand the different kinds of data you can store. Next, focus on the crucial section, Storing a list of values. This is exactly what we need for our favorites feature. Finally, review Custom field types and Creating fields to see how these concepts are put into practice.
Your Task: Add the "Favorites" Field (15 minutes)
Now it's time to apply this to your app. You will add a new field to your User data type that will hold a list of each user's favorited tools.
Objective: Create a field on the User data type named Favorite Tools that is a list of Tools.
Steps:
- Navigate to the Data tab in your Bubble editor.
- In the "Data types" list, click on the User type. You'll see the list of its current fields.
- Click the Create a new field button. A dialog box will appear.
- Configure the new field as follows:
- Field name: Type in
Favorite Tools. - Field type: Click the dropdown and select your
Tooldata type. (You created this in Module 2). - This field is a list (multiple entries): Check this box. This is the most important step! It transforms the field from holding a single tool to a list of many tools.
- Field name: Type in
- Click the CREATE button.
The dialog should look very similar to this example, just with "Products" replaced by "Tools".

You have now successfully modified your database schema. Every user in your app, from this point forward, will have a personal, empty list ready to be filled with their favorite tools.
This quick video clip demonstrates the exact action of creating a field that is a list of another data type.
Mastering the Bubble Database: A Beginner's Guide | Bubble.io Tutorials
This clip from PlanetNoCode's guide shows the process of making a field a list.
Watch the short segment from creating a list field to see a live demonstration of checking the "This field is a list" box.
Looking Ahead: The Workflow
Having the field is only half the battle. How do we add or remove tools from this list? That's a job for a workflow. While we will build this in detail in the next lesson, it's helpful to see the high-level logic now.
This article from RapidDev briefly outlines the entire process. You've already completed the first step!
How to build a favorites list in Bubble | RapidDev
This guide provides a concise overview of the setup and logic for a favorites feature.
Read the section on Core Setup, which will confirm the step you just completed. Then, glance over the Button Logic section. You don't need to implement this yet, but notice the logic: the workflow will check if a tool is already in the user's list. If it is, it removes it; if not, it adds it.
This simple "add/remove" logic is what we will construct in our next lesson, connecting a "favorite" icon on your tool pages directly to the Favorite Tools list you created today.
Conclusion
Fantastic work. Today, you moved from designing the user interface to structuring the underlying database that powers it. This is a fundamental skill in application development, and you've implemented it perfectly for one of your core user-centric features.
Here are the key takeaways:
- The
Userdata type is your central hub for storing all information related to a specific user. - You can customize the
Usertype by adding your own fields. - A field's type can be another data type, creating a powerful relationship between different kinds of data in your app.
- By checking "This field is a list", you enable one-to-many relationships, allowing one
Userto be connected to manyTools.
In our next lesson, we will build on this foundation. You'll create the user-facing "favorite" button and the workflow that populates the Favorite Tools list you just created, bringing this feature to life.