Welcome to the final lesson in our module on building your freelance business. In our last session, you learned the critical skill of writing a compelling case study by structuring your projects into a "Problem, Process, Results" narrative. You now have the stories that prove your value.
Today, we will assemble those stories into a single, professional portfolio. This document is your key to opening doors with potential clients. Our goal is to create a polished portfolio using a free and accessible tool—either Google Docs or Google Slides—that you can confidently attach to your freelance proposals. This final step transforms your completed work into a powerful marketing asset, preparing you to officially launch your data research services.
Part 1: Your Portfolio's Foundation: Structure and Tools
Before you start building, you need to decide on the format and structure. Your portfolio is more than just a collection of work; it's a curated presentation of you as a professional.
First, let's confirm that you don't need fancy or expensive software. A simple, clean document is often the most effective tool.
The Freelancer's Definitive Guide to Creating a Killer Online Portfolio
This guide by Austin L. Church offers practical advice for new freelancers.
Read the section titled How to Make an Online Portfolio Quickly. Notice the emphasis on simple, effective options. The article validates our approach by specifically recommending you create a GDoc or Slides presentation and export it as a PDF.
As the article suggests, our focus will be on Google Docs and Google Slides.
- Google Docs: Ideal for a text-centric, professional report. This format feels like an expanded resume, allowing for detailed, multi-page case studies. It’s excellent for showcasing in-depth research projects.
- Google Slides: Best for a more visual, presentation-style portfolio. This format allows you to break down each case study into digestible slides, using visuals and concise text to tell your story.
Regardless of the tool you choose, your portfolio should contain several key sections.
S2: Ep4 | How to Build a Freelancer Portfolio with NO Experience (Step-by-Step Guide!)
In the video "How to Build a Freelancer Portfolio with NO Experience," Mia Juan outlines the essential components of a strong portfolio.
Watch the segment from what to include in your resume. This will serve as our checklist for the sections to build.
Based on the video, here is the structure we will create:
- Title Page & Introduction: Your name, professional title, and a brief bio that explains who you are and what you do.
- Skills & Tools: A clear, organized list of your capabilities.
- Case Studies: The core of your portfolio, featuring the projects you completed in this course.
- Testimonials (Optional): If you have positive feedback, even character references, this is where it goes.
- Contact Information / Call to Action: Make it easy for clients to take the next step.
Now, let's get practical and build this document.
Part 2: Building Your Portfolio with Google Docs
Choose this option if you prefer a traditional document format that allows for detailed written explanations. This approach presents you as a thorough and professional researcher.

Here is a step-by-step guide to creating your portfolio in Google Docs:
Step 1: Create Your Document and Title Page
- Open a new Google Doc.
- On the first page, center your name in a large, clean font.
- Underneath, add your professional title, such as "Data Research Specialist" or "Freelance Data Researcher."
- In the footer of the document, add your email address and a link to your professional profile (like LinkedIn, once you have one). This ensures your contact information is on every page.
Step 2: Write Your "About Me" and "Skills" Section
- On the second page, create a heading like "About Me."
- Write a one-paragraph professional biography. Briefly introduce yourself, state the type of services you offer (e.g., "I help small businesses make data-driven decisions through targeted market research and lead generation"), and mention your commitment to quality and detail.
- Below your bio, create two columns. Use headings like "Skills" and "Tools."
- Under Skills, list the services you offer (e.g., Market Research, Data Cleaning, Competitor Analysis, Lead Generation).
- Under Tools, list the software you've learned (e.g., Google Sheets, Google Search, LinkedIn).
Step 3: Add Your Case Studies
- Start a new page for your first case study. Give it a clear title (e.g., "Case Study: Competitor Analysis for a Food-Tech Startup").
- Use the Problem, Process, Results structure you learned in the last lesson. Use bold headings for each section.
- Crucially, add visuals. Take screenshots of your deliverables (e.g., a portion of your cleaned spreadsheet, a chart from your market analysis). To do this, use your computer's screenshot tool (Cmd+Shift+4 on Mac, Snipping Tool or Snip & Sketch on Windows) and insert the image using
Insert > Image > Upload from computer. A visual breaks up the text and provides tangible proof of your work. - Dedicate one or two pages to each case study. Repeat this for the other projects from the course.
Step 4: Curate Your Best Work
As a beginner, it's tempting to include everything. However, quality is more important than quantity.
The Freelancer's Definitive Guide to Creating a Killer Online Portfolio
Let's return to the guide by Austin L. Church for advice on what makes the final cut.
Read the sections What to include and what to leave out. The key takeaway is to only showcase work that represents the kind of projects you want to do more of in the future.
Step 5: Finalize and Export
- Add a final page with a clear "Contact Me" heading and your email address.
- Proofread the entire document for spelling and grammar mistakes.
- To export, go to File > Download > PDF Document (.pdf). Always send the PDF version to clients. It's professional, maintains formatting, and is not editable.
Part 3: Building Your Portfolio with Google Slides
Choose this option if you prefer a more visual, modern format. Slides force you to be concise and are excellent for creating a portfolio that is scannable and visually engaging.
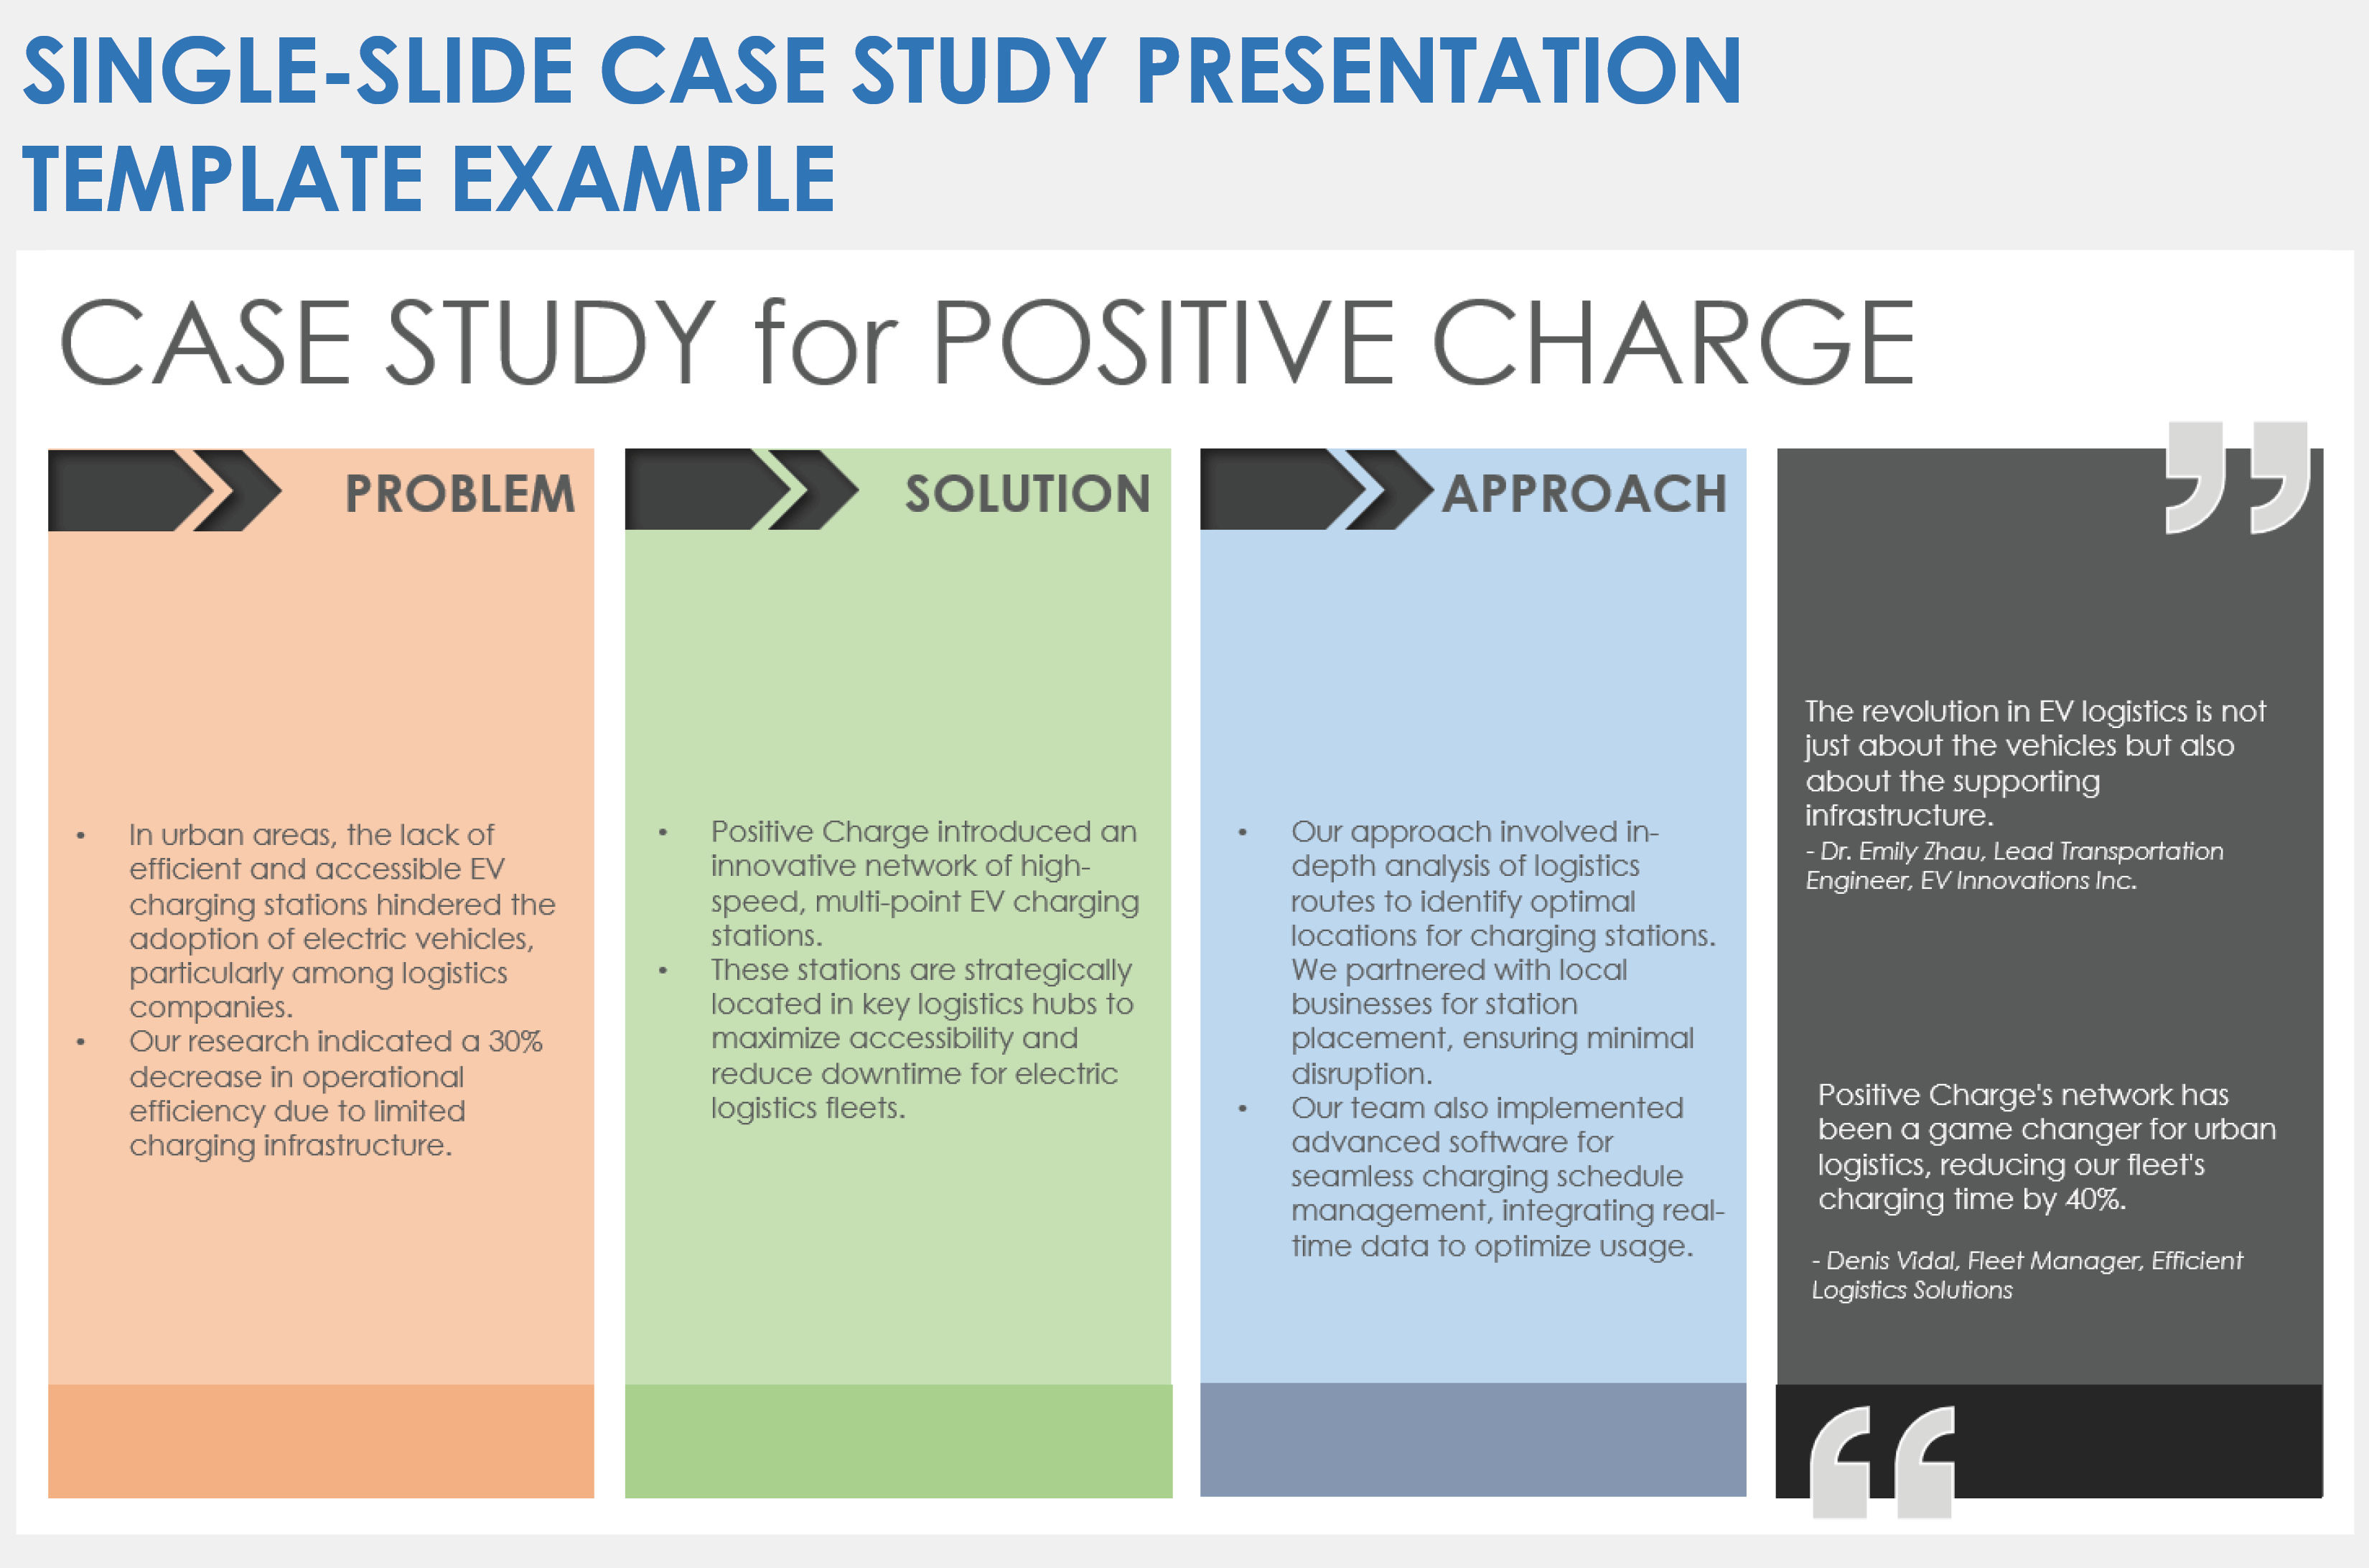
Let's walk through creating this version using the technical guidance from Creative Bloq.
Google Slides: How to design a document | Creative Bloq
This article from Creative Bloq is a practical, step-by-step tutorial for using Google Slides for design. We will use it as our guide.
Open this article in a new tab and refer to it as we go. You don't need to read it all at once; we will reference specific sections as we build your portfolio.
Step 1: Set Up Your Presentation
- Following the article's guide,
create a new blank presentation in Google Slides. - Adjust the size. For a document-style portfolio, go to File > Page Setup and choose "Custom." Enter dimensions for a standard document, like 8.5 x 11 inches. (See
section 03 in the article). - Set up a Master Slide. Go to View > Master. On the top-most master slide, add your name and email in the footer. This ensures consistency. (See
section 04 ).
Step 2: Create Your Title and About Slides
- Title Slide (Slide 1): Add your name and professional title.
- About & Skills Slide (Slide 2): Create a two-column layout. On the left, put a heading "About Me" and your professional bio. On the right, put "Skills & Tools" with your bulleted lists. Use the guidance in
section 06 of the article for adding text boxes and shapes.
Step 3: Design Your Case Study Slides
This is where the visual storytelling happens. Plan for 2-3 slides per case study.
- Case Study Intro Slide: Title of the project and a clear, concise statement of the Problem.
- Process & Results Slide(s):
- Use one side of the slide for bullet points detailing your Process.
- Use the other side for the Results, highlighting the impact.
- Most importantly, include a large, high-quality screenshot of your work.
- Use the advice on
using guides (section 05) and theformat panel (section 07) to keep your layout clean and aligned.
Step 4: Finalize and Export
- Add a final slide with a clear "Contact Me" heading and your email.
- Review all slides carefully.
- Export the final version by going to File > Download > PDF Document (.pdf).
Conclusion
Congratulations! You have now created the final and most important asset for your new freelance business. A professional portfolio is your ticket to proving your skills and winning your first projects.
Here are the key takeaways from this lesson:
- A professional portfolio can be created easily and for free using Google Docs or Google Slides.
- Your portfolio should be a curated document containing an introduction, your skills, your best case studies, and contact information.
- Google Docs is great for a detailed, report-style portfolio, while Google Slides is better for a visual, presentation-style format.
- Always curate your best work—quality over quantity is key to impressing clients.
- The final deliverable should always be a PDF to ensure professionalism and consistent formatting.
This lesson marks the end of your foundational training. You have journeyed from learning basic spreadsheet functions to conducting complex market research and, finally, to building a business-ready portfolio. You have the skills and the tools. The next step is to take what you've built and start applying for freelance data research projects. Good luck