Introduction
In our last lesson, you built your LinkedIn outreach playbook, giving you a powerful, multi-step sequence to turn cold connections into warm conversations. Combined with your cold email engine, you now have a two-pronged system for generating leads.
However, activity without organization leads to chaos. As you start sending dozens of emails and LinkedIn messages, you'll quickly face a new problem: Who did I contact? When do I follow up? Who replied? Which leads are hot? Dropping the ball on a follow-up with a potential $5,000 client because you forgot is not an option.
This lesson is about building your command center. Your goal is to develop a simple, ruthlessly efficient system to track every outreach effort and every follow-up. We won't use a bloated, expensive CRM. We're going to build a lean, powerful, and free personal CRM using Google Sheets. By the end of this session, you will have a new, mission-critical deliverable: a fully functional Client Acquisition Tracker that you will use every single day.
1. Why Google Sheets? The "Commando" Approach to CRMs
Before we build, it's important to understand why we're choosing a spreadsheet over a dedicated CRM like HubSpot or Salesforce. For a solo consultant focused on high-value clients, traditional CRMs are overkill. They're expensive, slow to set up, and bloated with features you don't need. Our philosophy is speed and efficiency.
A Google Sheets CRM offers several key advantages for our purposes.
Ultimate Guide to Using Google Sheets as a CRM in 2025 - Kixie
This article from Kixie, 'Ultimate Guide to Using Google Sheets as a CRM,' provides an excellent overview of why a spreadsheet is often the smartest choice for a lean sales operation. It validates our 'commando' approach.
Read the first two sections: 'Why Teams Still Rely on Google Sheets for CRM in 2025' and 'The Benefits of a Spreadsheet-Based CRM with Google Sheets.' Focus on the key benefits mentioned: cost, familiarity, customization, and control. This is the strategic reasoning behind the tool we are about to build.
As the article highlights, a spreadsheet gives you:
- Zero Cost: It's free. Every dollar saved is a dollar earned.
- Immediate Usability: You already know how it works. There is no learning curve.
- Total Control: You define the process. The tool adapts to you, not the other way around.
This approach keeps you agile and focused on what matters: closing deals.
2. Building Your Client Acquisition Tracker
Now, let's build the tracker. We'll set up the essential columns and add simple functions to make it a dynamic tool that tells you exactly what to do each day.
To see how this comes together in practice, the following video provides a great visual walkthrough of building a simple CRM from scratch.
I Built a FREE Sales CRM with Google Sheets (2024)
This video from CloseDr, 'I Built a FREE Sales CRM with Google Sheets,' demonstrates step-by-step how to create the core components of our tracker. It covers setting up columns, adding checkboxes for touchpoints, and creating dropdowns for lead status.
Watch from 01:43 to 06:21. Pay close attention to these specific actions: Setting up Columns (01:43 - 02:45): Notice the basic contact info and the 'Touch' columns. Adding Checkboxes (03:52 - 04:30): This is how we'll track our email and LinkedIn sequence steps. Creating a Status Dropdown (04:55 - 06:21): This is critical for managing your pipeline stages. We will use a more specific list of statuses tailored to our consulting work.
Core Structure
Your tracker will have the following columns. This structure is designed specifically for your outreach process.
| Column | Purpose |
|---|---|
| Prospect Name | Full name of the contact. |
| Title | Their job title (e.g., Head of Product). |
| Company | The company they work for. |
| LinkedIn URL | Direct link to their profile for quick access. |
| Their email address. | |
| Lead Source | Where you found them (e.g., 'LinkedIn Sales Nav', 'SaaS List'). |
| Status | The current stage in your pipeline. This will be a dropdown menu. |
| Last Contact | The date of your last interaction. |
| Next Follow-up | The date your next action is due. This is your most important column. |
| Touchpoints | A series of checkboxes (e.g., LI-1, E-1, LI-2, E-2) to track your sequence. |
| Notes | Key insights, pain points, or personal details. |
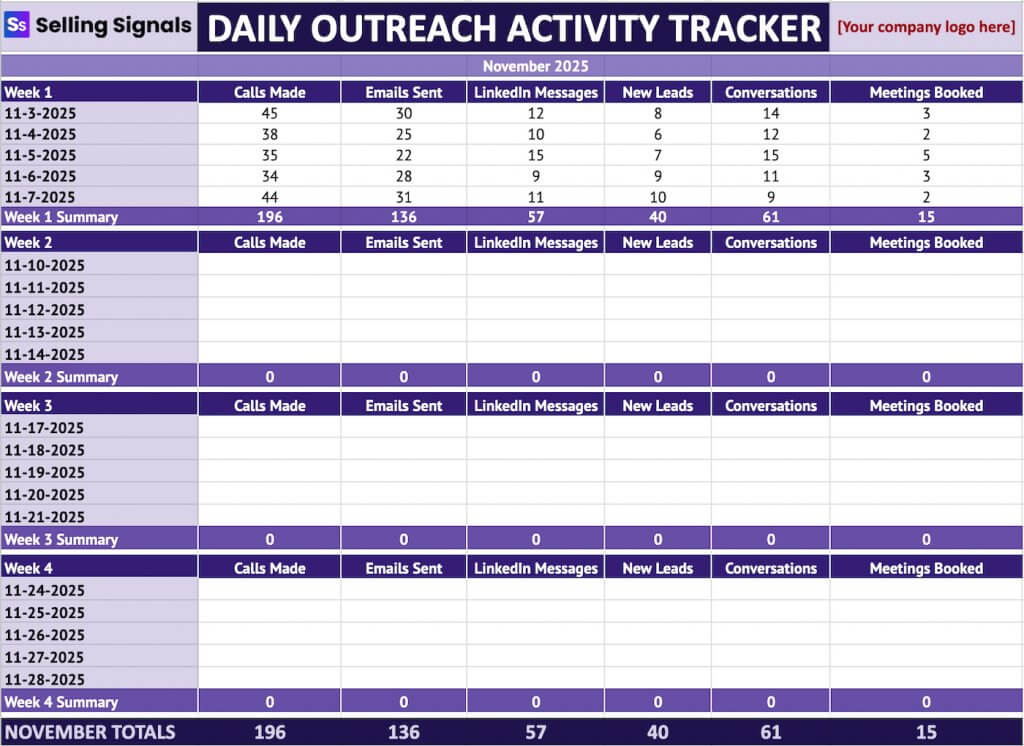
3. Adding "Intelligence" to Your Tracker
A static list is not enough. We need the tracker to actively guide your daily actions. We'll use two key features: Data Validation for the Status column and Conditional Formatting for the Next Follow-up date.
A. The Status Pipeline (Data Validation)
Instead of typing a status, you'll select it from a predefined list. This ensures consistency. Your statuses represent the entire journey from a cold lead to a paying client.
Status Options:
To ContactContacted(Initial outreach sent)Replied - PositiveReplied - NegativeMeeting BookedProposal SentClosed - WonClosed - LostNurture(Not now, but maybe later)
B. The Daily Action Trigger (Conditional Formatting)
This feature makes it impossible to miss a follow-up. We'll make the Next Follow-up cell change color based on its date.
I Built the BEST Sales CRM Using Google Sheets (2023)
This video from Enrique Aquiles, 'I Built the BEST Sales CRM Using Google Sheets,' shows a fantastic implementation of conditional formatting to manage follow-ups. We will use this exact technique.
Watch the section from 05:32 to 06:15. The key takeaway is how the date cell automatically changes color: green for today, red for overdue. This creates an unmissable visual cue for your daily tasks.
We'll set up these rules for the Next Follow-up column:
- If the date is in the past, the cell turns RED. (Overdue!)
- If the date is today, the cell turns GREEN. (Do it now!)
- If the date is in the future, the cell remains the default color.
Your Deliverable: Build Your Personal Outreach CRM
Now it's time to build this asset. This is not a theoretical exercise; you will use this sheet every day to manage your path to $5k/month.
Task (25 minutes):
- Create the Sheet: Open Google Sheets and create a new file named
[Your Name] - Client Acquisition Tracker. - Build the Structure: Create the 11 columns listed in the "Core Structure" table above.
- Implement the Status Dropdown:
- Select the entire
Statuscolumn (click the column letter, e.g., 'G'). - Go to
Data>Data validation. - Click
+ Add rule. - For
Criteria, chooseDropdown. - Enter the
Status Optionsfrom the list above, one by one. - Click
Done.
- Select the entire
- Implement Conditional Formatting:
- Select the entire
Next Follow-upcolumn. - Go to
Format>Conditional formatting. - Rule 1 (Overdue):
- Under "Format rules," choose
Date is beforeand selecttoday. - Set the formatting style to a light red fill.
- Click
Done.
- Under "Format rules," choose
- Rule 2 (Today):
- Click
Add another rule. - Choose
Date isand selecttoday. - Set the formatting style to a light green fill.
- Click
Done.
- Click
- Select the entire
- Populate with Initial Targets:
- Add the 20 ideal prospects you identified in the previous module to your tracker. Fill in their
Name,Title,Company,LinkedIn URL, andEmail. - Set the
Statusfor all of them toTo Contact. - For the first 5 prospects, simulate that you've sent your initial outreach today. Change their
StatustoContacted, setLast Contactto today's date, and setNext Follow-upfor 3 days from now.
- Add the 20 ideal prospects you identified in the previous module to your tracker. Fill in their
You now have a living, breathing command center for your client acquisition.
Conclusion
You have successfully built the operational backbone of your client acquisition engine. This isn't just a spreadsheet; it's a system for ensuring that no opportunity is ever lost due to disorganization. Your outreach sequences generate the opportunities, and this tracker ensures you capitalize on every single one.
Key Takeaways:
- System Over Memory: Don't rely on your memory to track dozens of conversations. A simple system is infinitely more reliable.
- The Follow-up is Everything: Your tracker's main job is to tell you who to follow up with and when. The red/green conditional formatting is your daily task list.
- A Daily Habit: This system only works if you use it. Make it the first thing you open in the morning and the last thing you update at the end of the day.
Preview of the Next Lesson:
Your outreach engine is running, and your tracking system is in place. The inevitable result is that you will start booking meetings. The next crucial step is to know exactly what to say and do on that first call.
In our next lesson, "The Sales Call: Scripts & Objection Handling," you will get the battle-tested scripts and frameworks needed to run a discovery call, confidently ask for the client's budget, and handle objections like "it's too expensive," turning a promising conversation into a signed contract.