Welcome back! In our last session, we meticulously set up a TypeScript project, installing LangChain and configuring our environment to securely handle API keys. We now have a launchpad, a clean src/index.ts file, waiting for instructions.
Today, we're going to press the "ignition" button. This lesson is all about making contact. You will learn how to initialize and invoke a large language model using LangChain's chat model interface. By the end of our 60 minutes, you'll have written code that sends a prompt to an AI model and prints its response, bridging the gap between your local project and the power of LLMs. This is the foundational skill upon which all other LangChain applications are built.
LLMs vs. Chat Models
Before we write any code, it's important to understand a key distinction LangChain makes: the difference between "LLMs" and "Chat Models".
- LLMs: This term in LangChain refers to older models that perform pure text completion. You give them a string of text, and they continue it. Their input is a string, and their output is a string.
- Chat Models: These are the more modern and powerful models (like GPT-3.5-turbo, GPT-4, and Claude 3) that are optimized for conversation. They don't just see text; they see a structured conversation with different roles (e.g., a system, a user, and the AI assistant). Their input is a list of messages, and their output is a message.
For this course, we will almost exclusively use Chat Models because of their superior performance and flexibility.
This mind map provides a clear visual summary of this core distinction.

Initializing a Chat Model
Let's get back to our project. Open the langchain-project you created in the last lesson. We're going to work in the src/index.ts file.
Our goal is to create an object in our code that represents the OpenAI chat model. This object will be our gateway to the API. LangChain provides the ChatOpenAI class for this exact purpose from the @langchain/openai package we've already installed.
Let's modify src/index.ts. First, import the ChatOpenAI class. Then, you can remove the verification code from the last lesson and replace it with the model initialization.
// src/index.ts

import dotenv from 'dotenv';
import { ChatOpenAI } from "@langchain/openai";

dotenv.config();

// 1. Instantiate the model
const model = new ChatOpenAI({
    modelName: "gpt-4o-mini",
    temperature: 0.7,
});
Let's break this down:
- We import
ChatOpenAI. - We use
new ChatOpenAI()to create an instance. - We pass a configuration object.
modelNamespecifies which OpenAI model to use (you can find a list in OpenAI's documentation), andtemperaturecontrols the randomness of the output (0 is deterministic, 2 is very creative).
You might be wondering where the API key is. Because we named our environment variable OPENAI_API_KEY in the .env file, LangChain's ChatOpenAI class automatically finds and uses it. This is an example of "convention over configuration," a principle that simplifies development by having sensible defaults.
The video below, from a tutorial by Leon van Zyl, provides an excellent explanation of the common parameters you can pass when initializing a chat model.
LangChain Tutorial (JS) #1: Build Your First AI Chatbot
Watch this segment to understand the key parameters you can configure on the ChatOpenAI class.
Pay close attention to the explanations of modelName, temperature, and maxTokens. These are the most common parameters you will use to control model behavior.
Invoking the Model
Now that we have our model object, how do we get it to do something? We use the .invoke() method.
Since you're comfortable with async/await from your prior experience with APIs, this pattern will look very familiar. The .invoke() method is an asynchronous function that sends your request to the model and returns a promise that resolves with the model's response.
Let's add the invocation code to our index.ts file.
// src/index.ts (continued)

async function main() {
    // 2. Invoke the model with a prompt
    console.log("Sending prompt to the model...");
    const response = await model.invoke("Explain the difference between TypeScript and JavaScript in one sentence.");

    // 3. Log the response
    console.log("Response from model:");
    console.log(response);
    console.log("-----");
    console.log("Content only:");
    console.log(response.content);
}

main();
Let's run this. Open your terminal in the project directory and run the start script we configured in the last lesson:
npm start
When you run the code, you'll see two logs for the response. The first console.log(response) shows the full response object. It's not just a string; it's an instance of a LangChain message class, specifically an AIMessage. This object contains the text content along with other metadata.
The second log, console.log(response.content), shows what you'll usually want: the actual text generated by the AI.
The following guide from CodeSignal provides a clear, concise summary of this entire process. Reading through it will help solidify your understanding.
Sending a Message with LangChain | CodeSignal Learn
This article walks through the same steps we just performed: initializing a ChatOpenAI instance, sending a message with invoke, and extracting the response from the content property.
Focus on the sections Understanding the Class, Sending a Message, and <_tf start="Extracting the Response" end="the model's reply">Extracting the Response</_tf>. Notice how the concepts and code structure mirror what we've just built. The "Complete Code Example" at the end provides a great self-contained summary.
Working with Different Message Types
As we discussed, chat models think in terms of conversations. A simple string prompt is automatically converted by LangChain into a HumanMessage. To have more control and build conversations, you can pass an array of message objects to the invoke method.
The three main message types are:
SystemMessage: Provides high-level instructions or sets the persona for the AI (e.g., "You are a helpful assistant that translates English to French."). It primes the model for the entire conversation.HumanMessage: Represents input from the user.AIMessage: Represents a response from the AI. This is used to provide the model with the history of the conversation.
This flowchart illustrates how these messages flow between your application and the chat model.
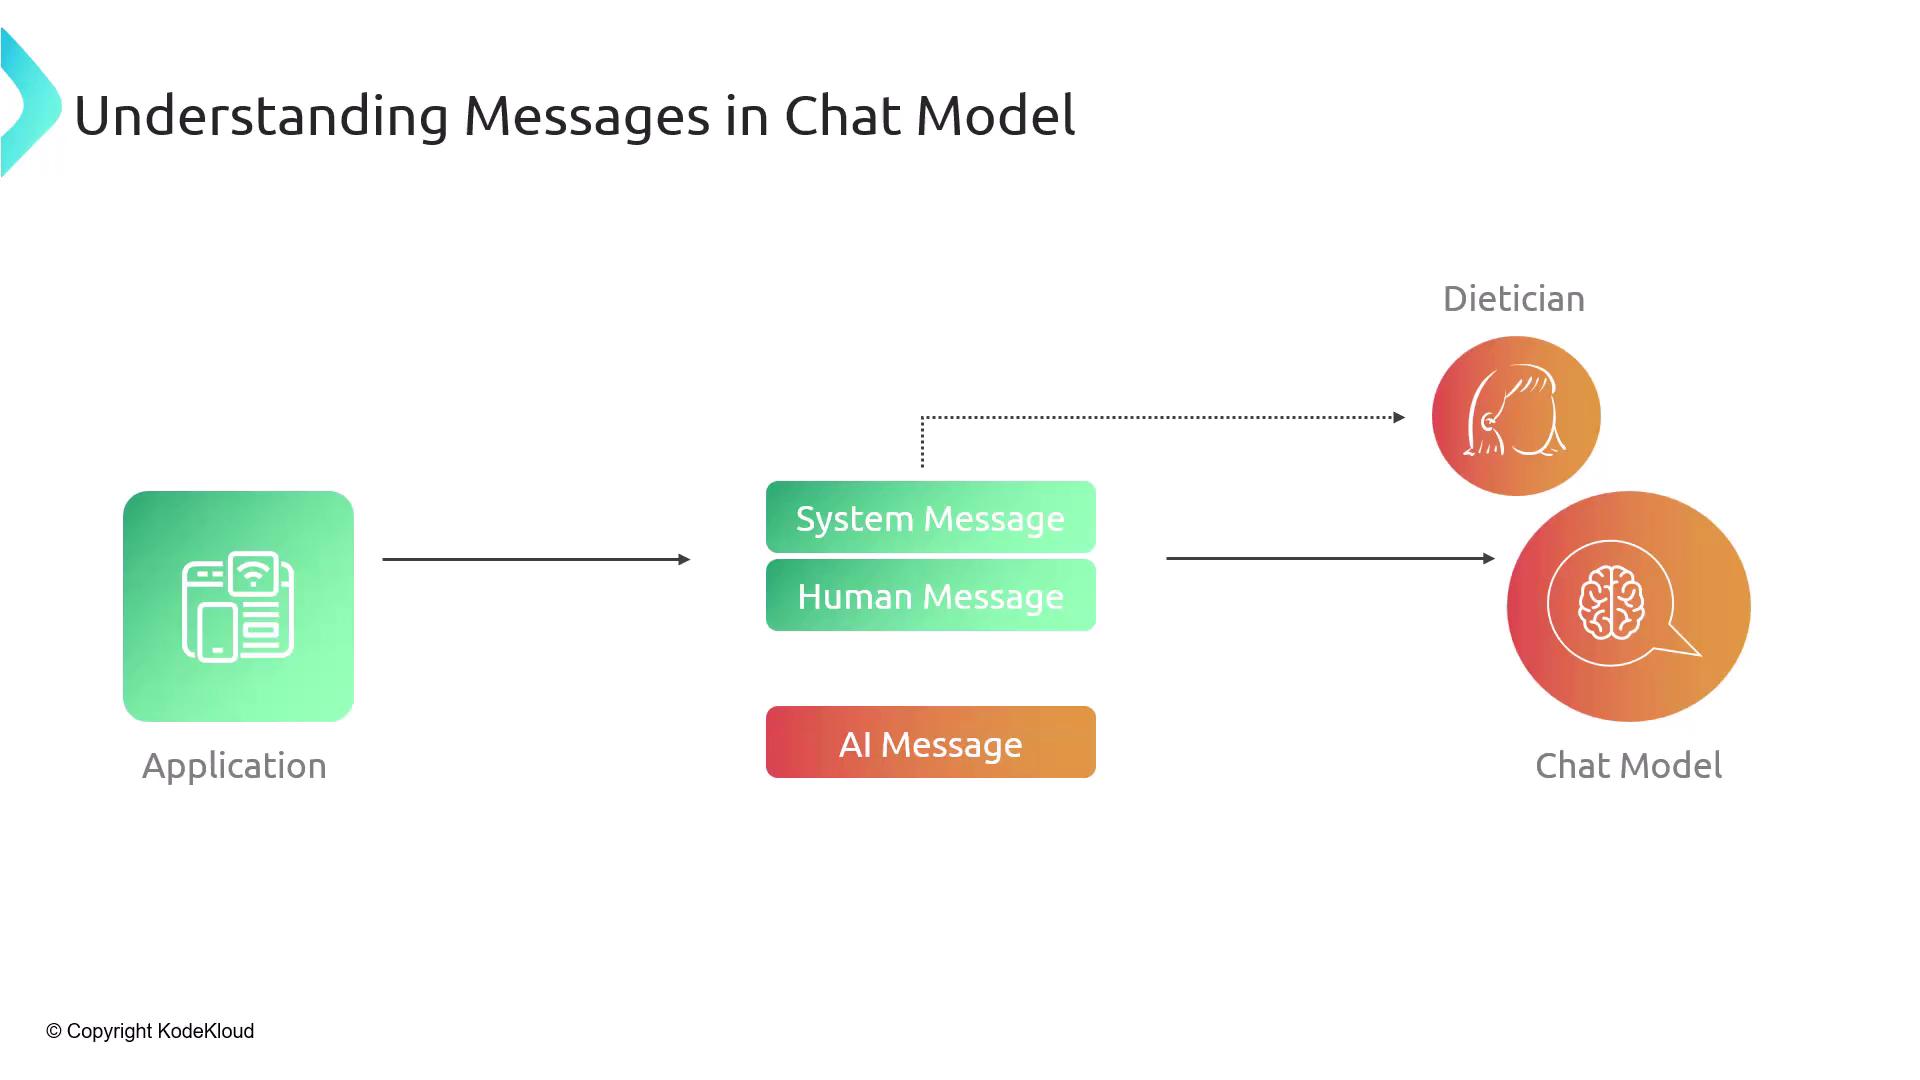
Let's see this in code. First, import the message types, then invoke the model with an array.
// Add these imports at the top of your file
import { HumanMessage, SystemMessage } from "@langchain/core/messages";

// Replace the contents of your main function with this:
async function main() {
    const response = await model.invoke([
        new SystemMessage("You are a cynical pirate who reluctantly answers questions."),
        new HumanMessage("Explain the difference between TypeScript and JavaScript in one sentence.")
    ]);

    console.log(response.content);
}
Run npm start again. You'll notice the tone of the response is completely different! This is the power of the SystemMessage.
A Glimpse at Other Invocation Methods
While invoke is the workhorse for single requests and responses, LangChain provides other methods for different use cases. We won't go deep, but it's good to know they exist.
stream(): Returns the response as a stream of chunks as they are generated. This is perfect for chatbot UIs where you want to display the text as it's being "typed" out.batch(): Takes an array of inputs and sends them to the model in parallel. This is highly efficient if you need to process many independent prompts at once.
The video below demonstrates batch and stream in action.
LangChain Tutorial (JS) #1: Build Your First AI Chatbot
This segment demonstrates the different ways you can call a LangChain model.
Watch how batch is used to process multiple prompts at once, and how stream is used to get a real-time, chunked response.
Conclusion
In this lesson, you took a significant step forward. You've successfully communicated with a powerful AI model from your own TypeScript application using LangChain.
Key Takeaways:
- LangChain distinguishes between older LLMs (string in, string out) and modern Chat Models (messages in, message out).
- The
ChatOpenAIclass is your primary tool for interacting with OpenAI's chat models. - LangChain automatically detects and uses the
OPENAI_API_KEYfrom your.envfile. - The
model.invoke()method sends a prompt to the AI. It's an async method that fits naturally with modern JavaScript. - The response from
invokeis anAIMessageobject; you access the generated text via the.contentproperty. - You can control the AI's persona and provide conversational context using
SystemMessage,HumanMessage, andAIMessageobjects.
You now have a direct line to an LLM. But so far, our prompts are static strings hard-coded into our file. To build truly dynamic applications, we need a way to construct prompts on the fly. That's precisely what we'll cover in our next lesson, where we'll explore Prompt Templates.